Okta
Information Need to send us (Issuer URI, Authorize URL & Client ID)
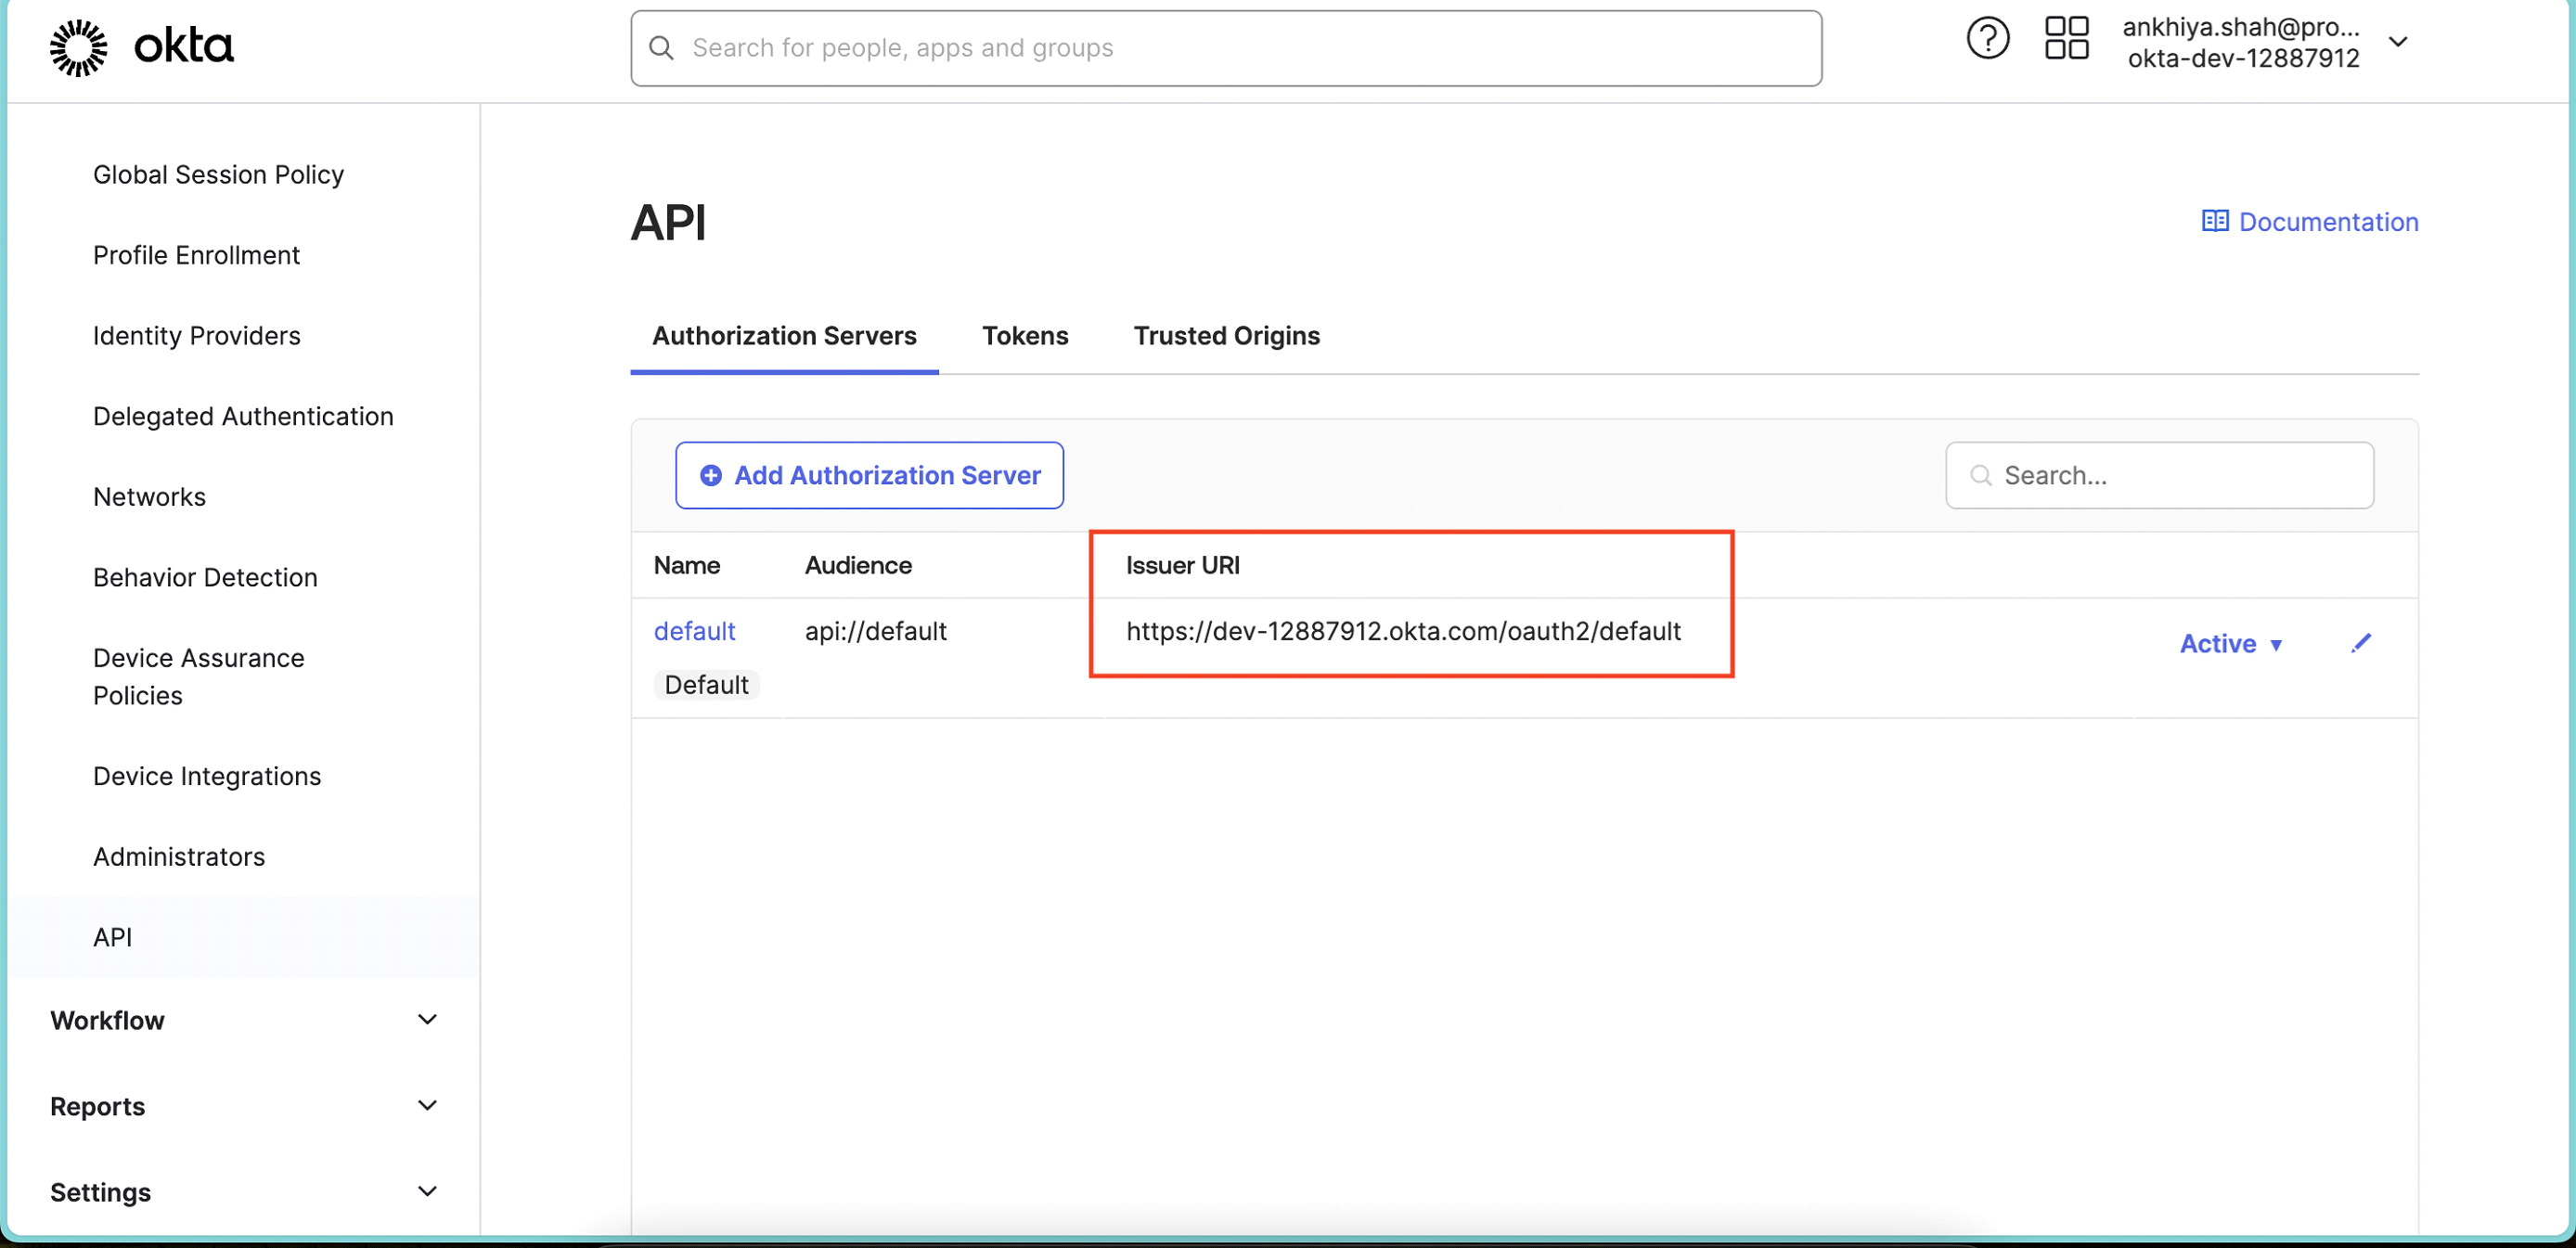
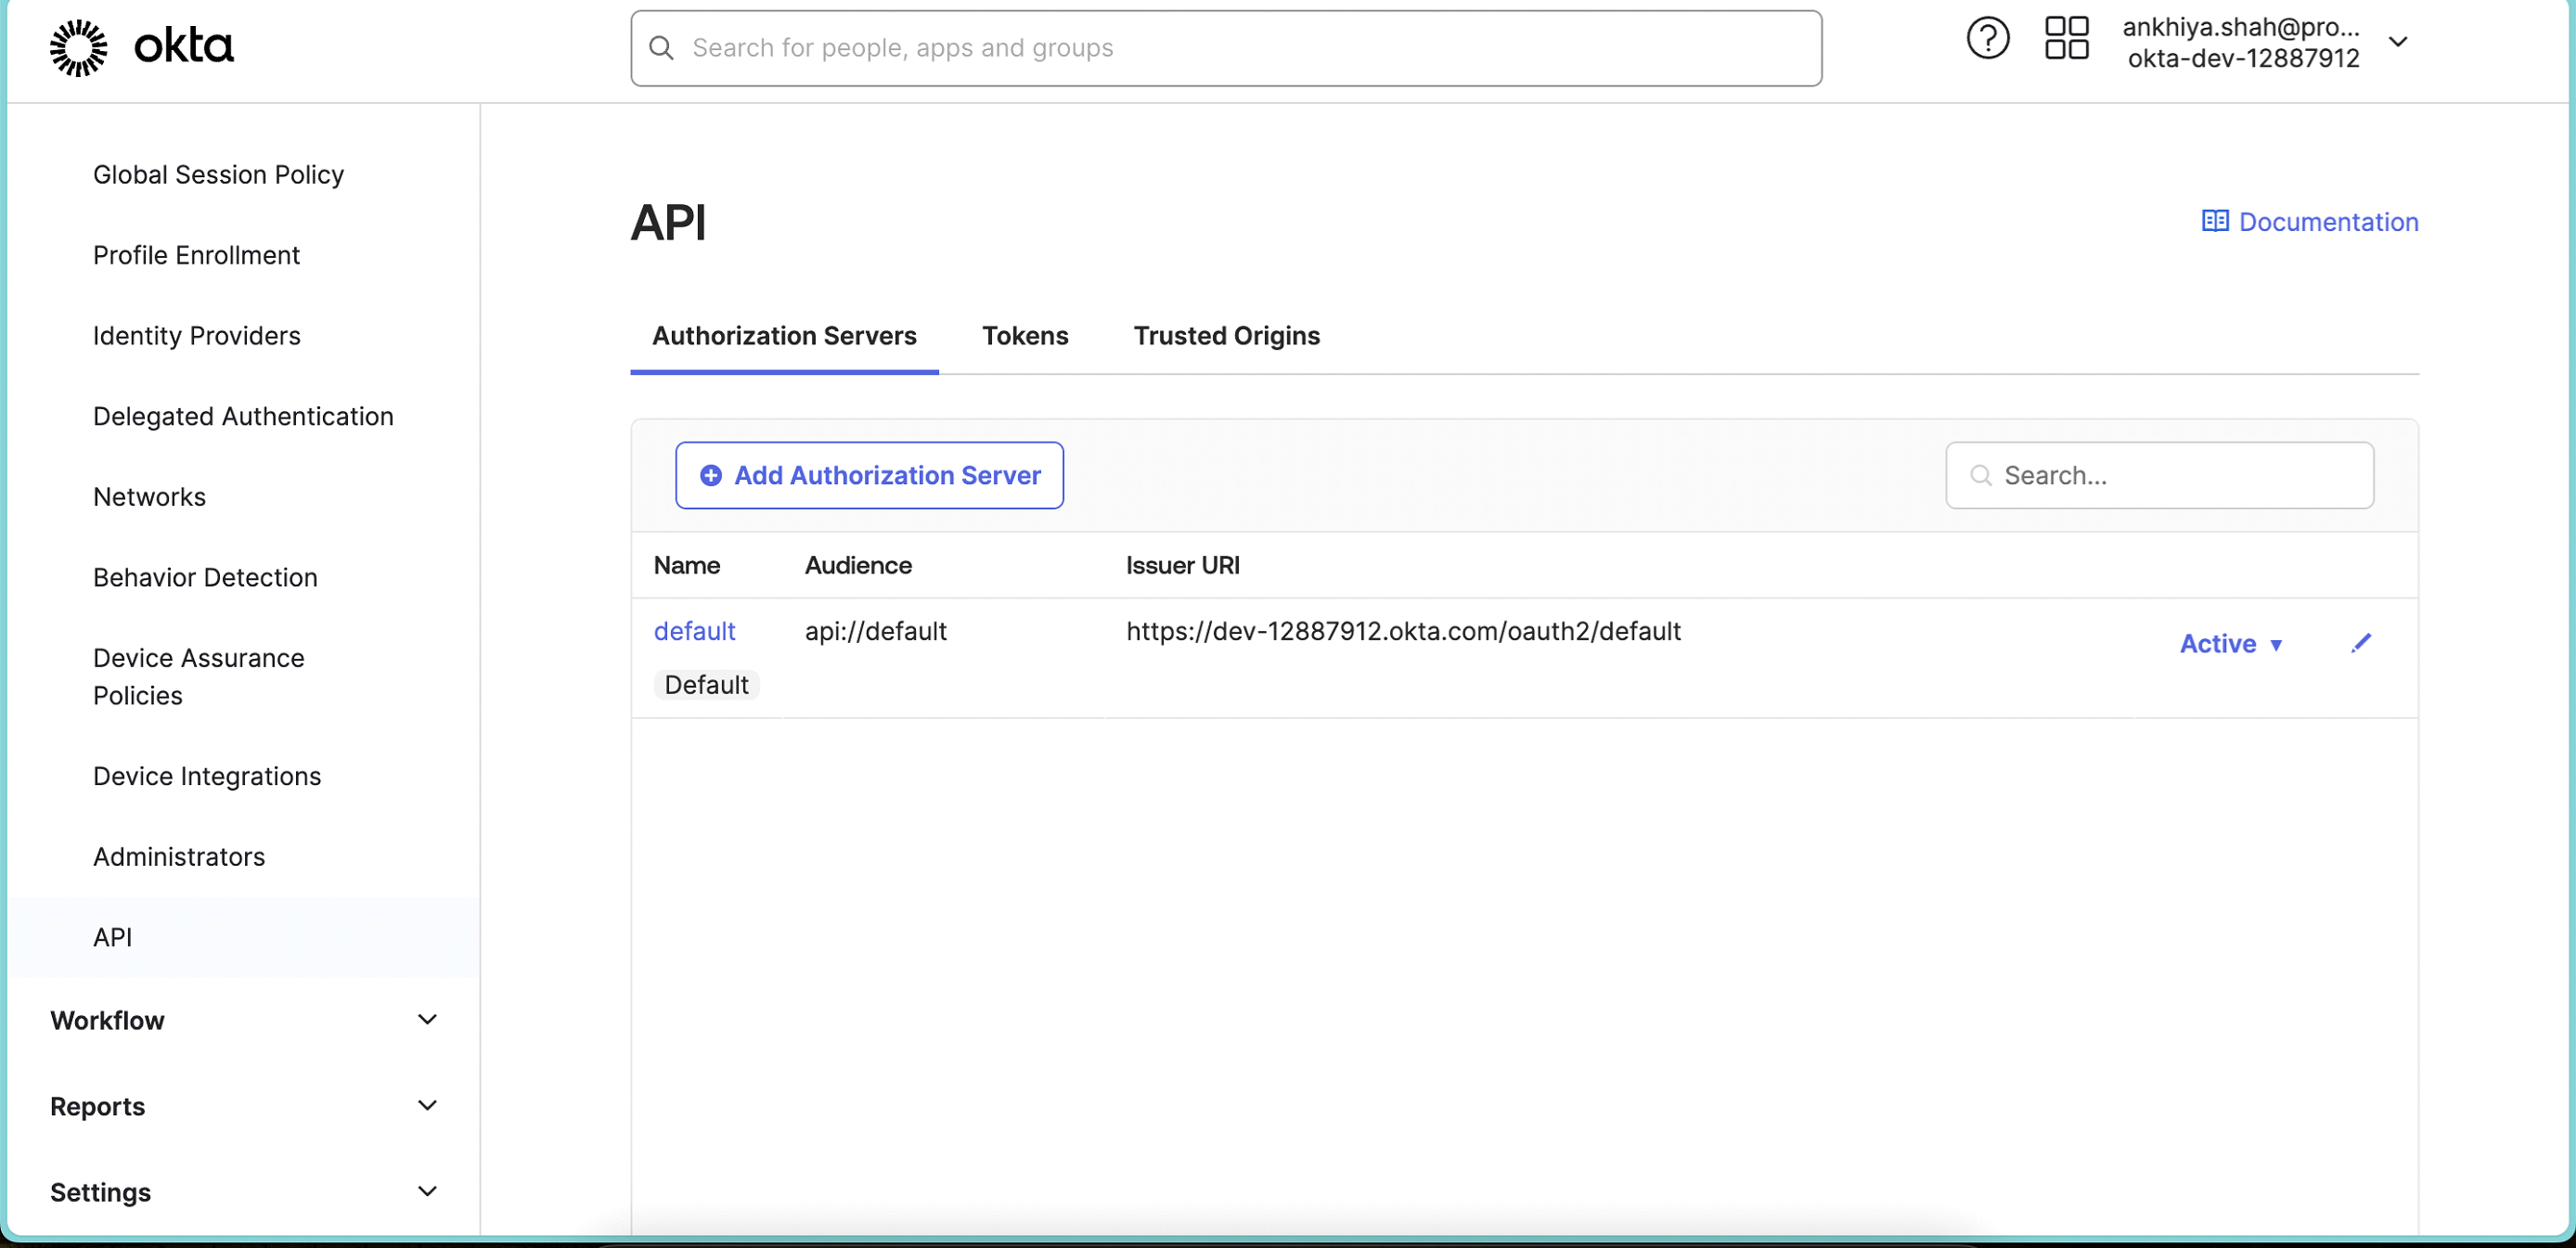
- Open Okta Admin Console, go to Security > API.
- Note down Issuer URI
- Now go to Securite > Identity Providers. Click on default identity provider.
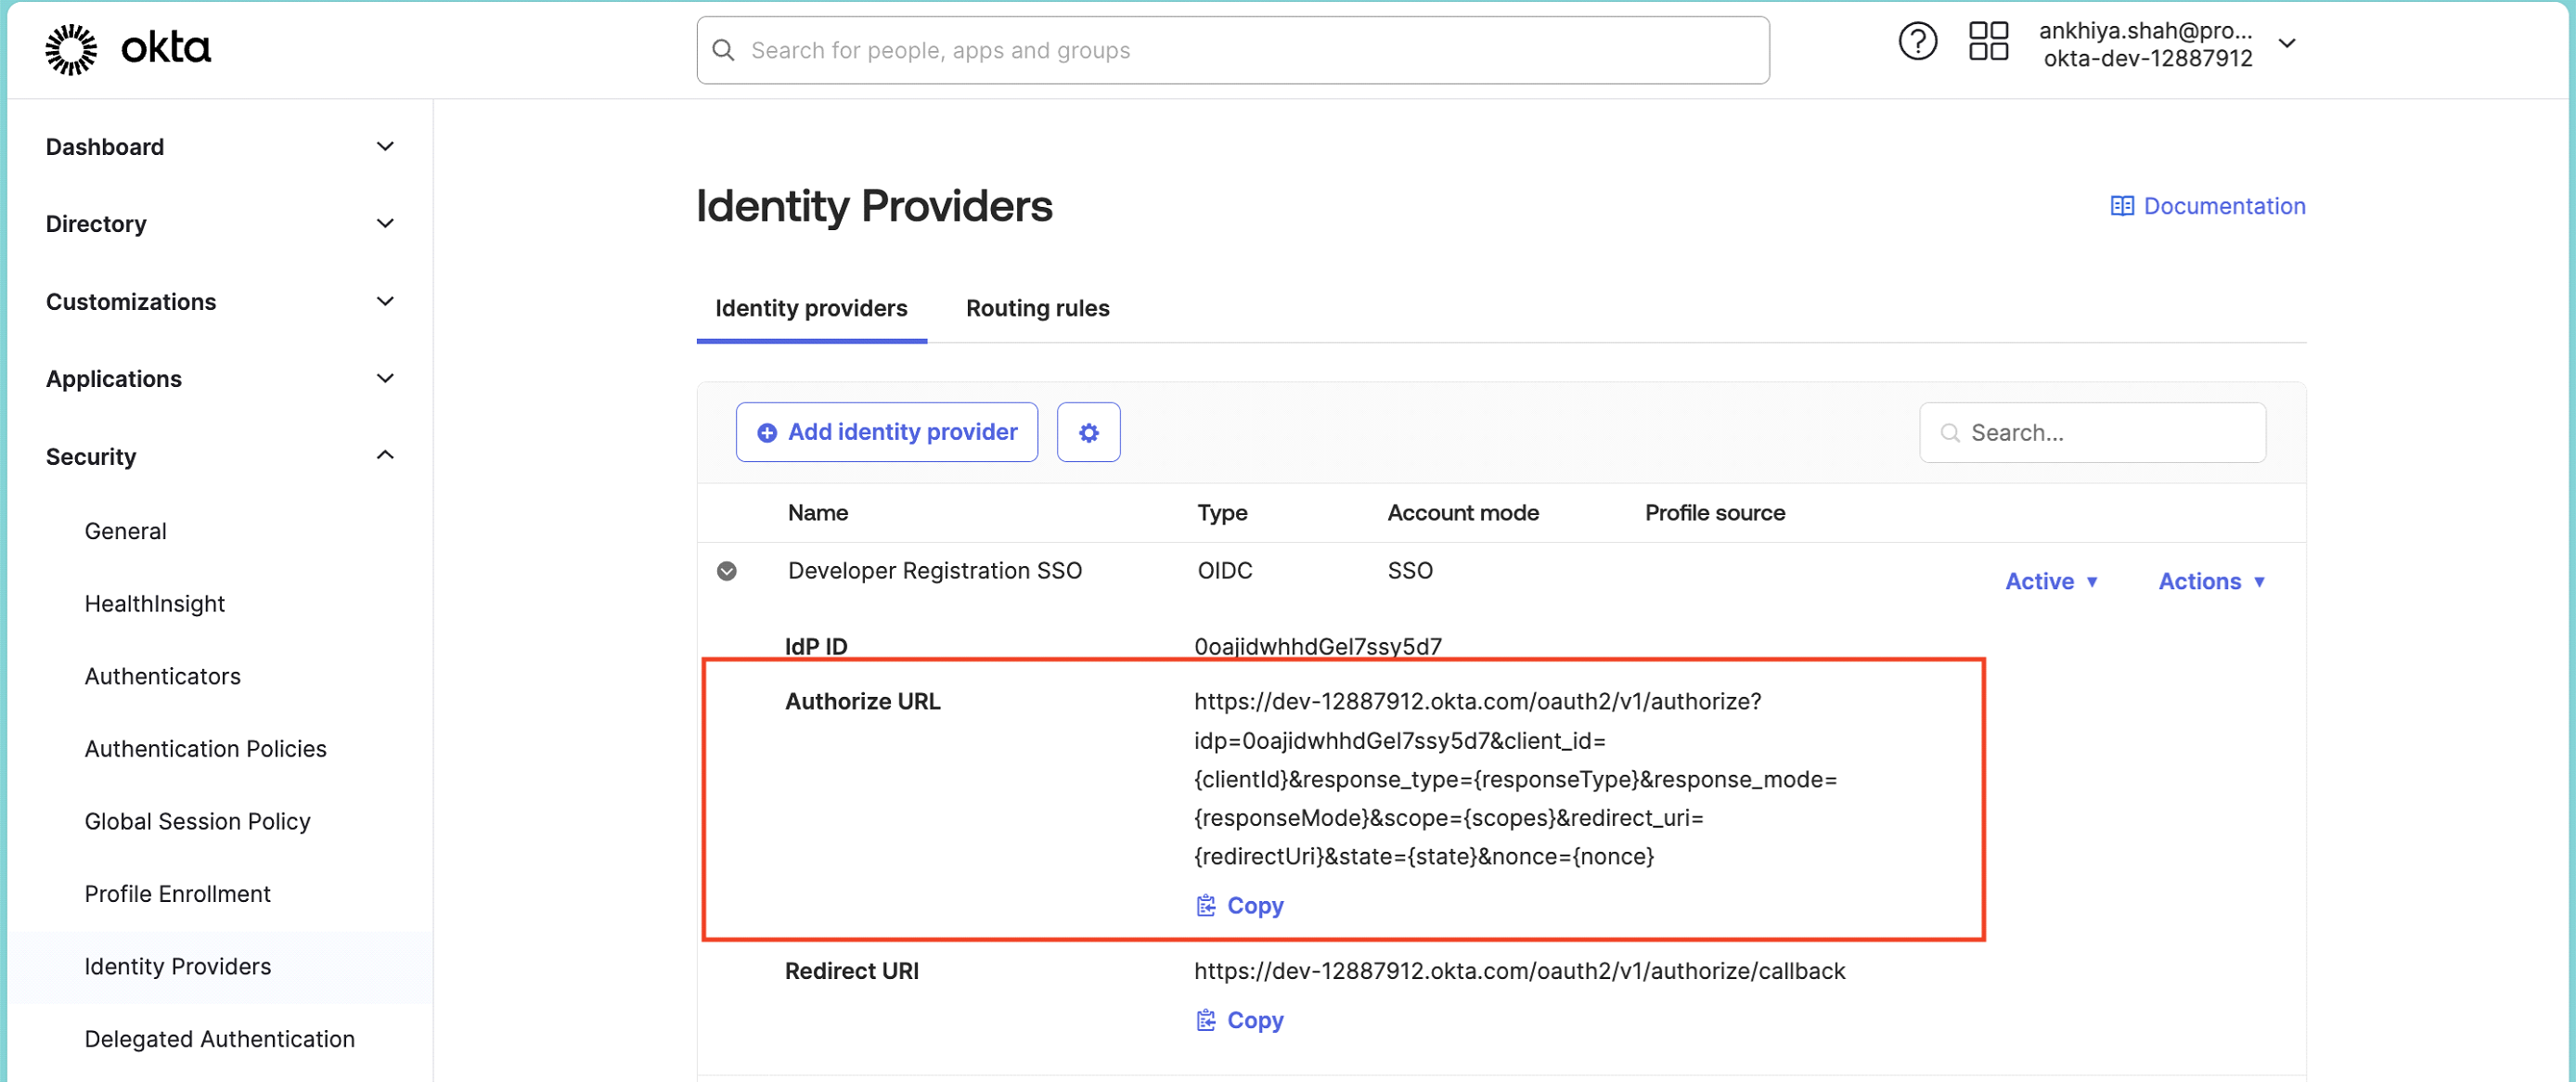 Note down Authorize URL.
 - Share both details with Protrak Team.
Create App
-
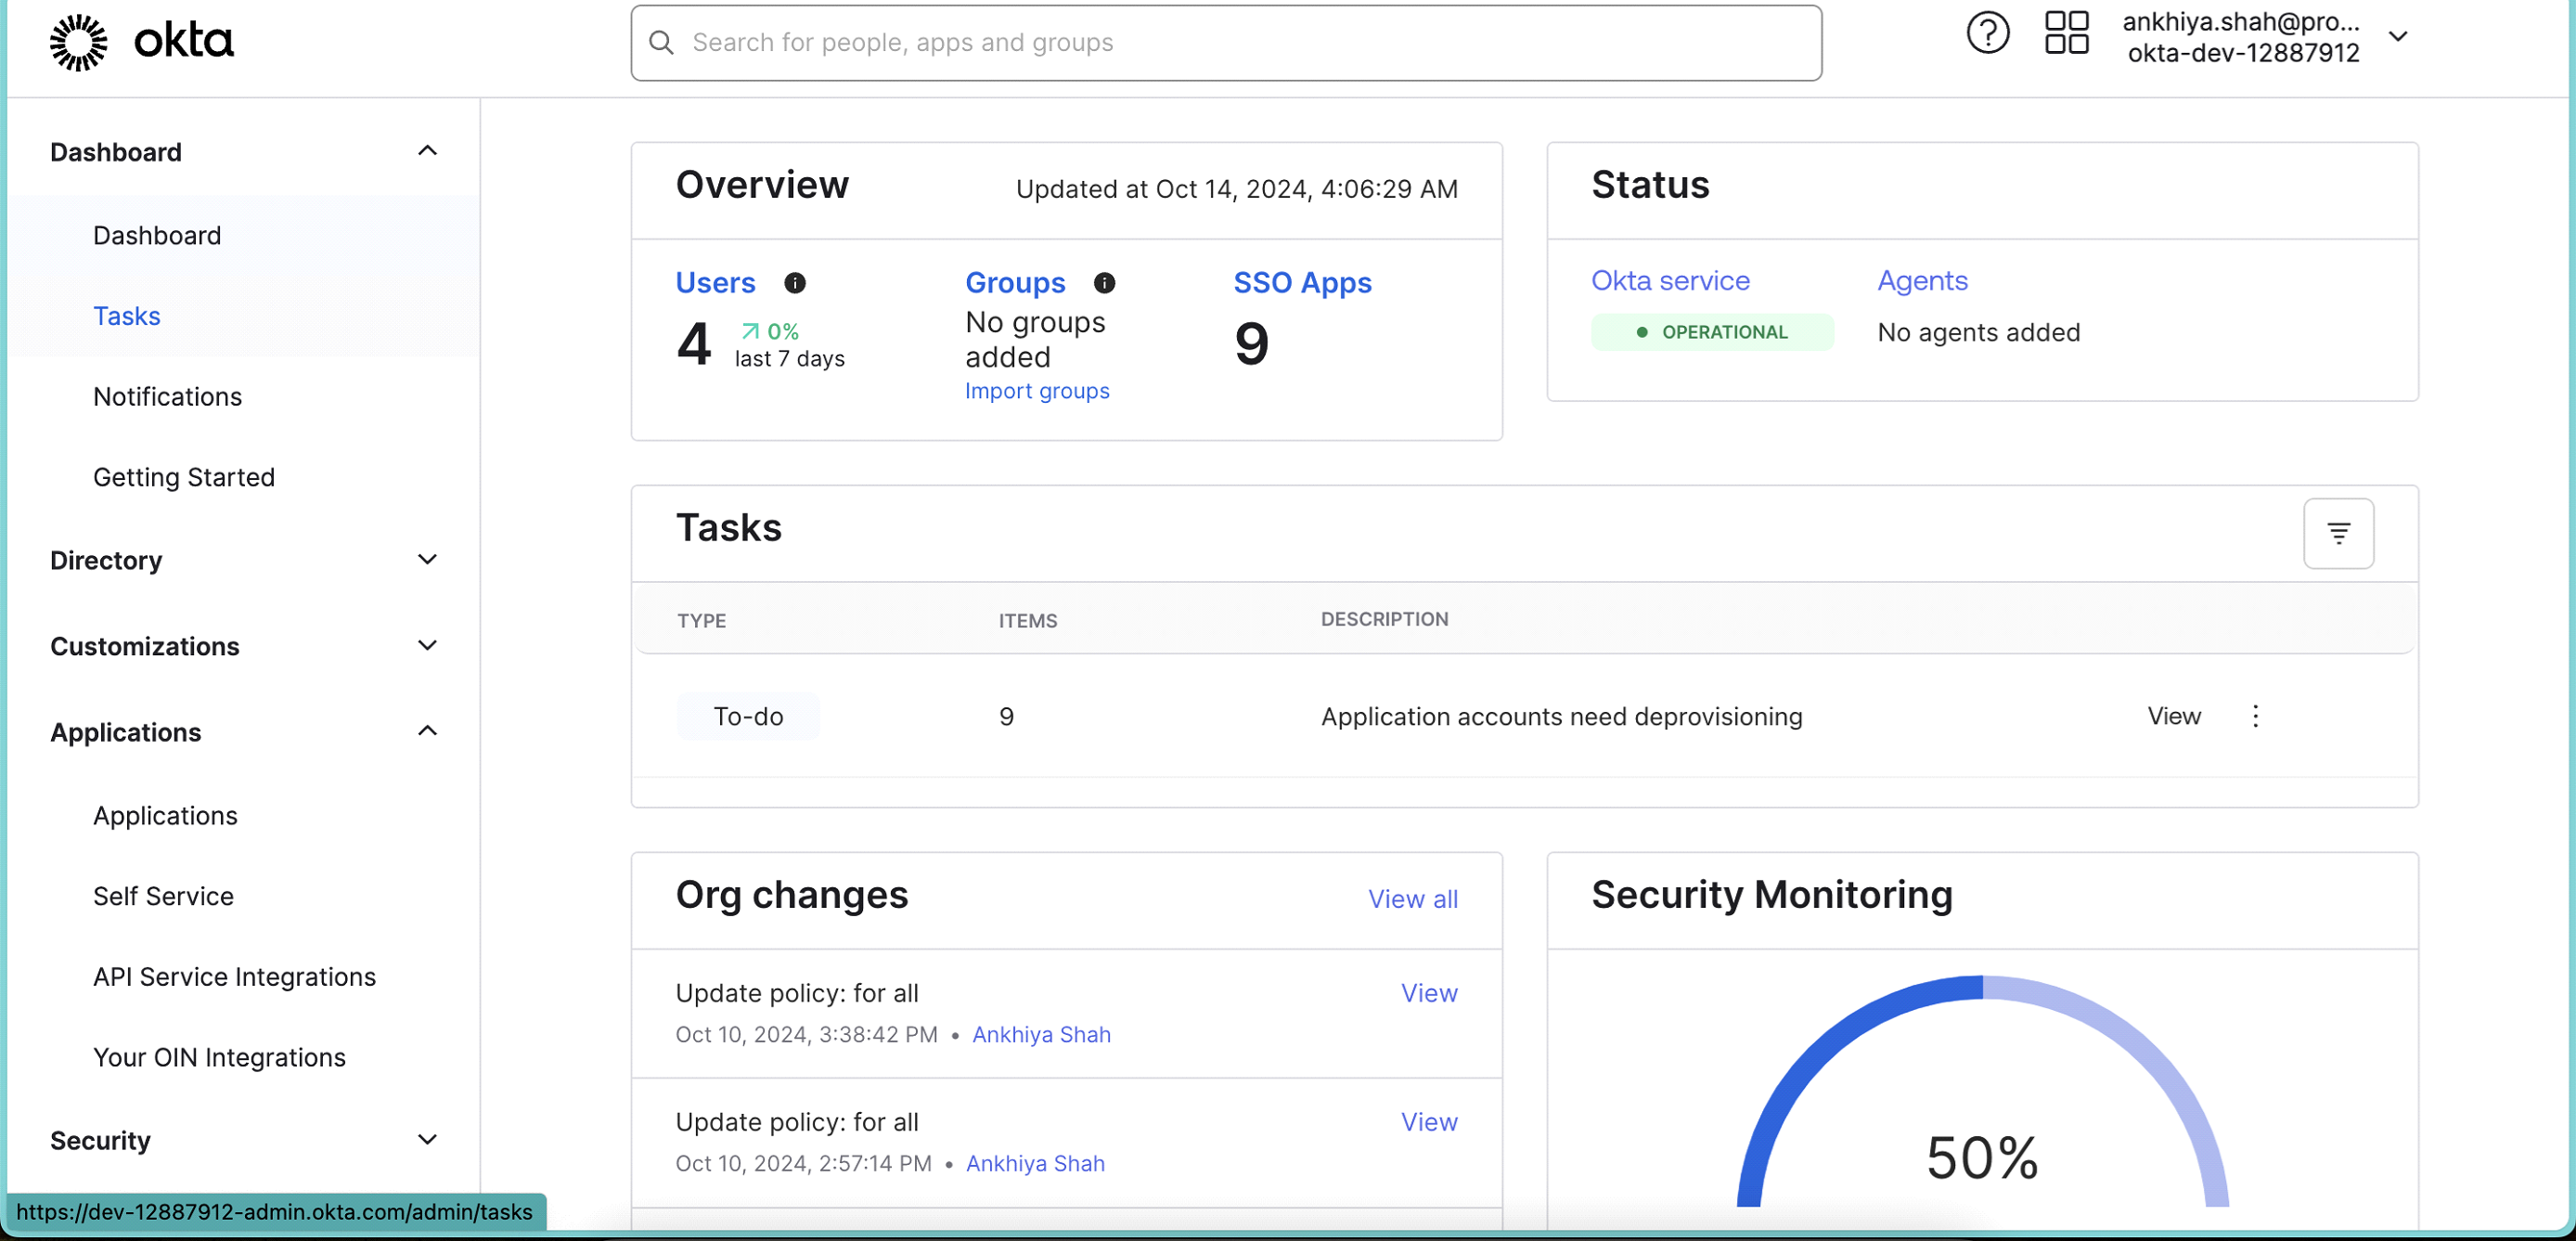
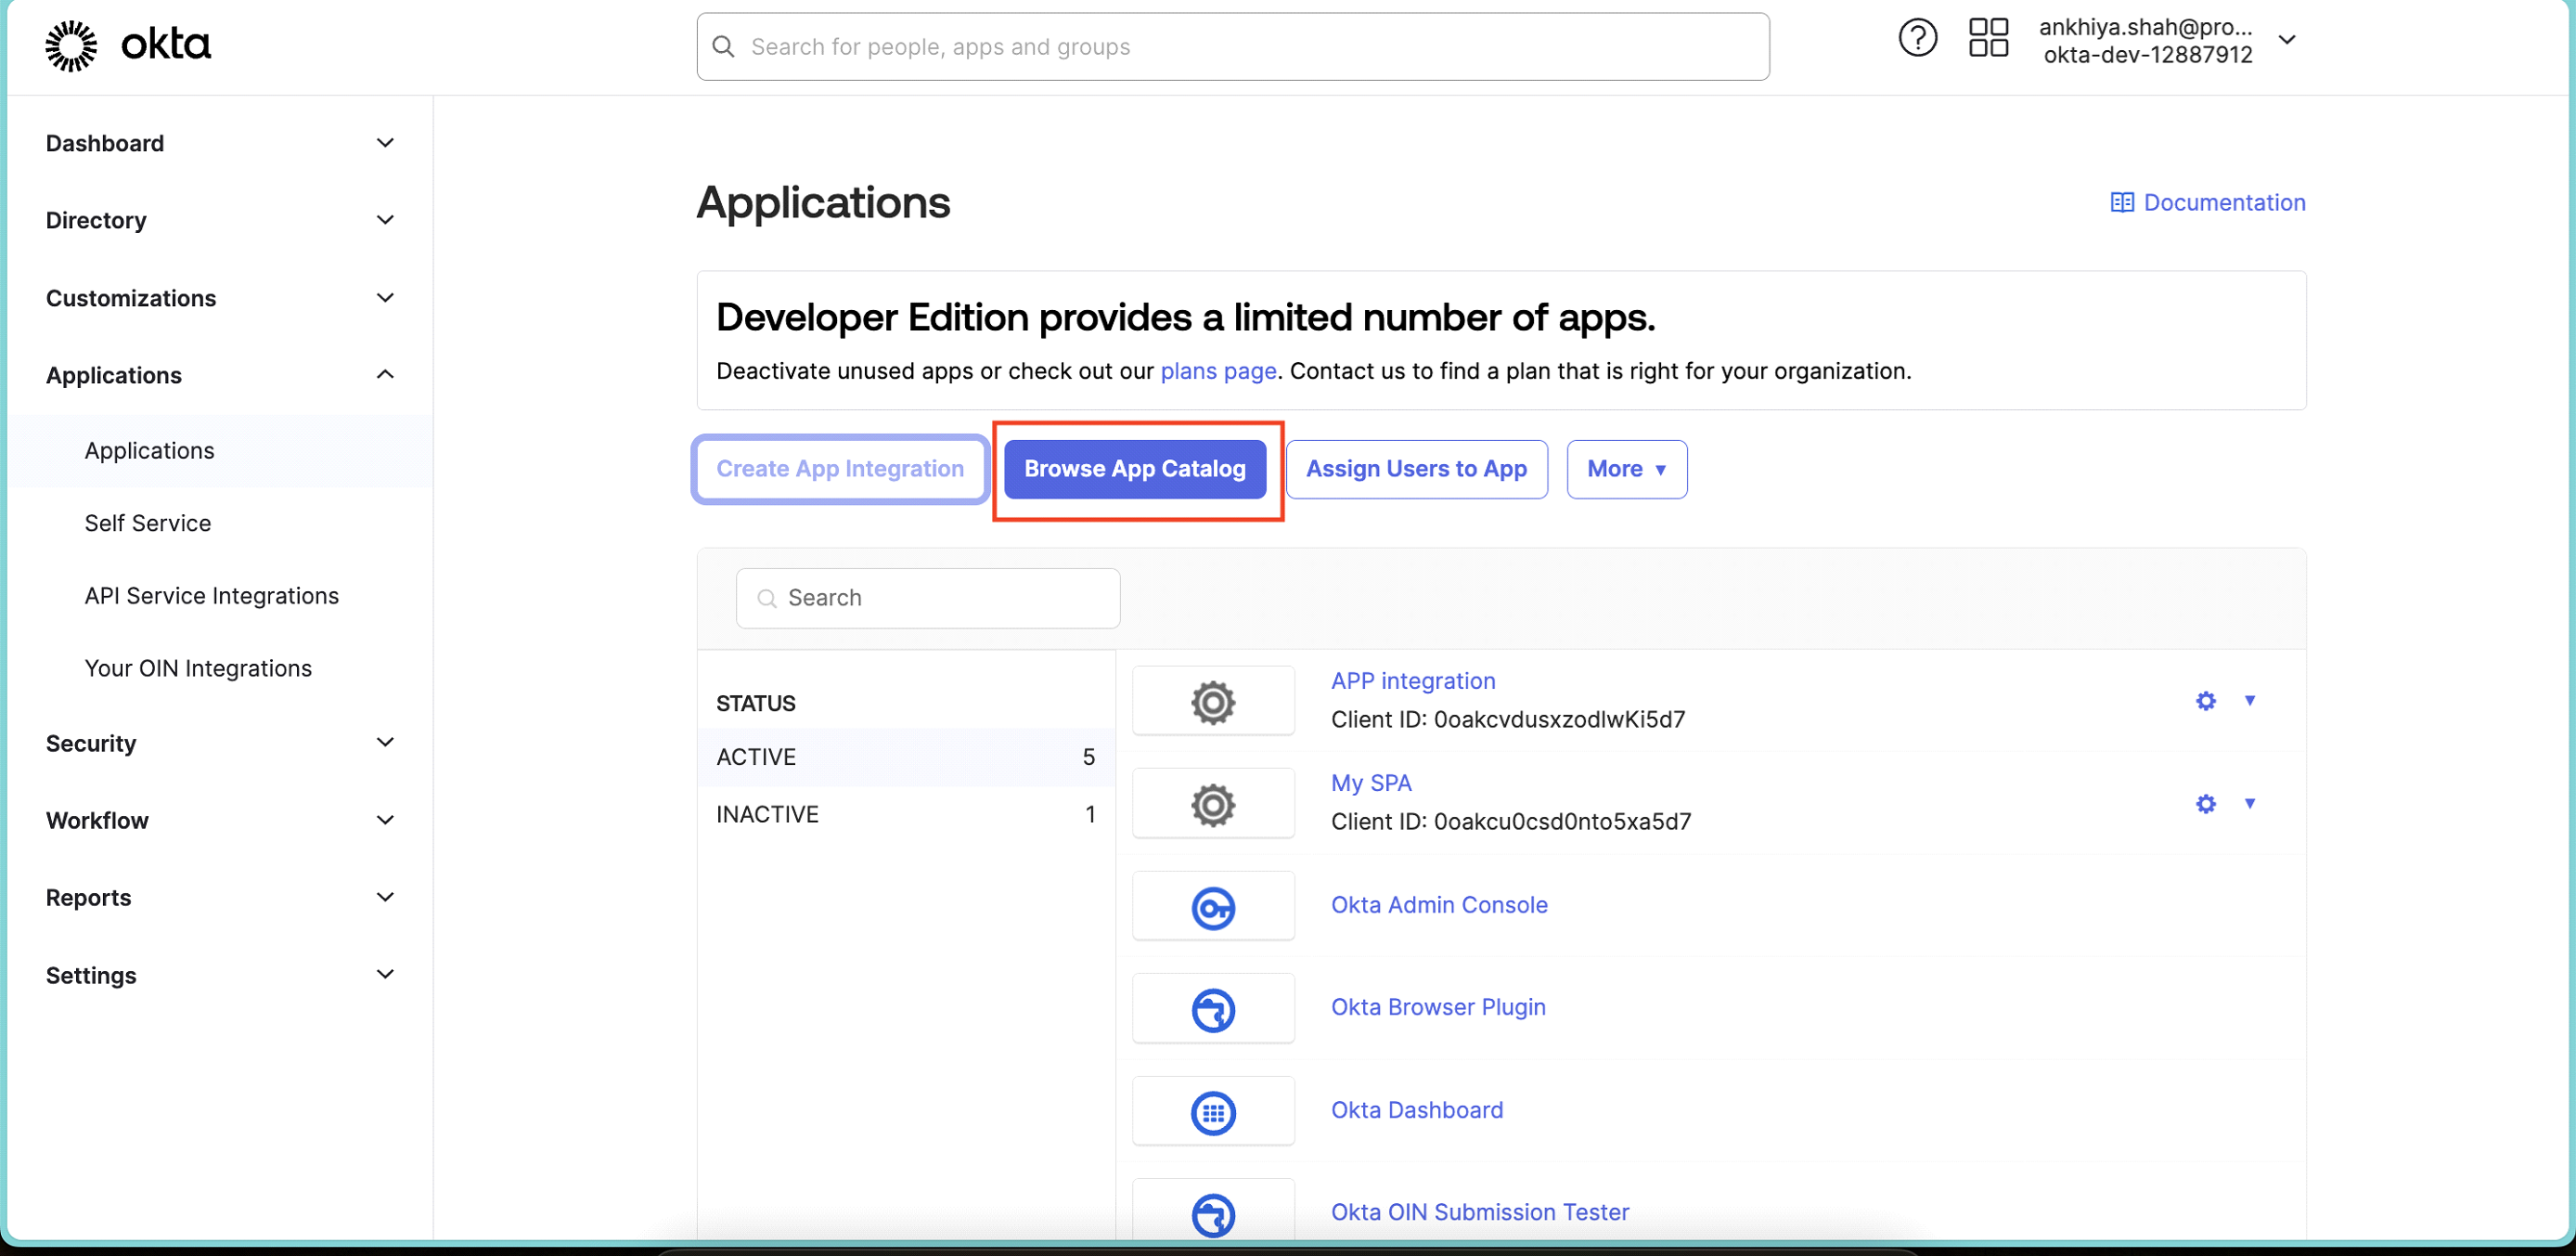
In the Admin Console, go to Applications > Applications.
-
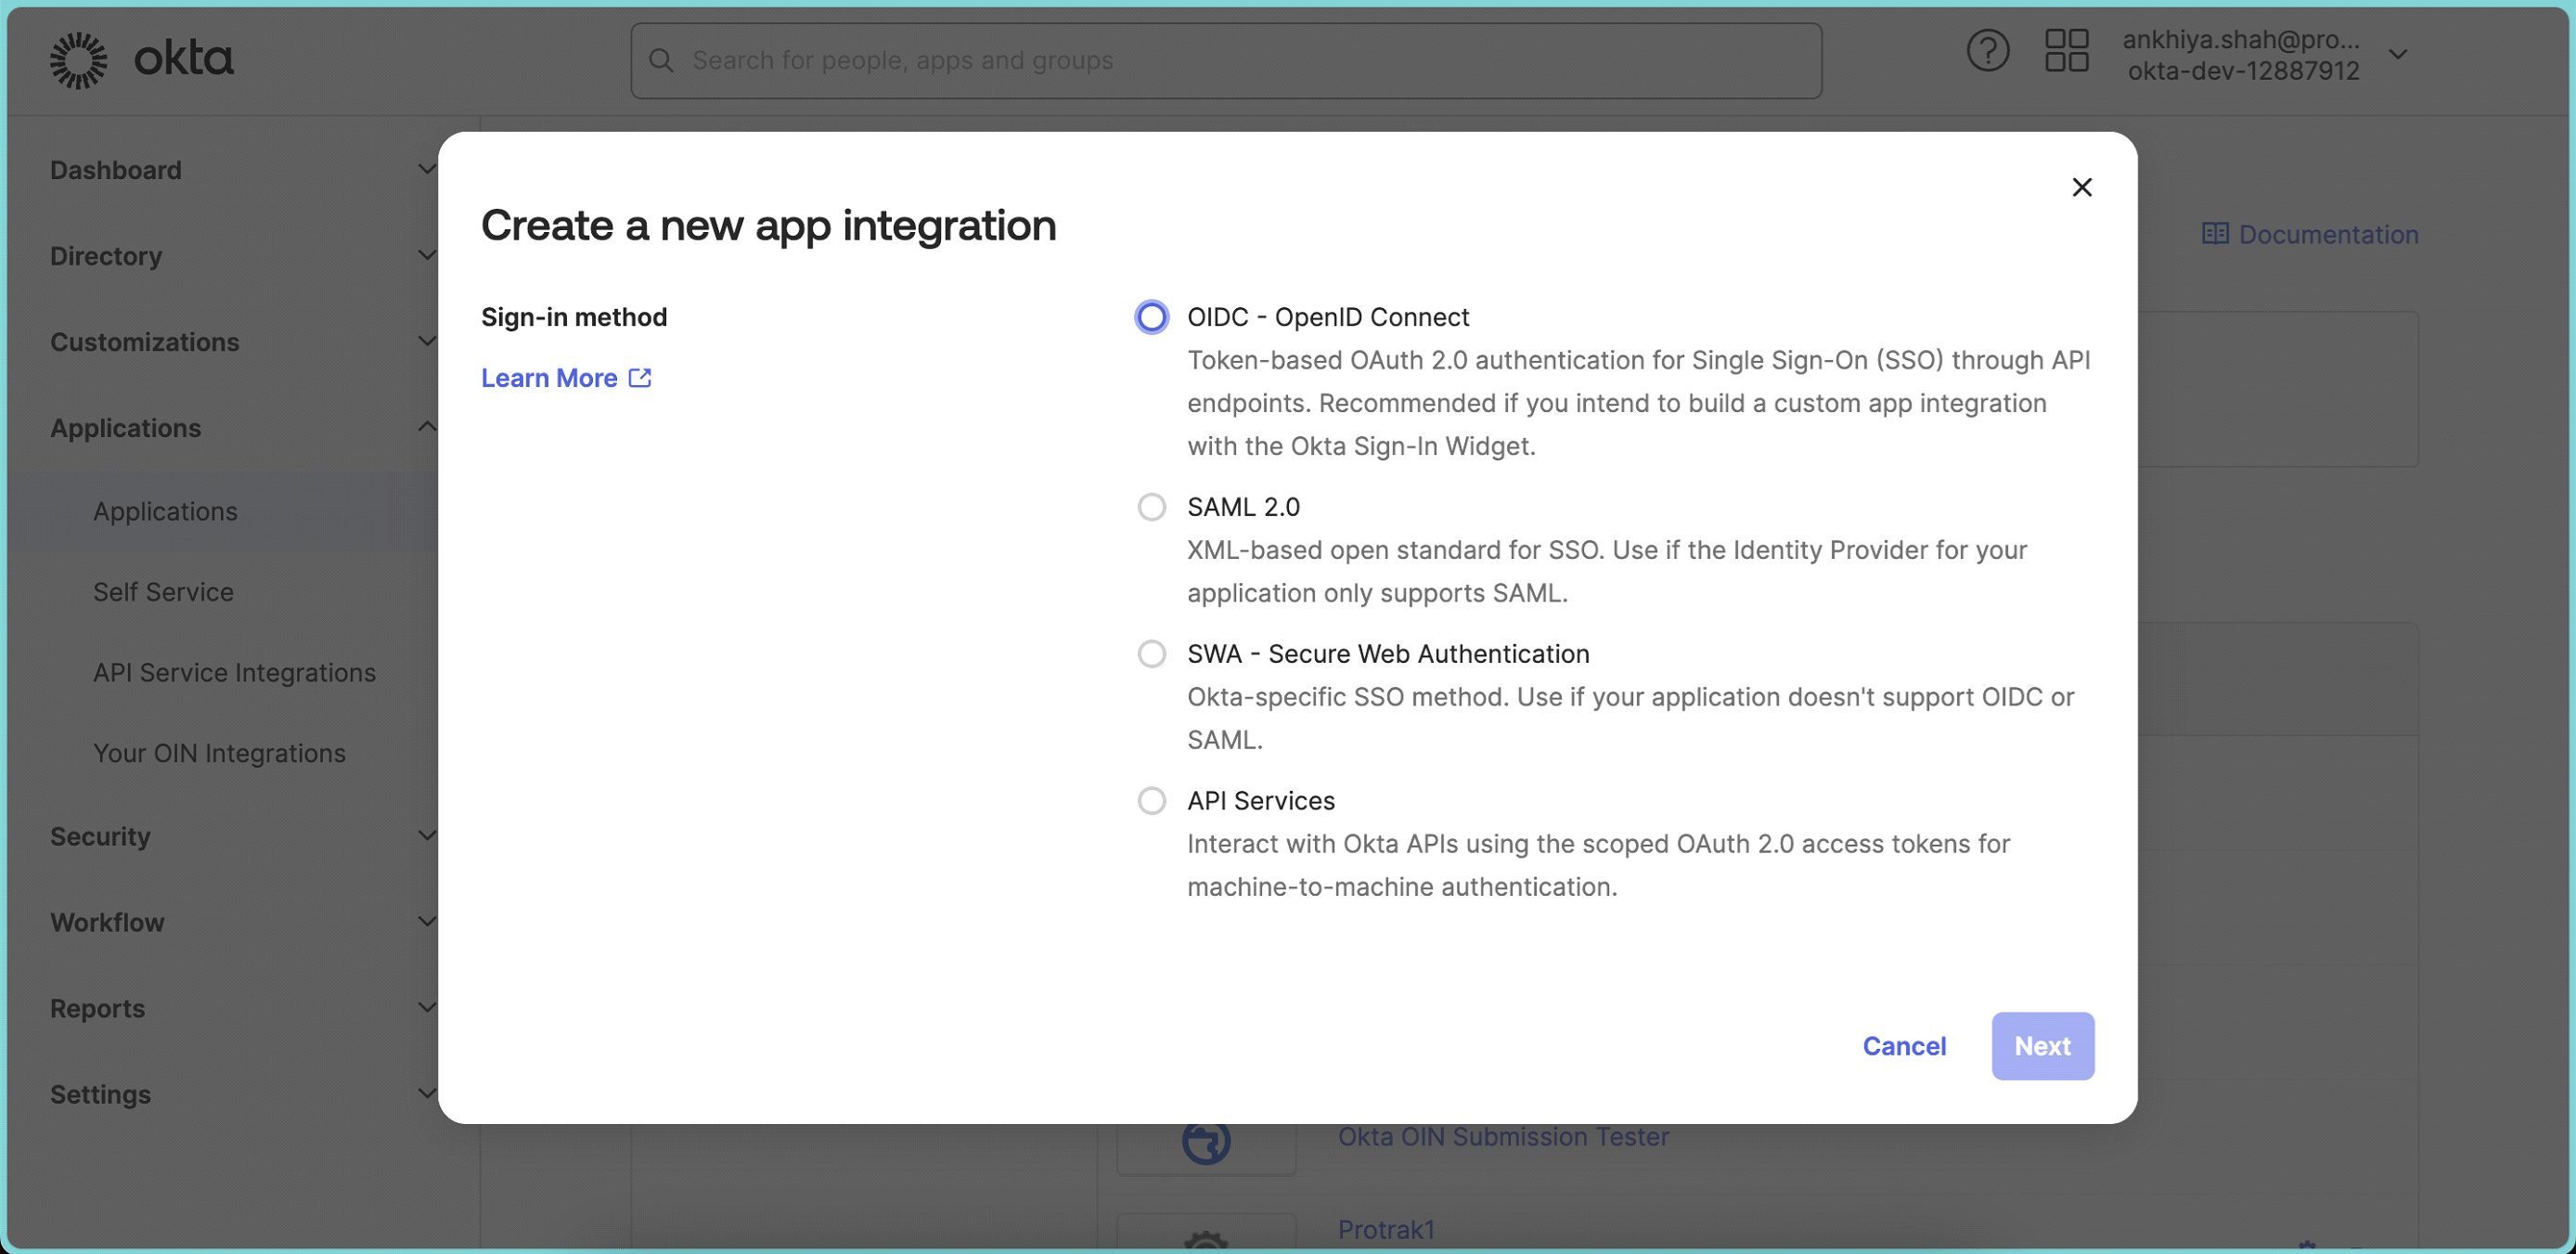
Click Create App Integration.
-
To create an OIDC app integration, select OIDC - OpenID Connect as the Sign-in method.
-
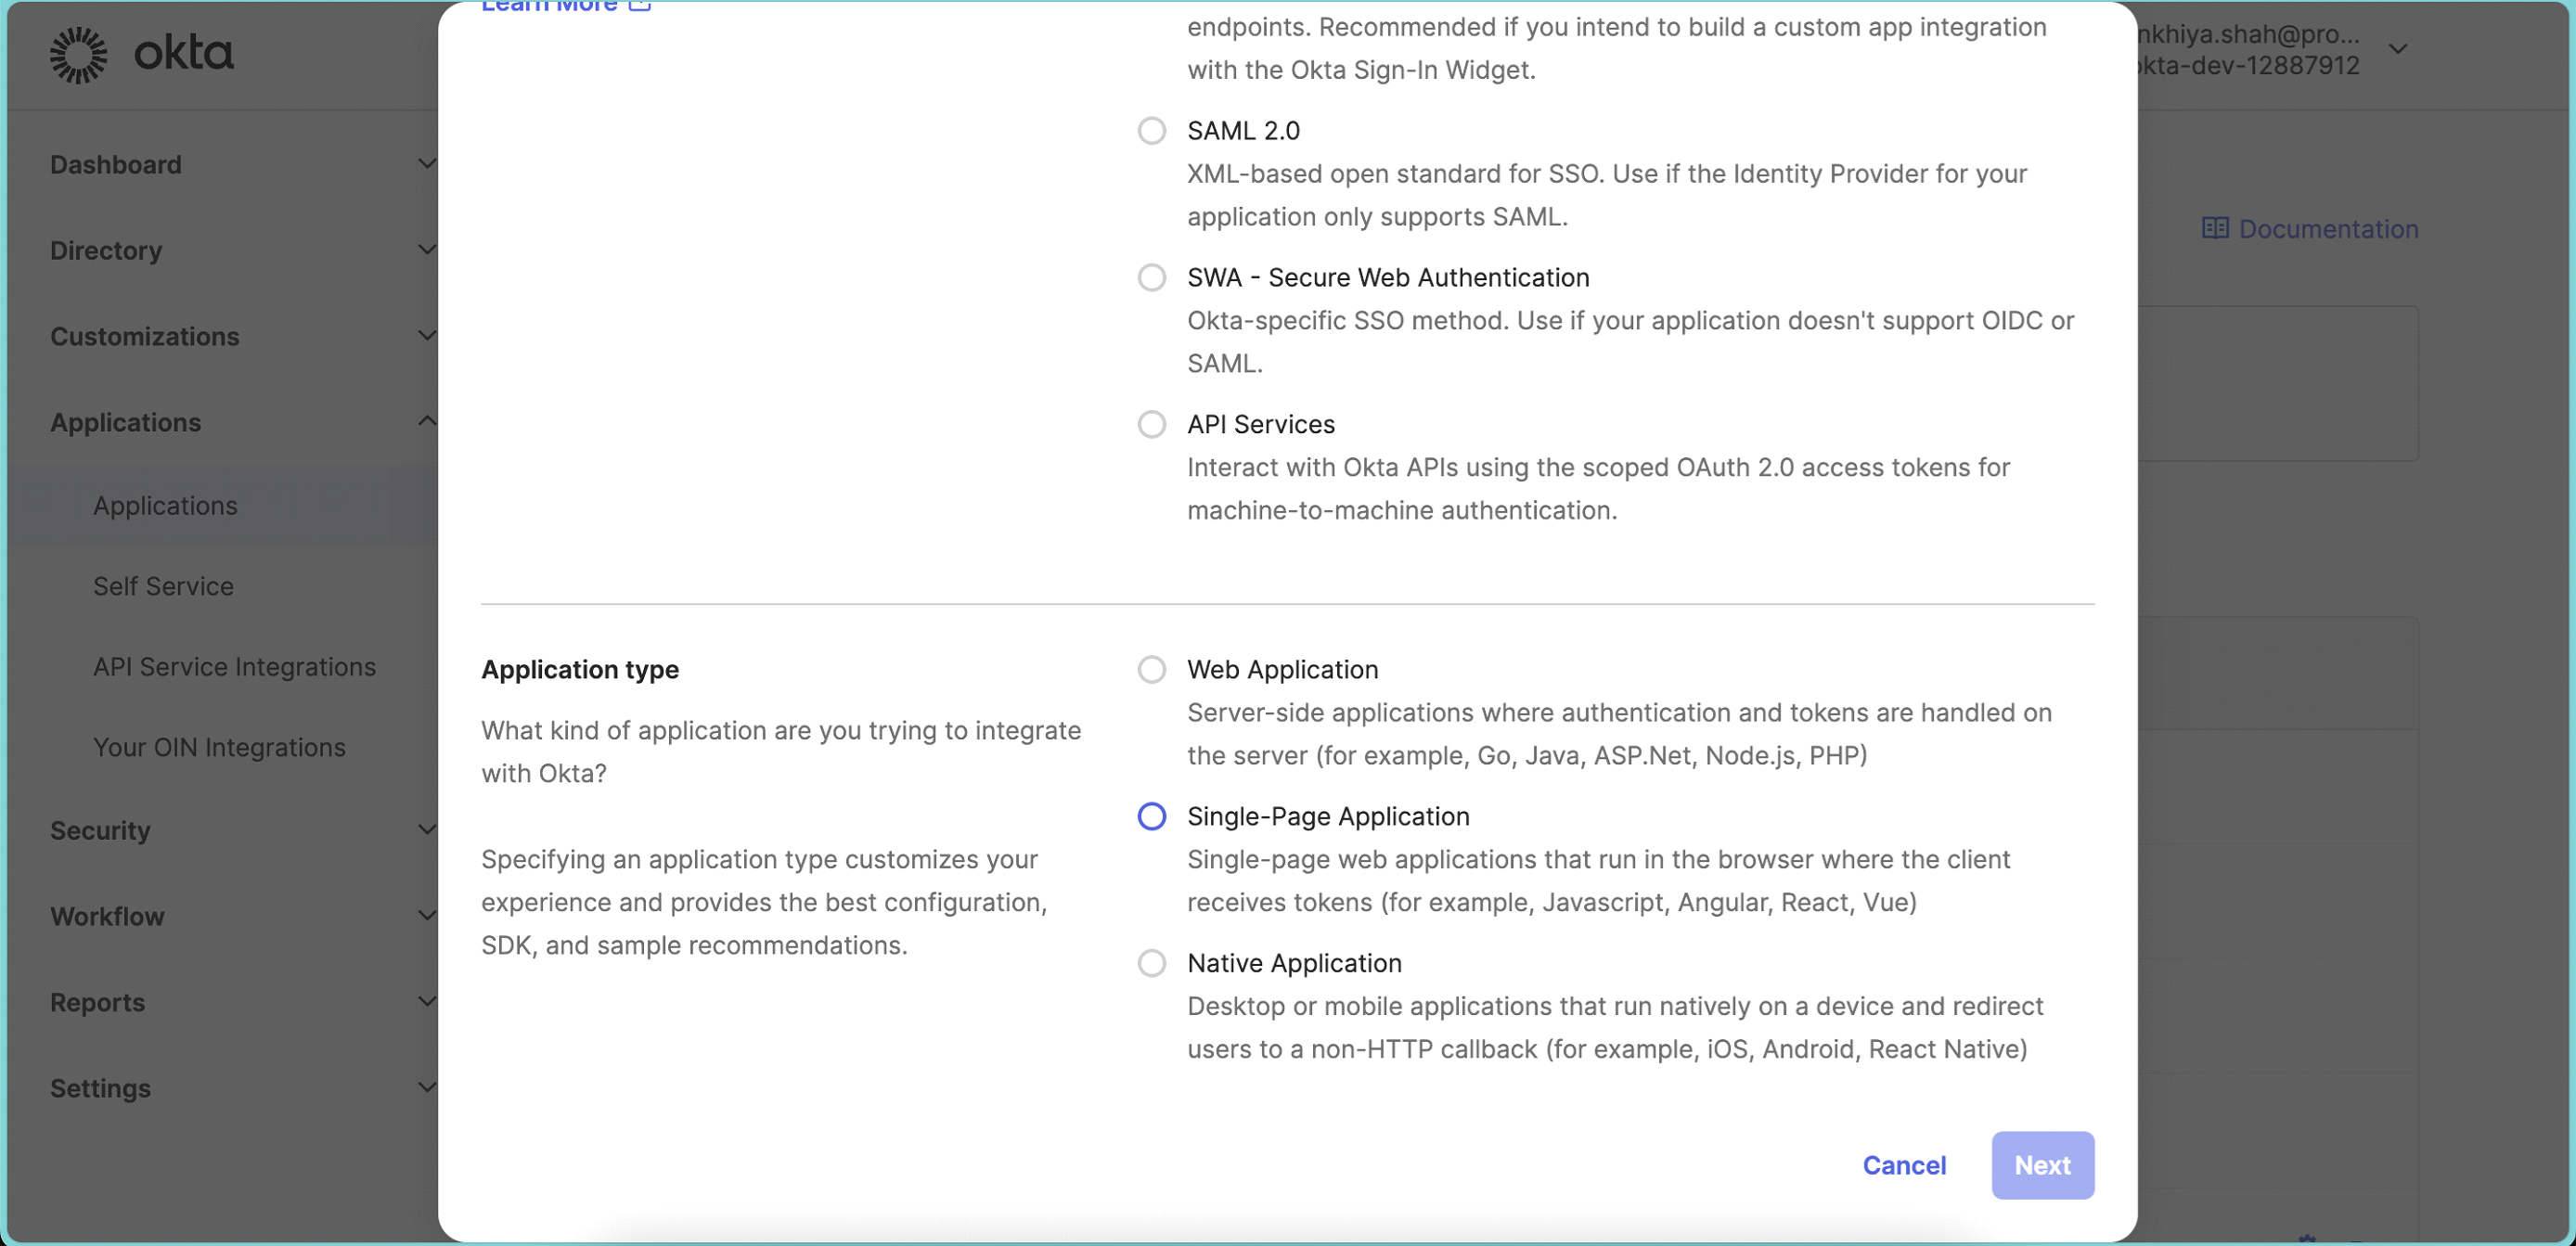
Choose the type of app as Single-Page Application
-
Click Next.
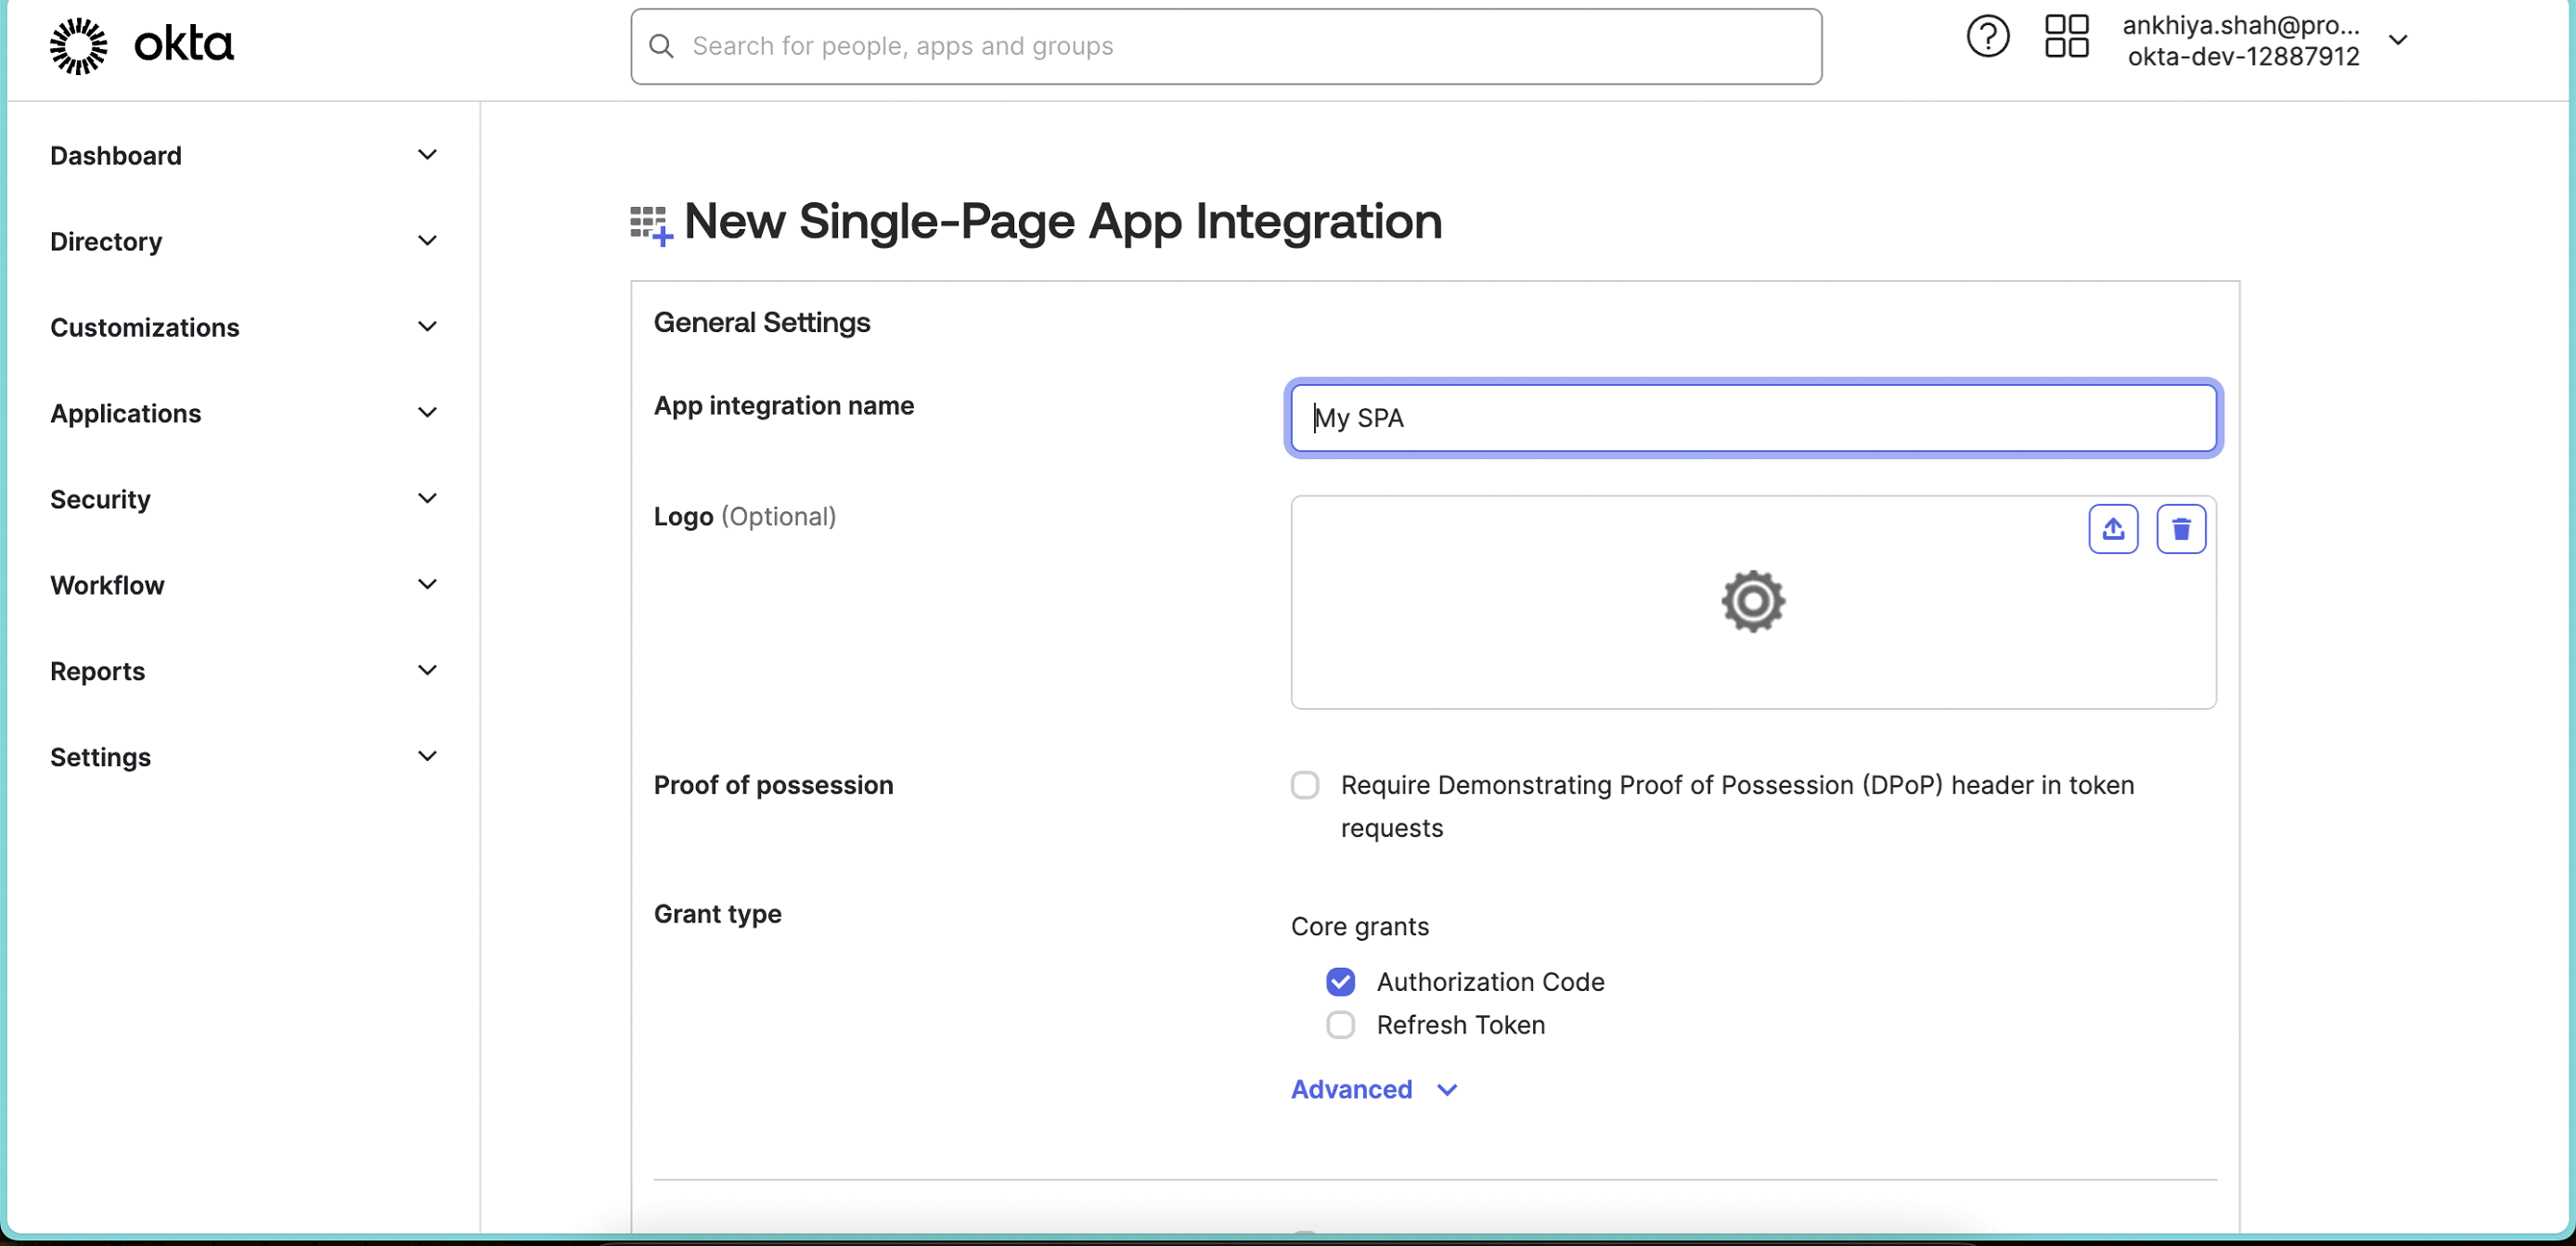
Configure General Settings:
-
Enter name of the app or keep as is (can be changed later).
-
Add Logo (Optional).
-
Grant type: Select Authorization Code & Refresh Token
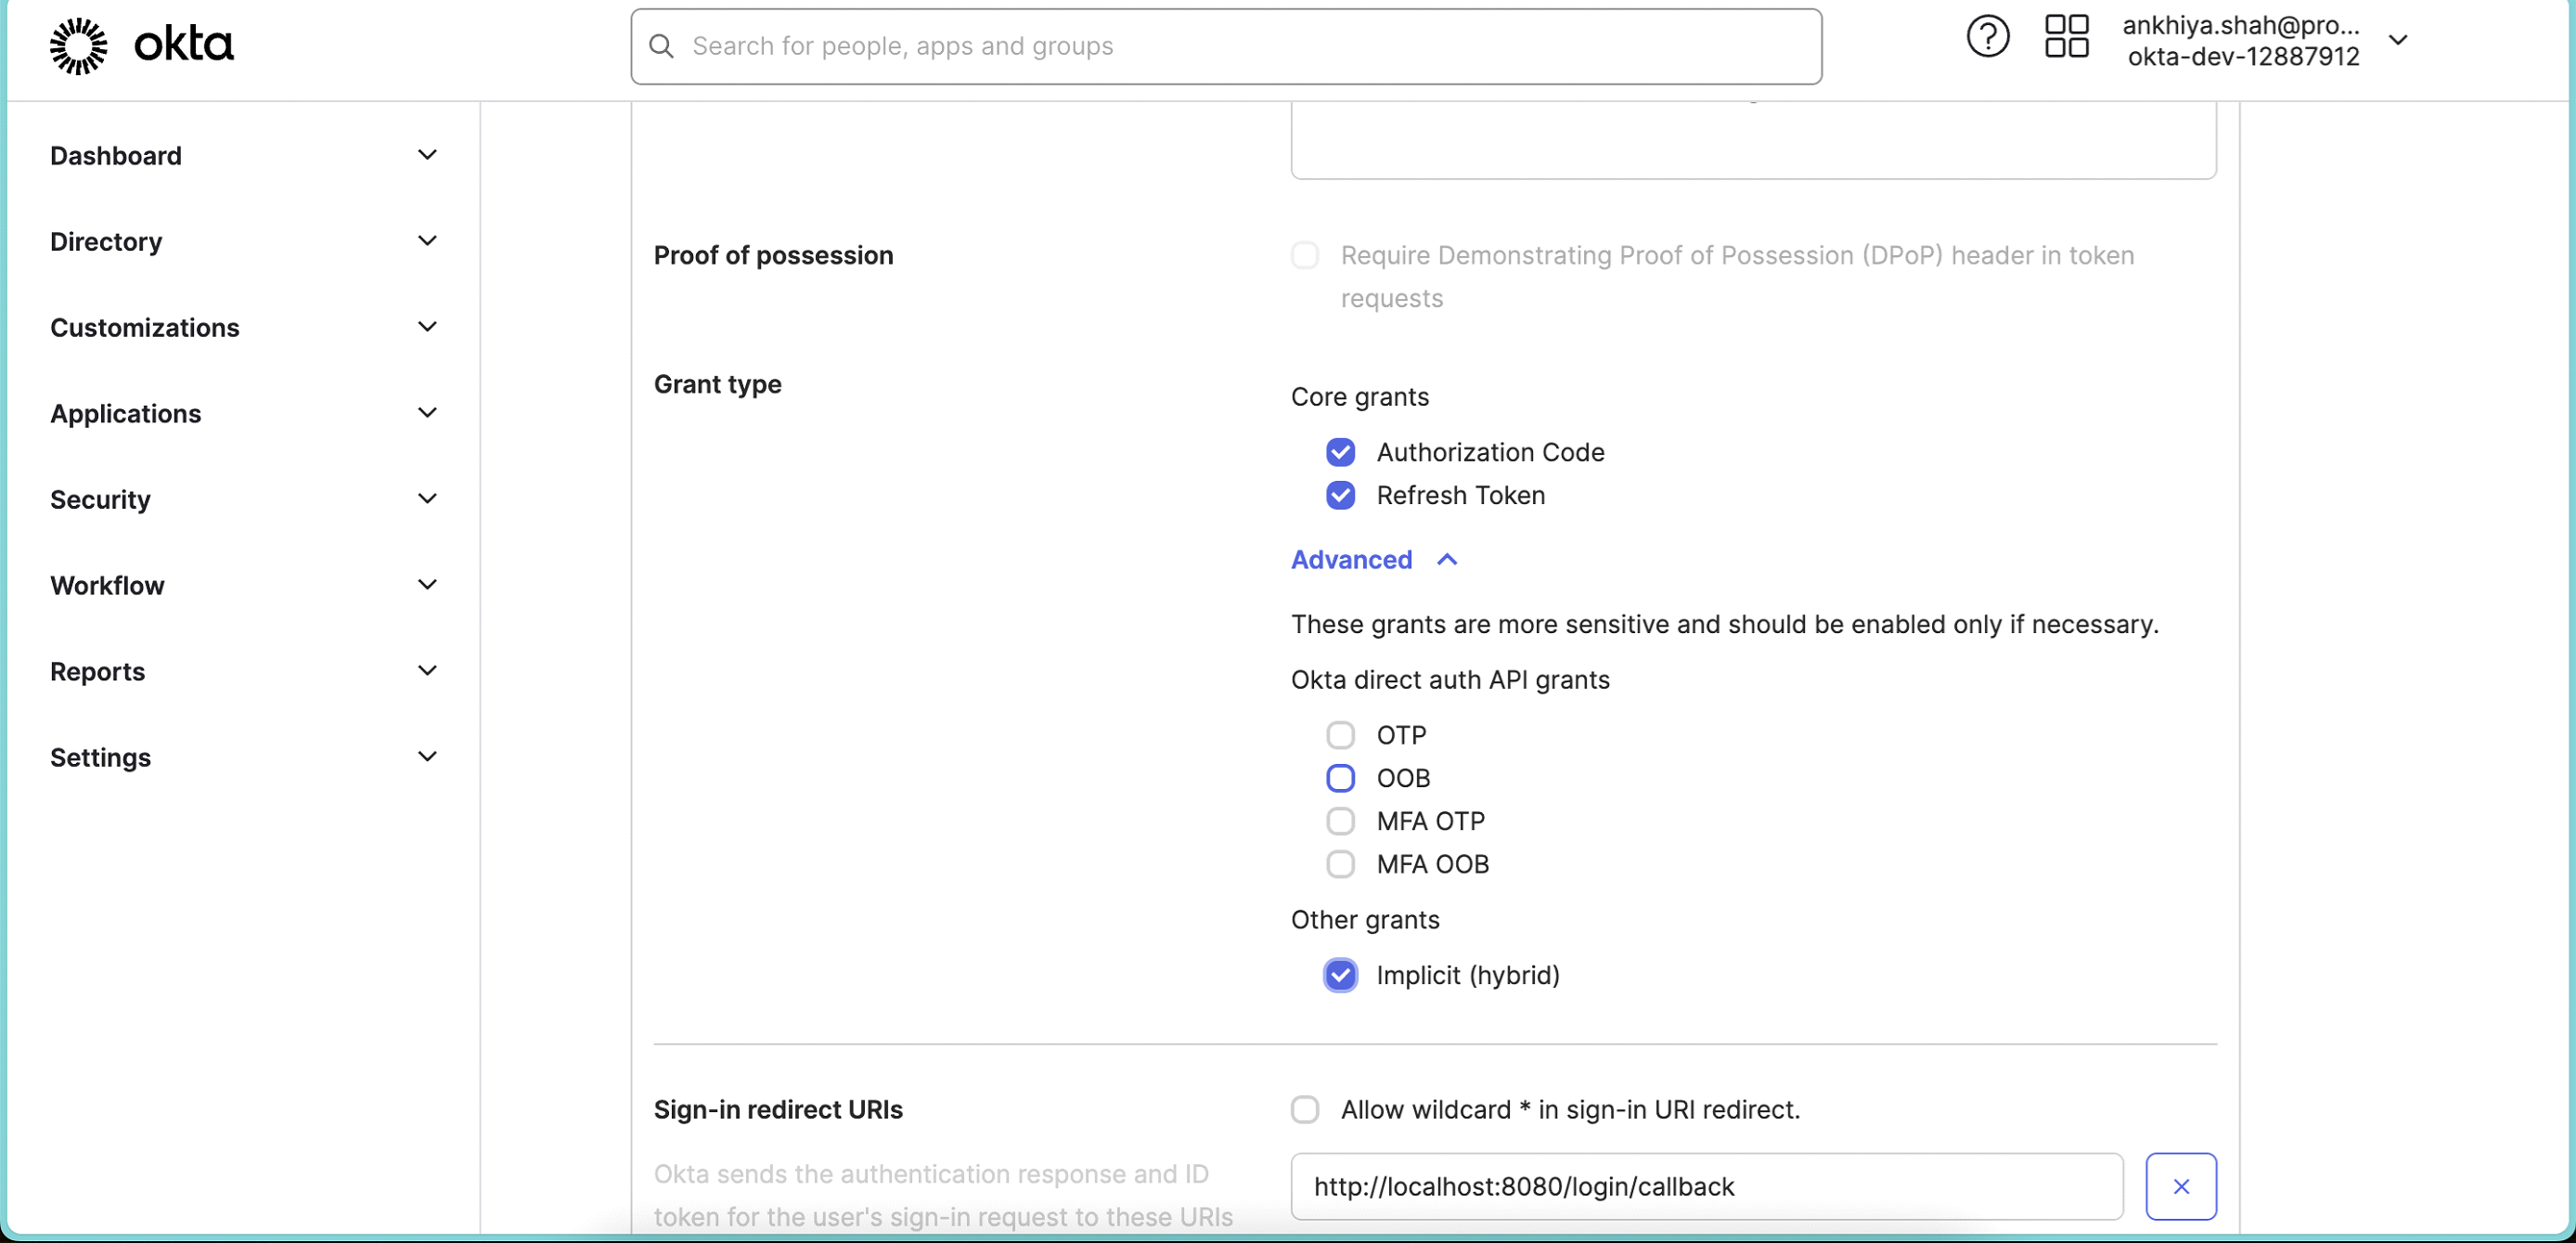 Also expand Advanced and select Implicit (hybrid).
 -
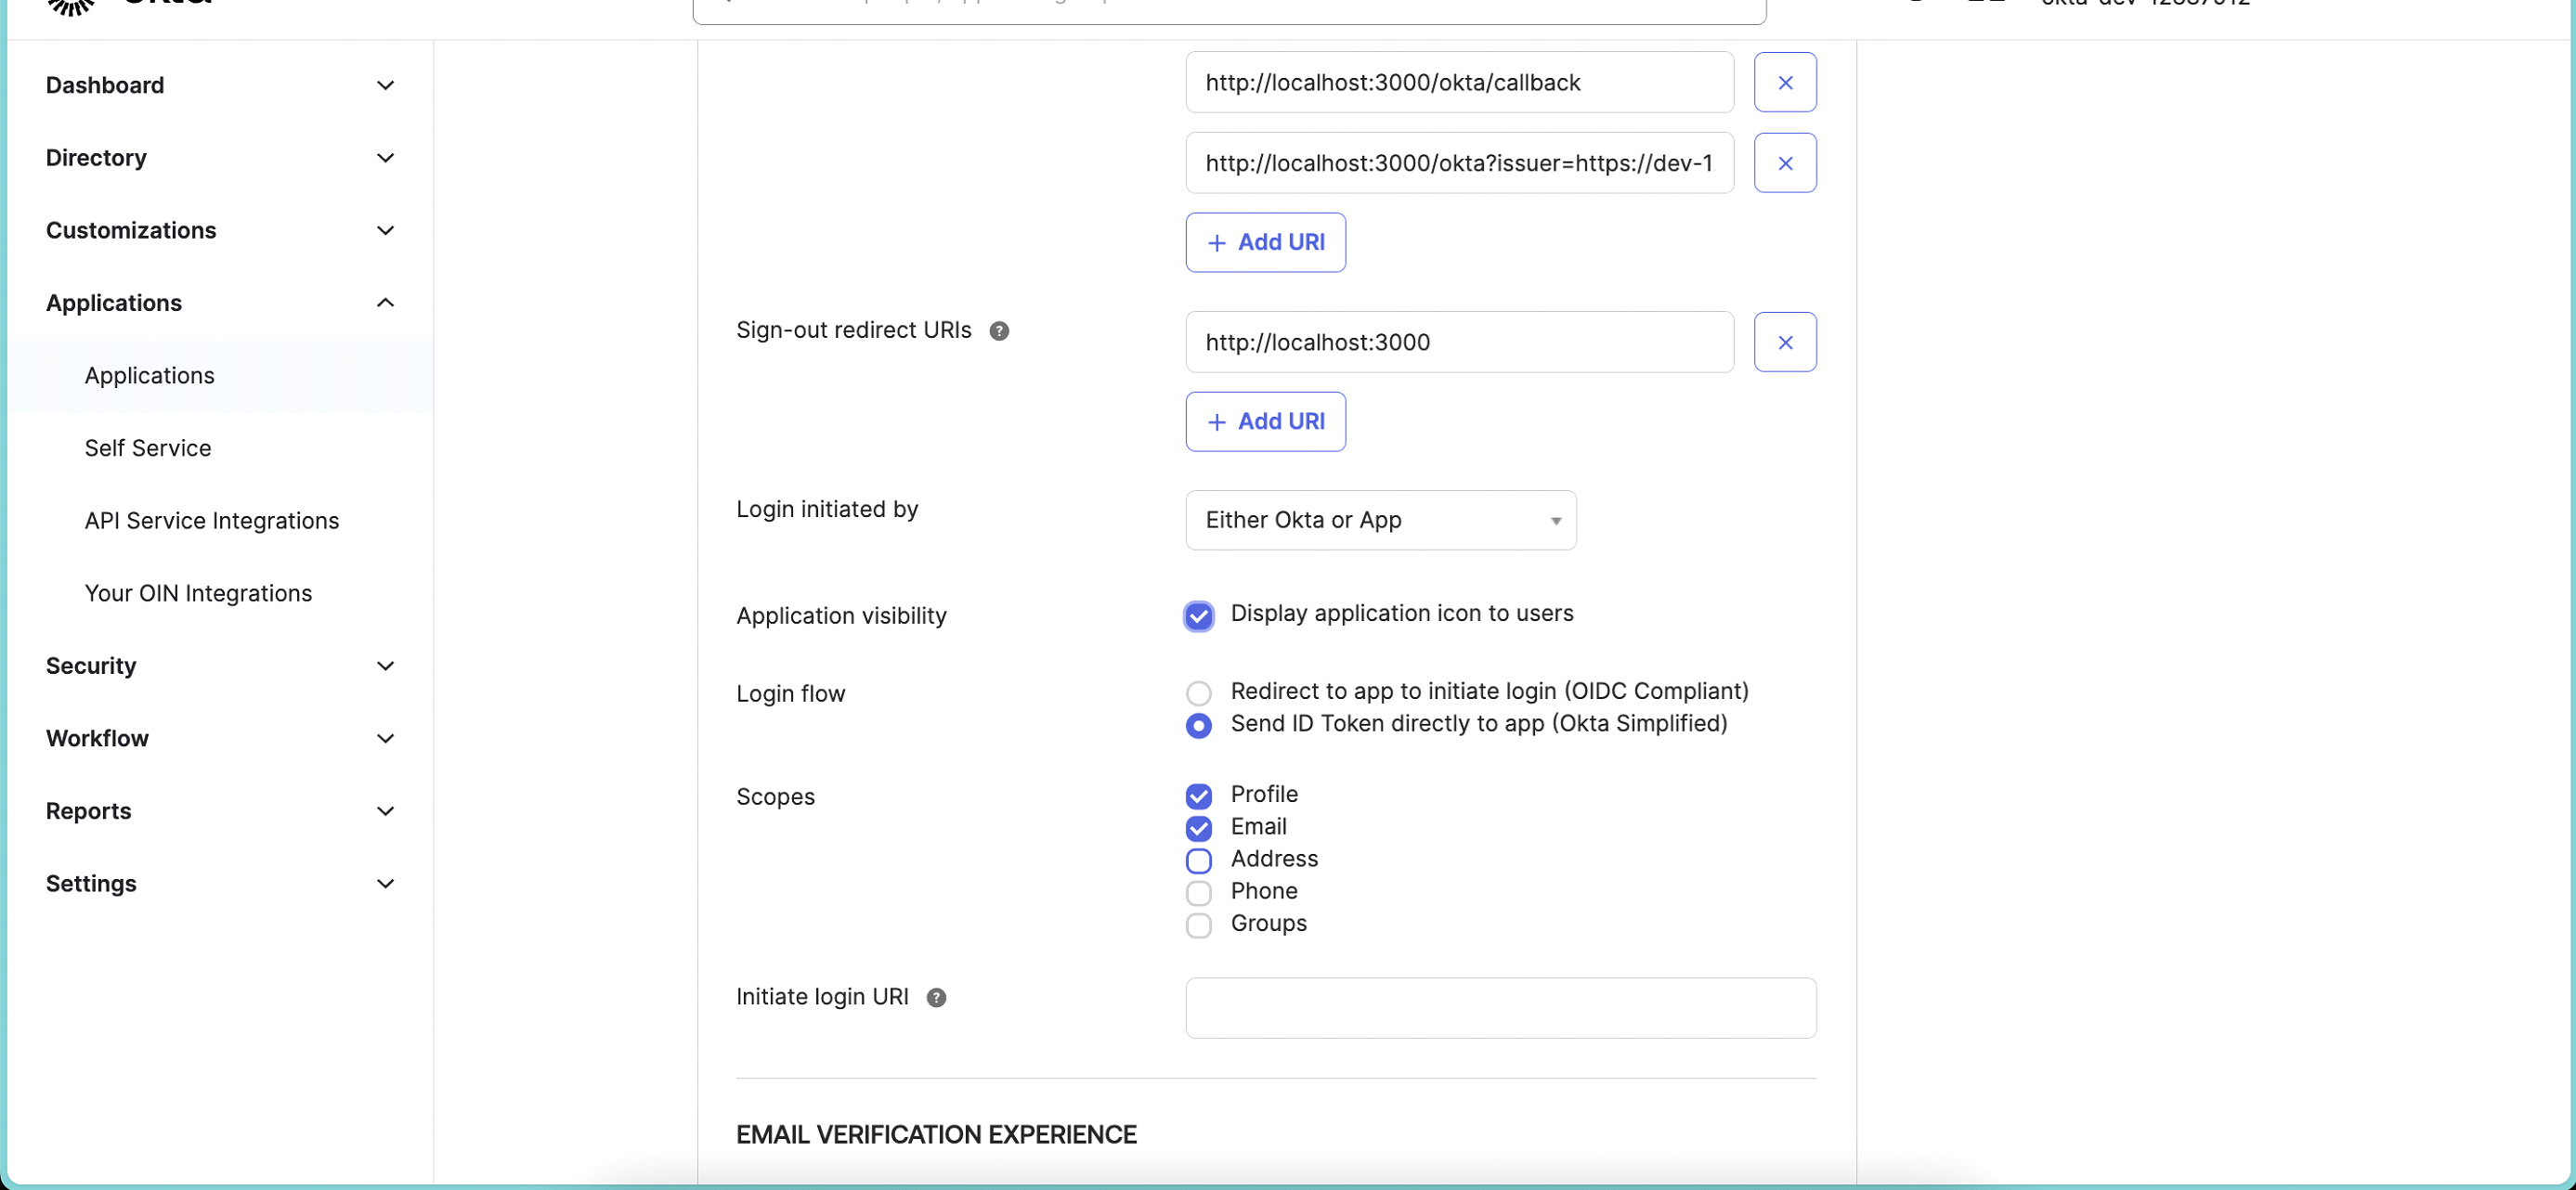
In Sign-In redirect URIs, edit URI to ⦁ "https://app.protrak.io/okta/callback" and add one more URI which Protrak Team provides. Sample URI "https://app.protrak.io" / okta? ⦁ issuer= "https://xxxx.okta.com/oauth2/default" tenantId=xxx-xxx-xxxx-xxx and Sign-out redirect URI to "https://app.protrak.io"
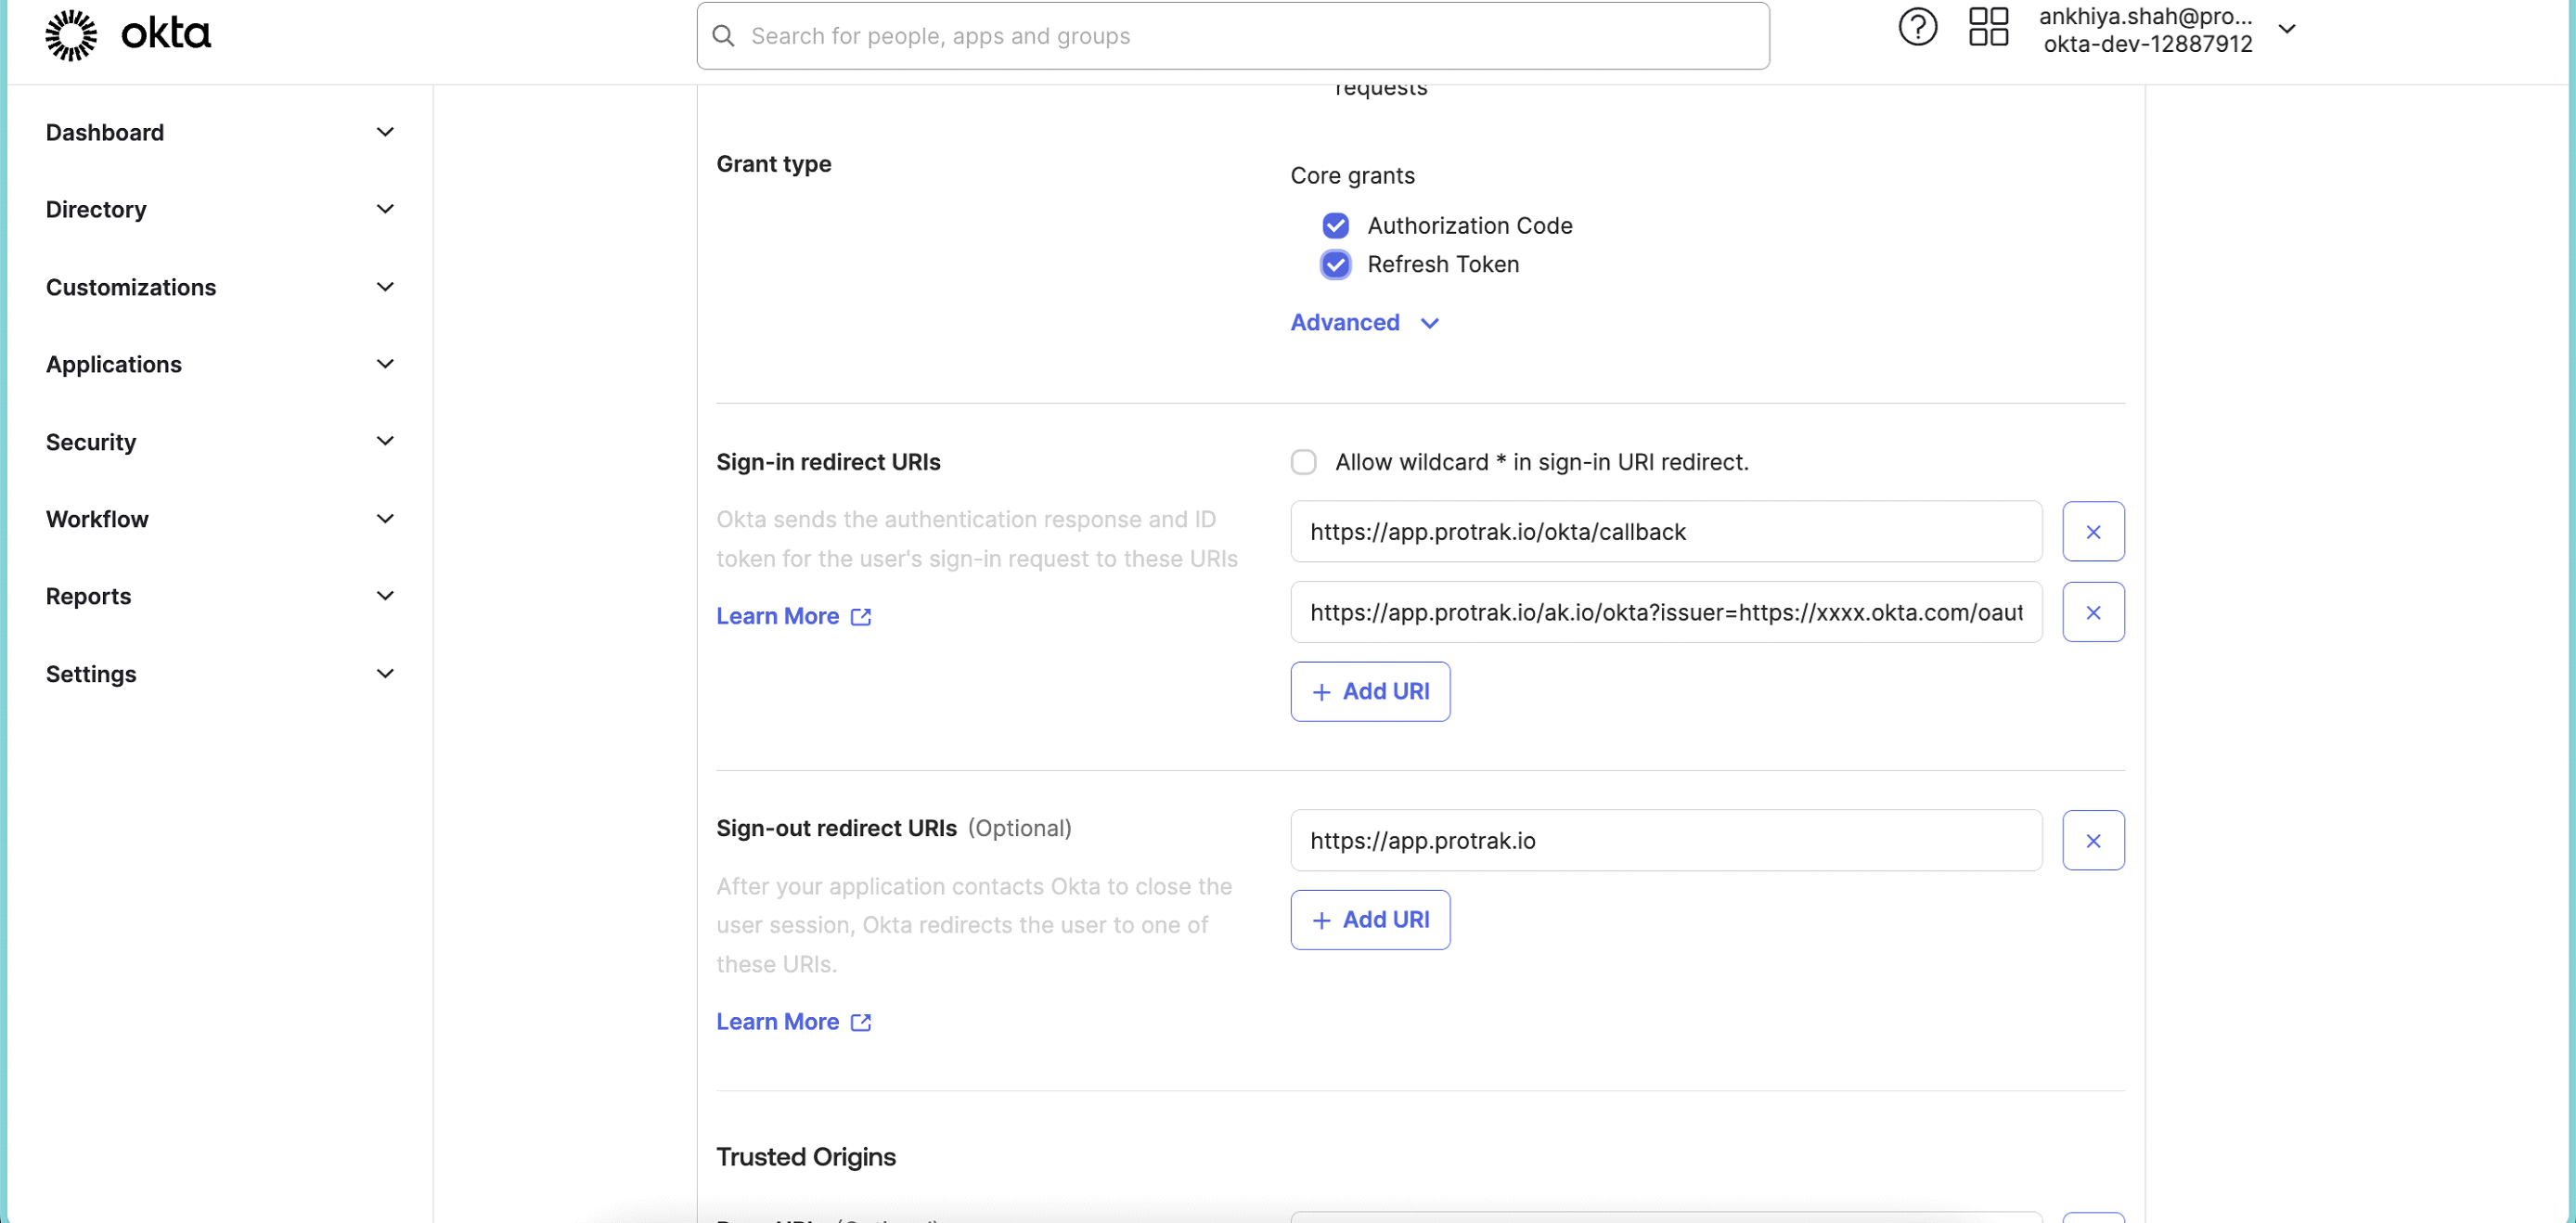
-
Scroll down to Assignments section & select Skip group assignment for now
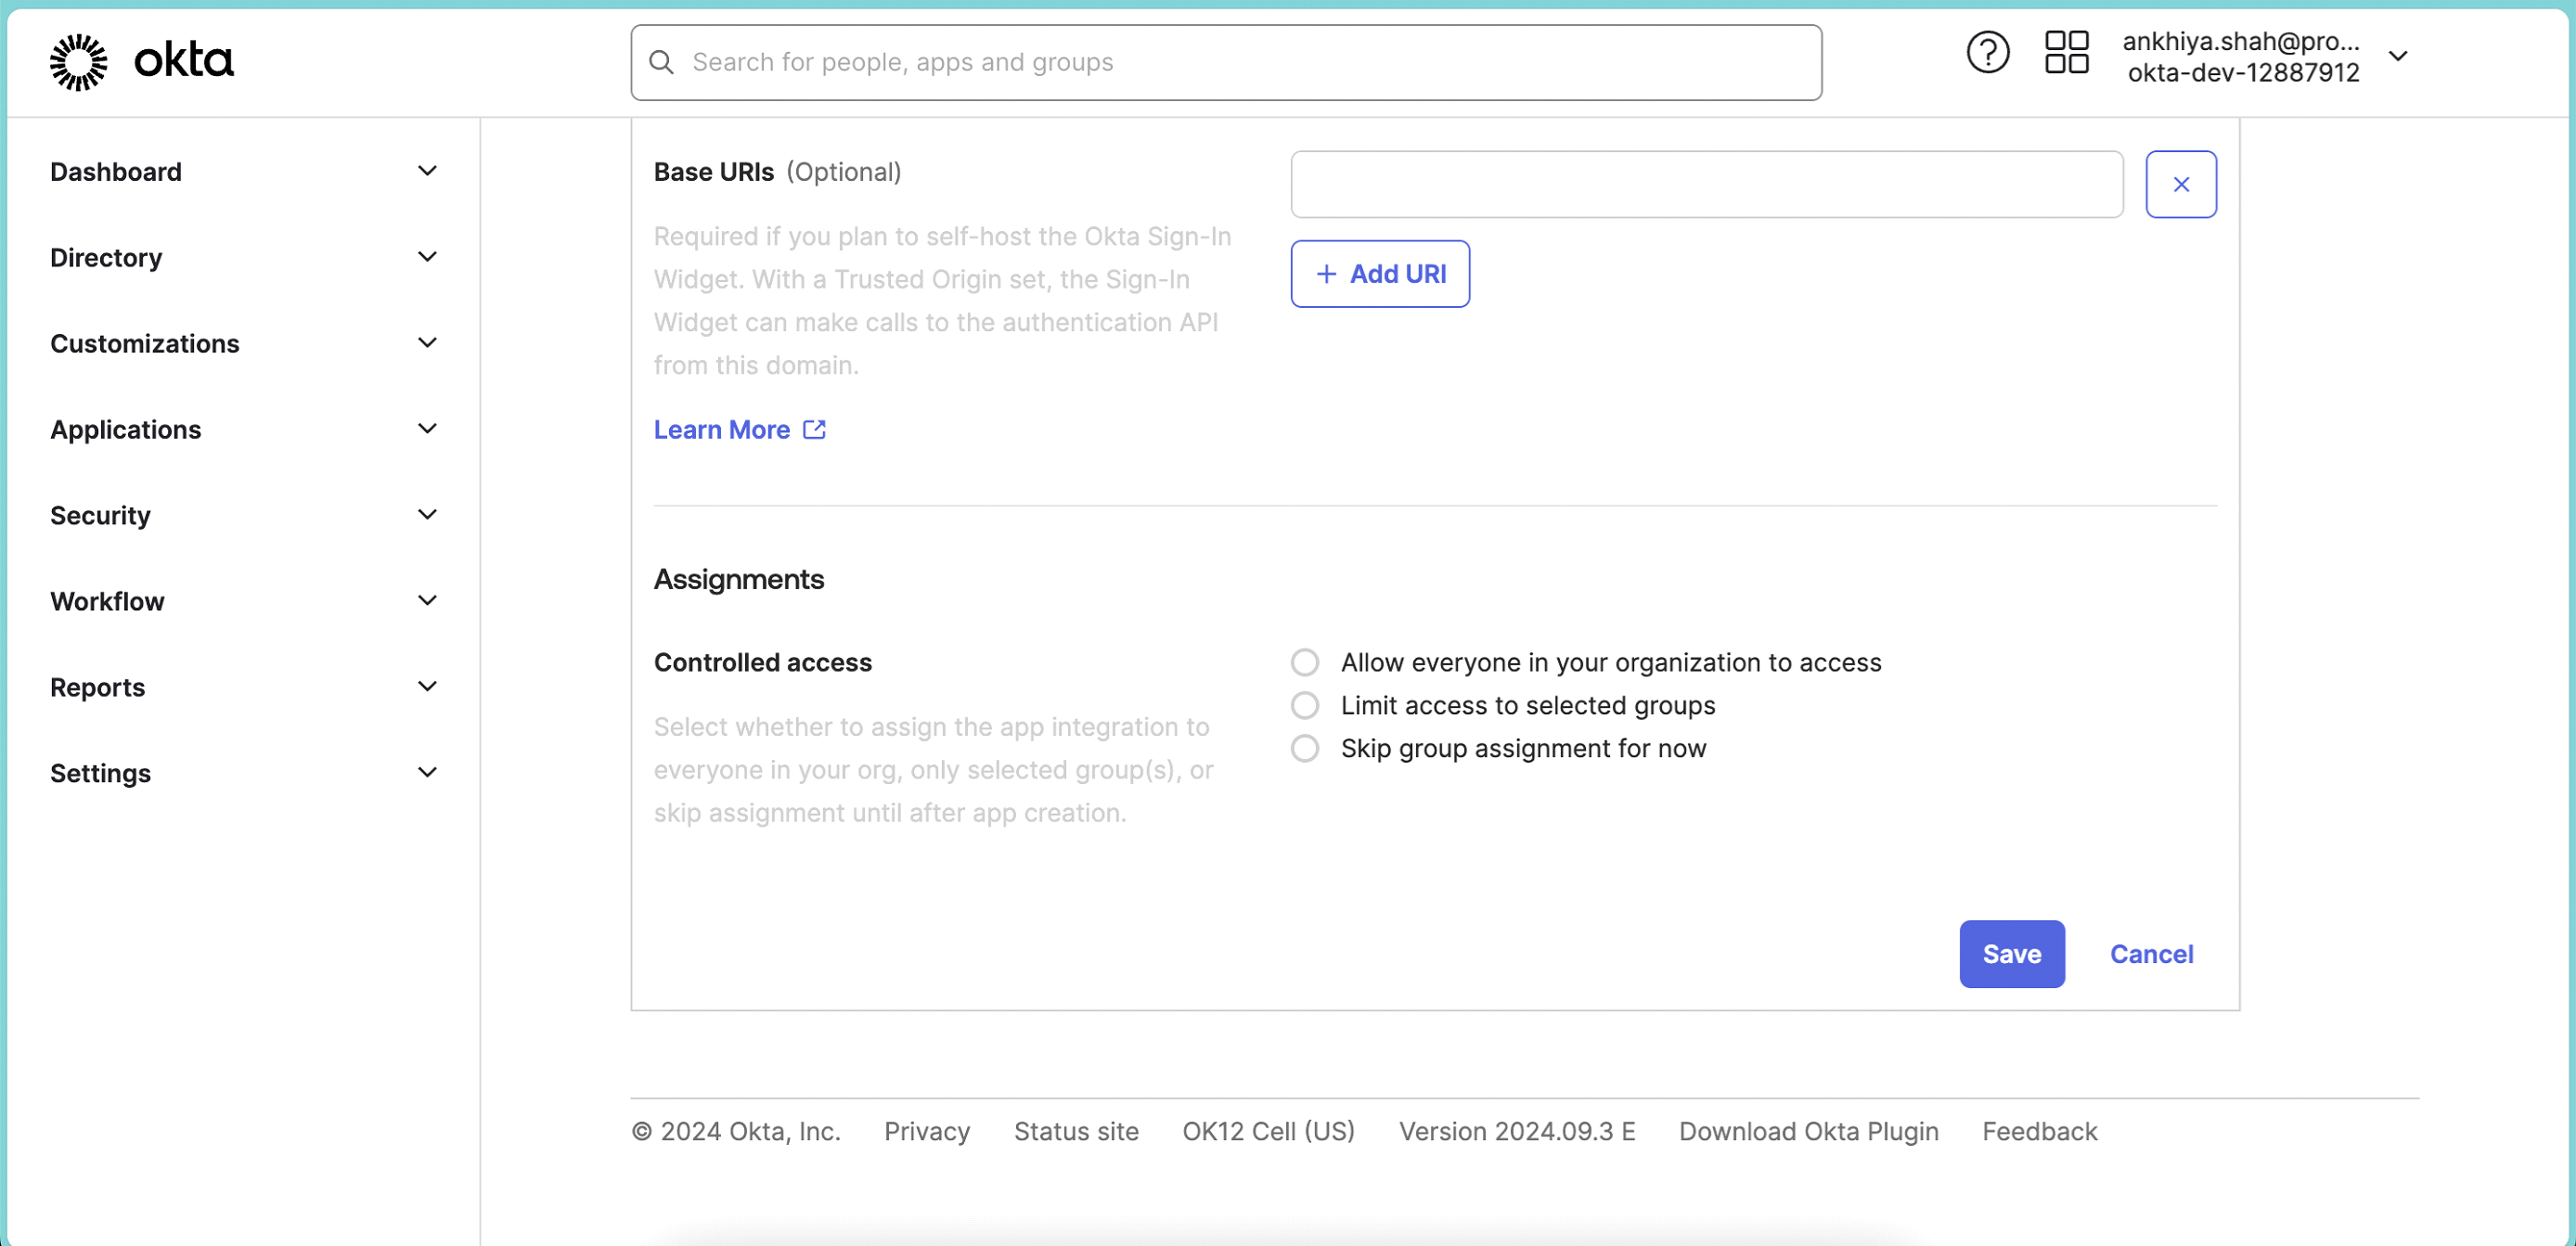
-
Click Save.
-
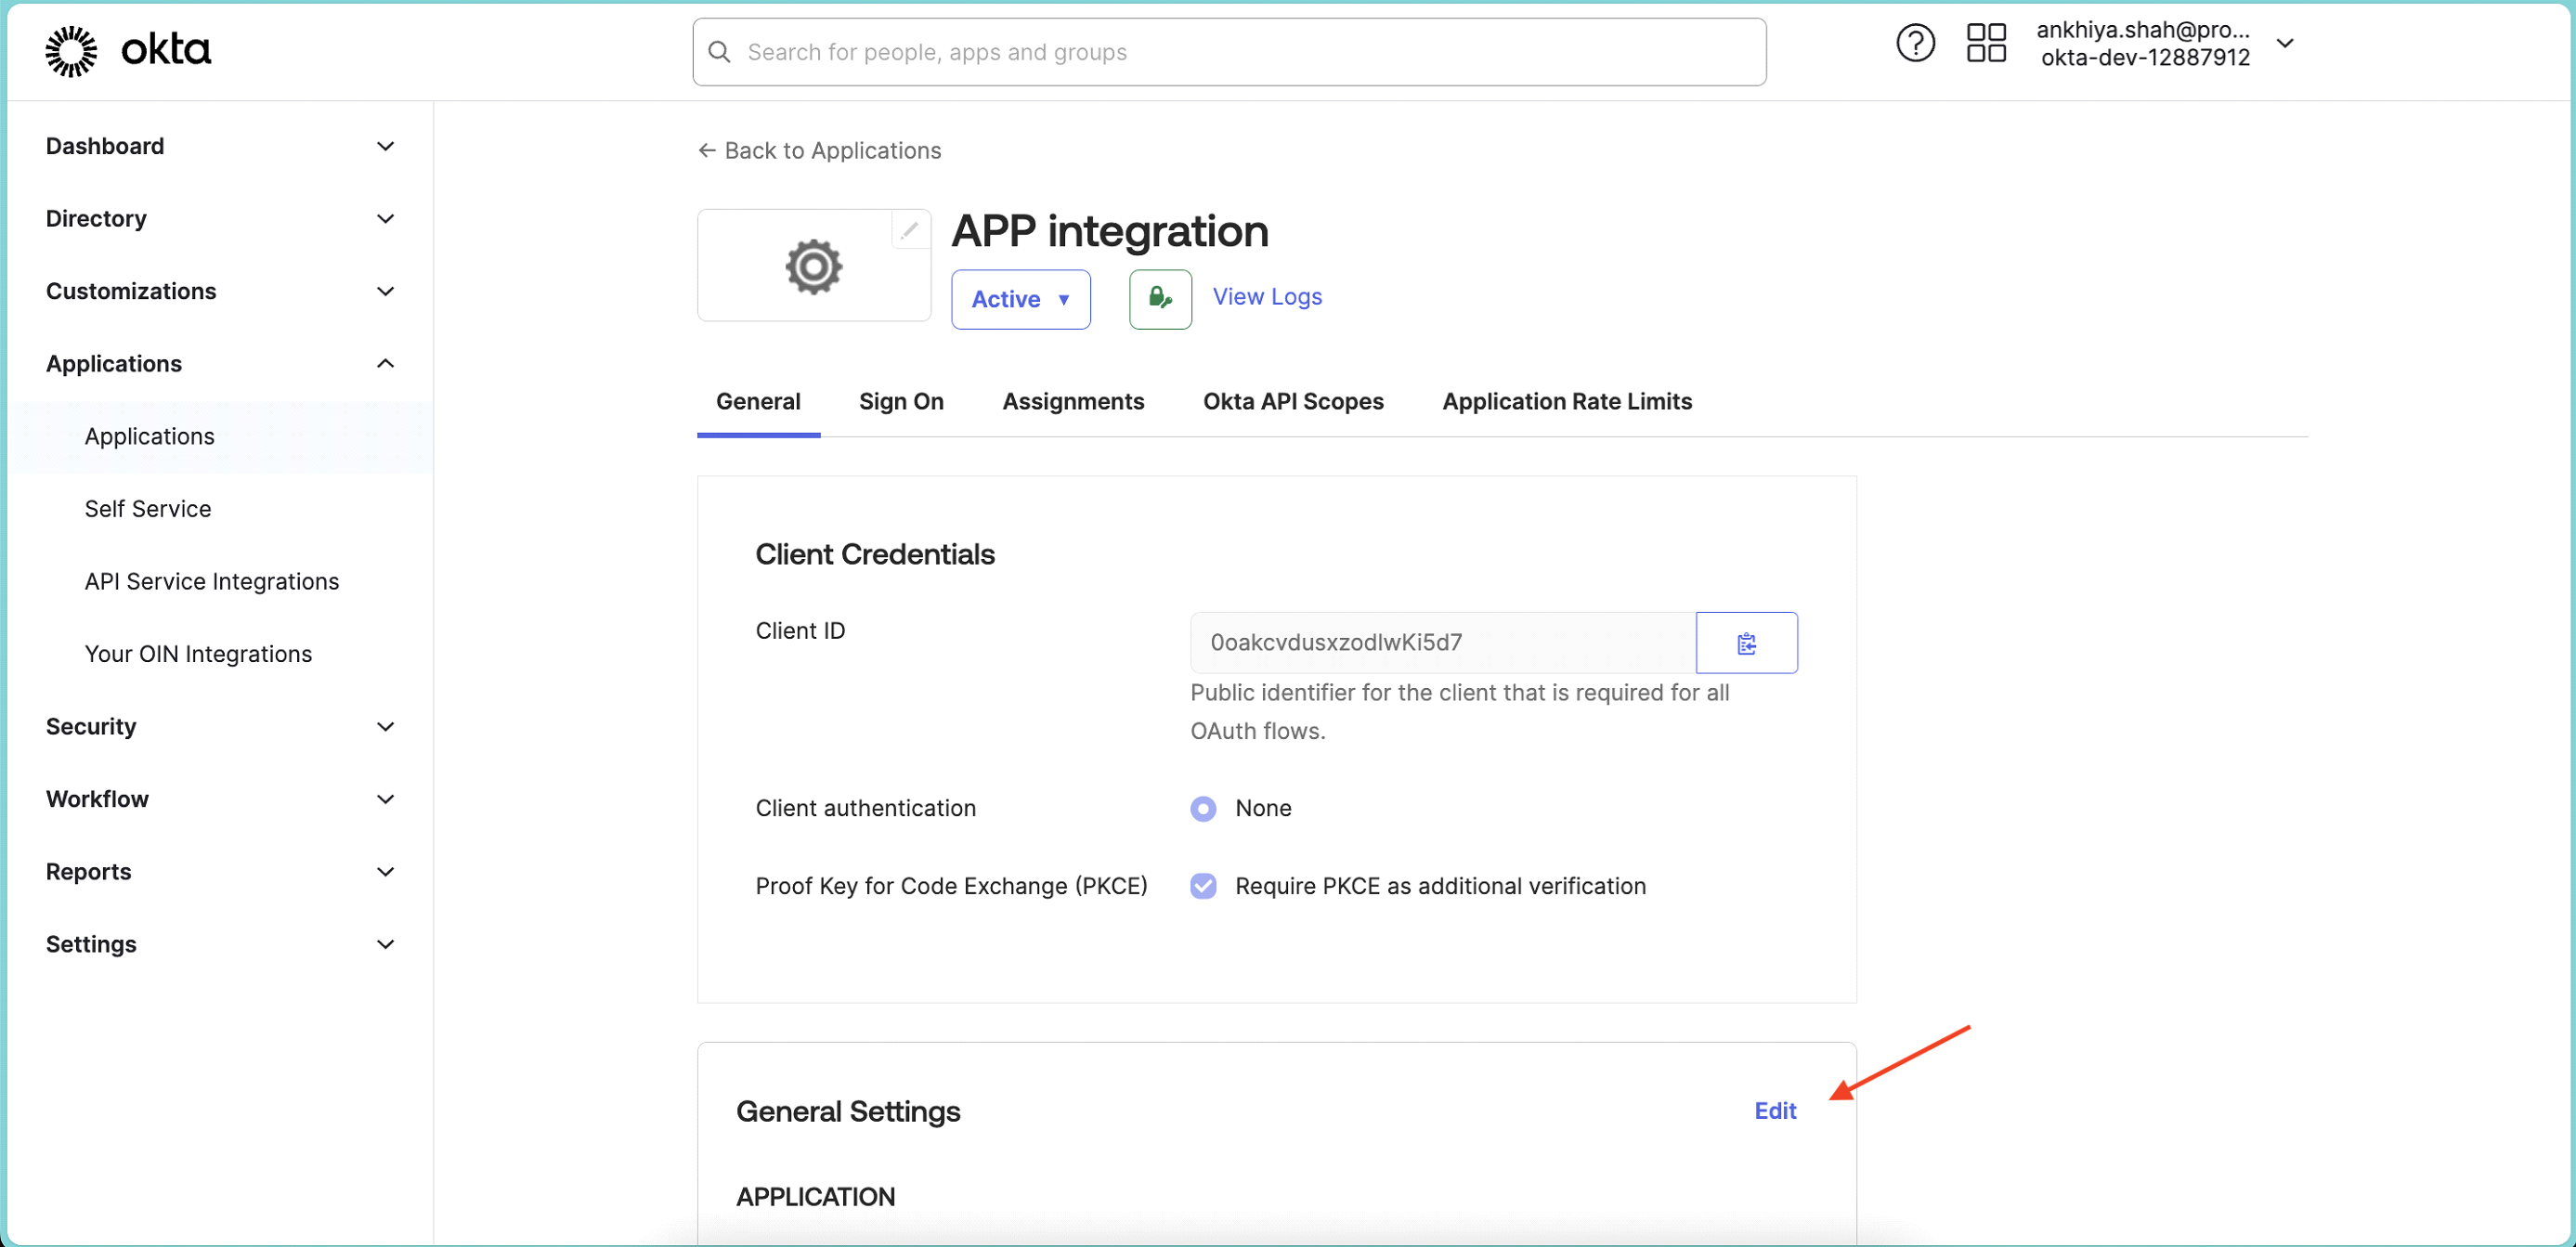
Once app is created, copy Client ID and share it with Protrak Team.
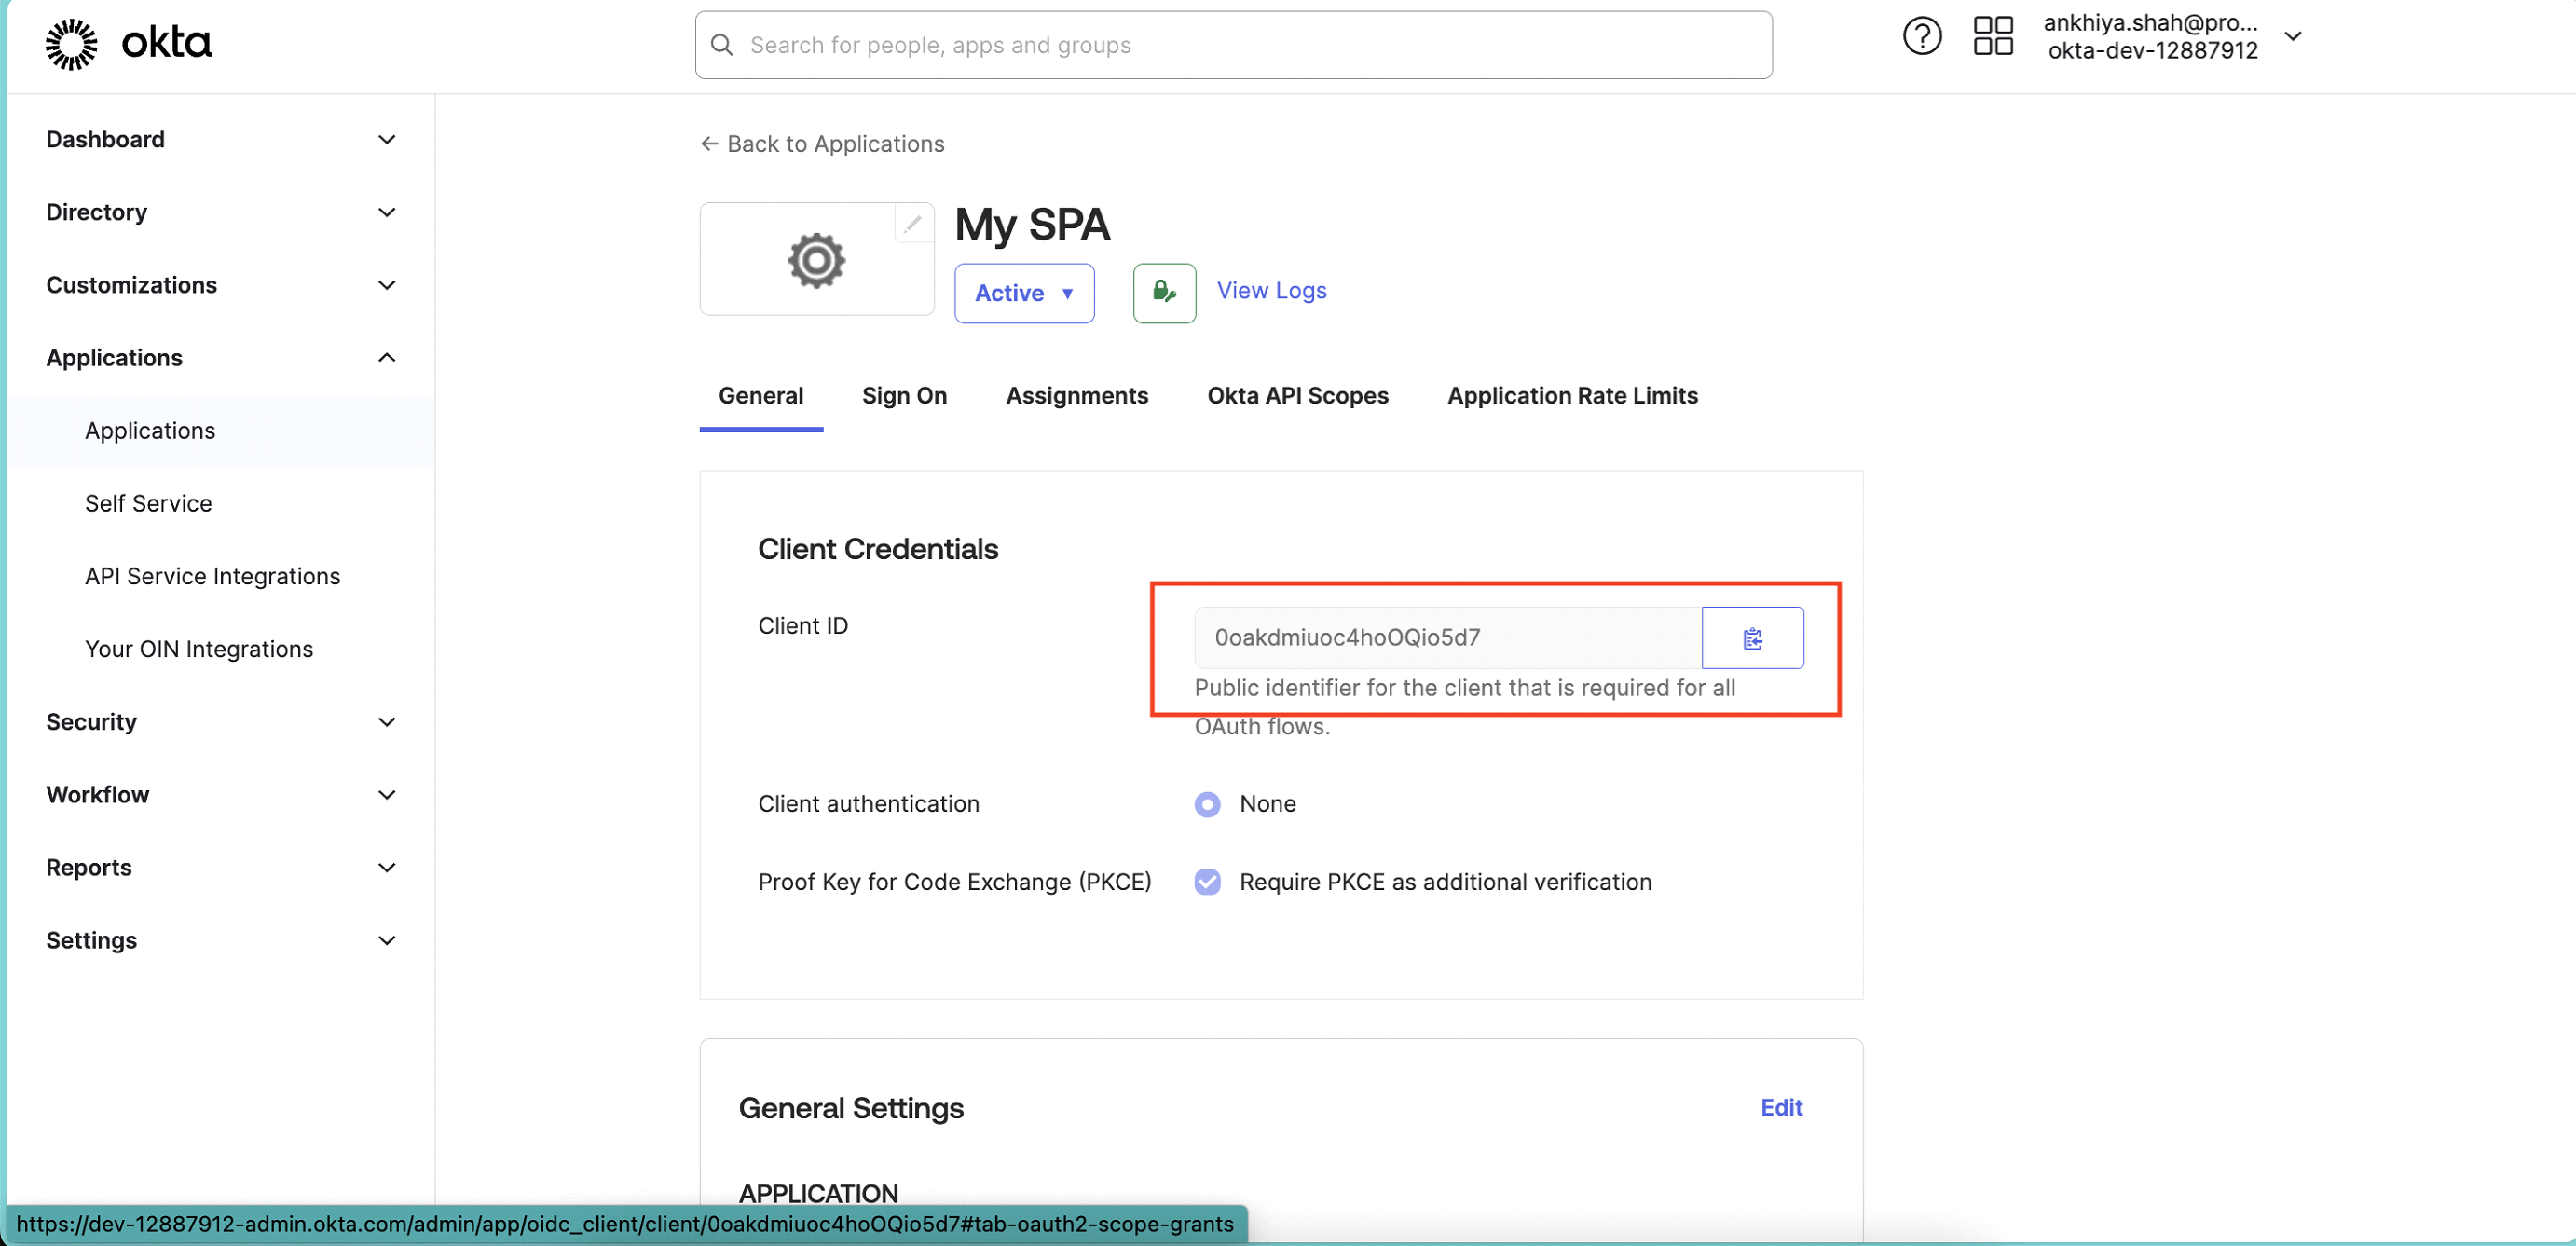
-
Click on Edit button.
-
Scroll down to LOGIN section and change Login Initiated By from App Only > Either Okta or App.
-
Application Visibility: Select checkbox, so users can see your App tile in okta app dashboard.
-
In Login Flow: select Send ID Token directly to app (Okta Simplified) and select below scopes.
-
Click Save.
-
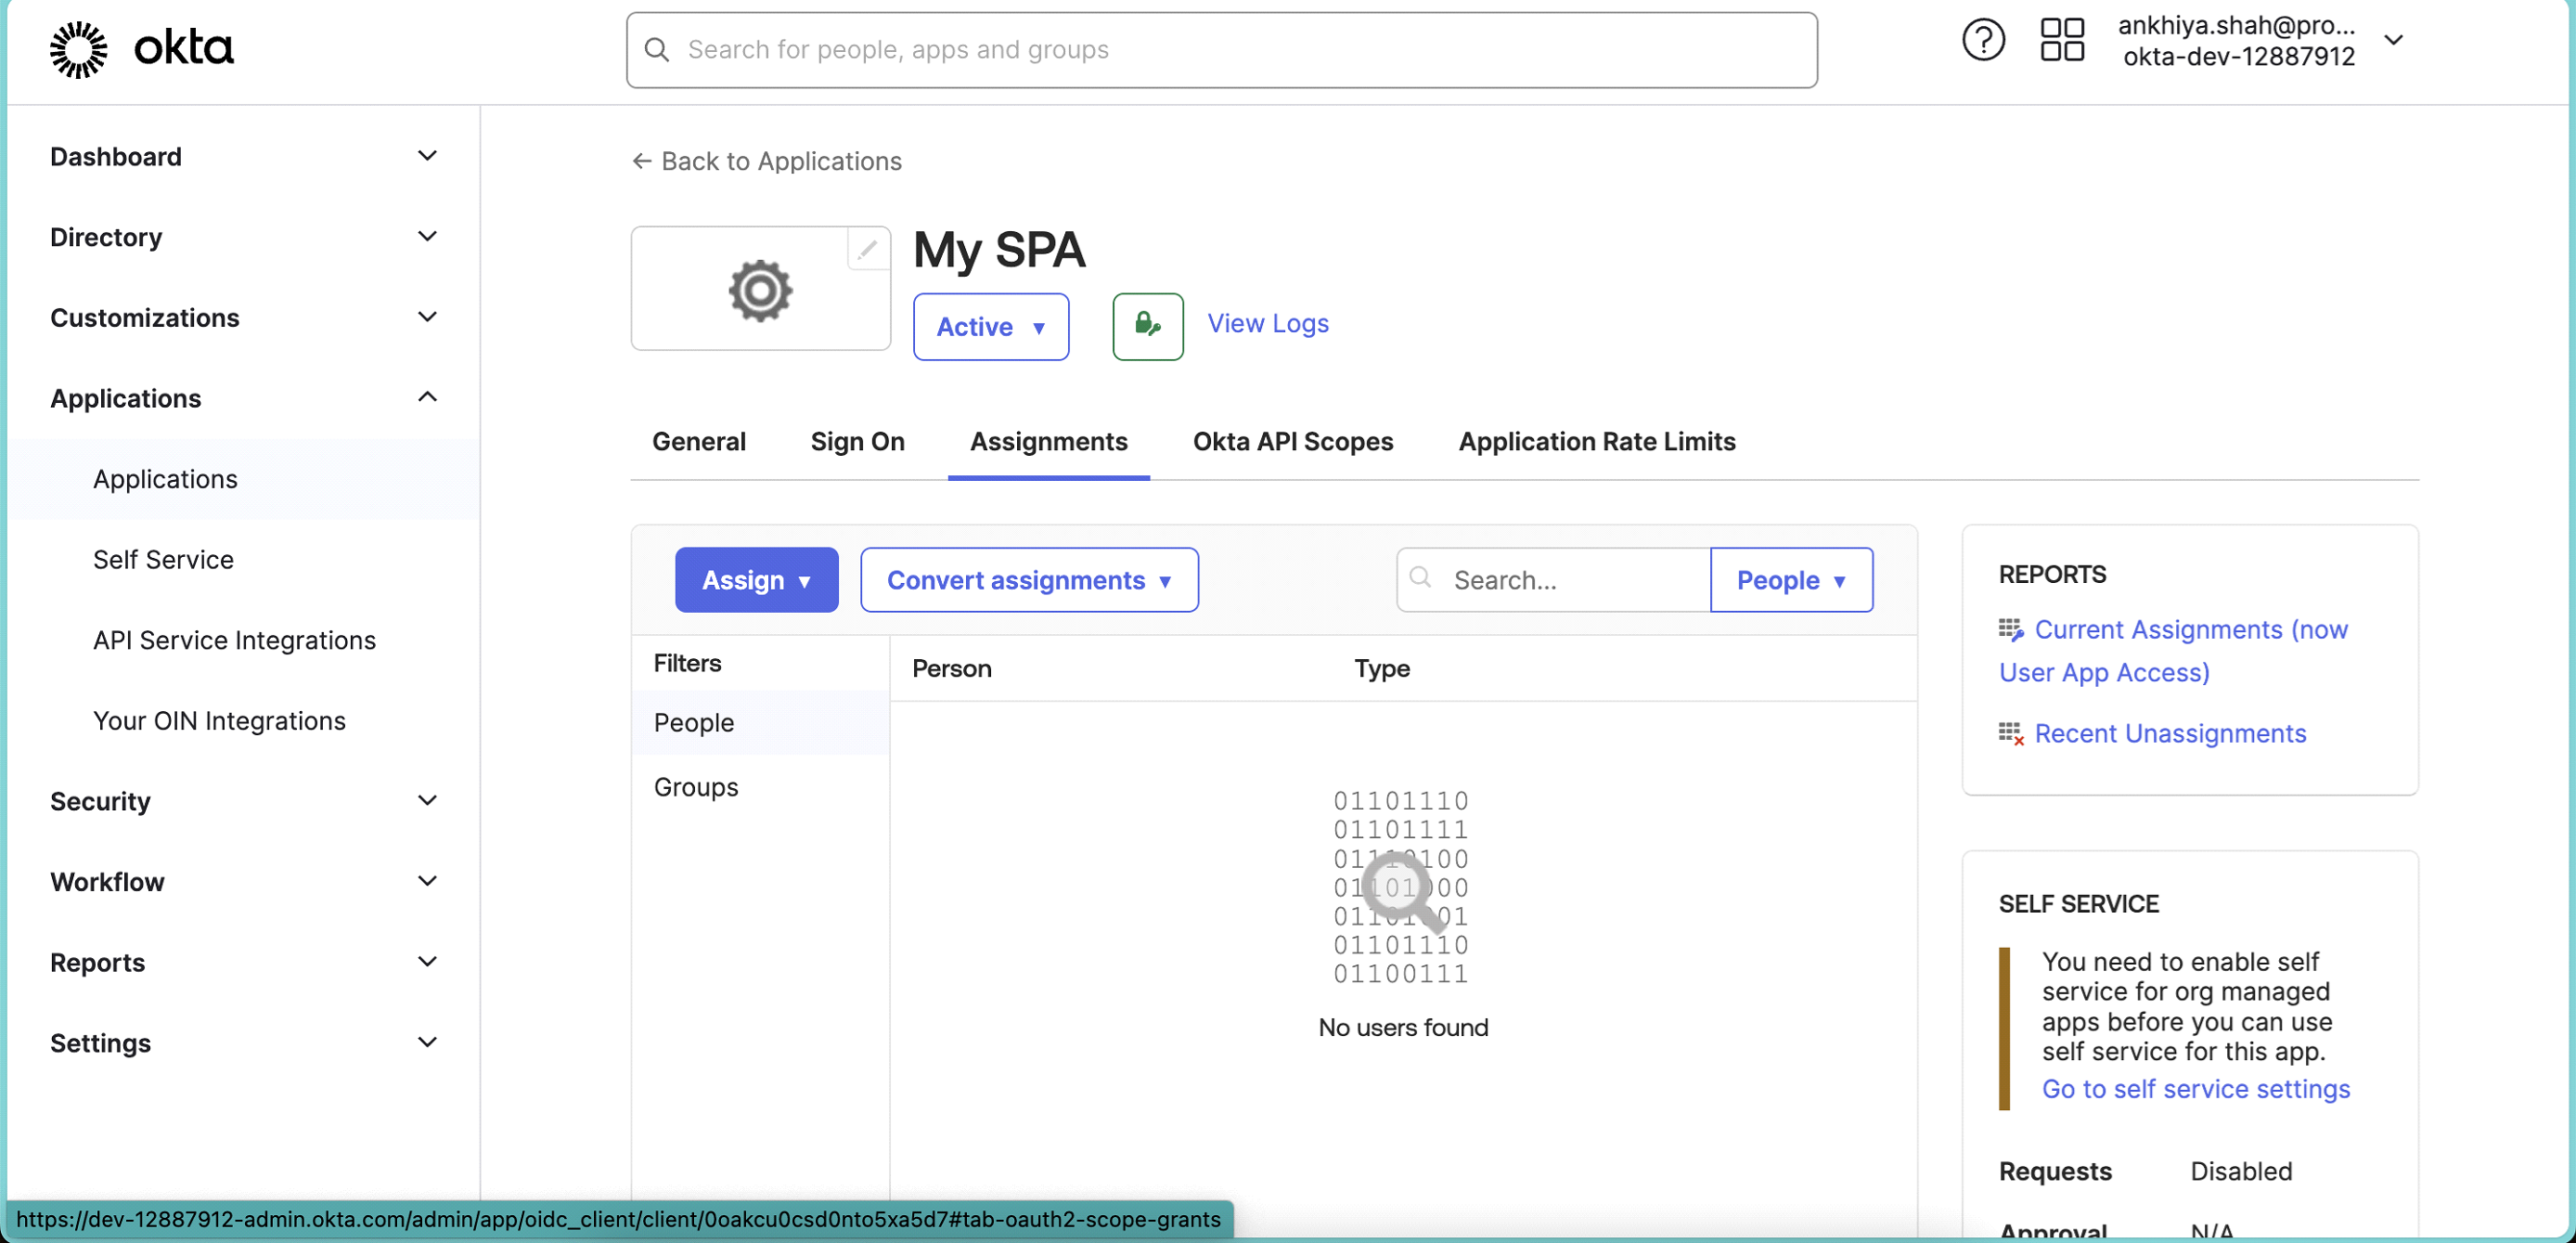
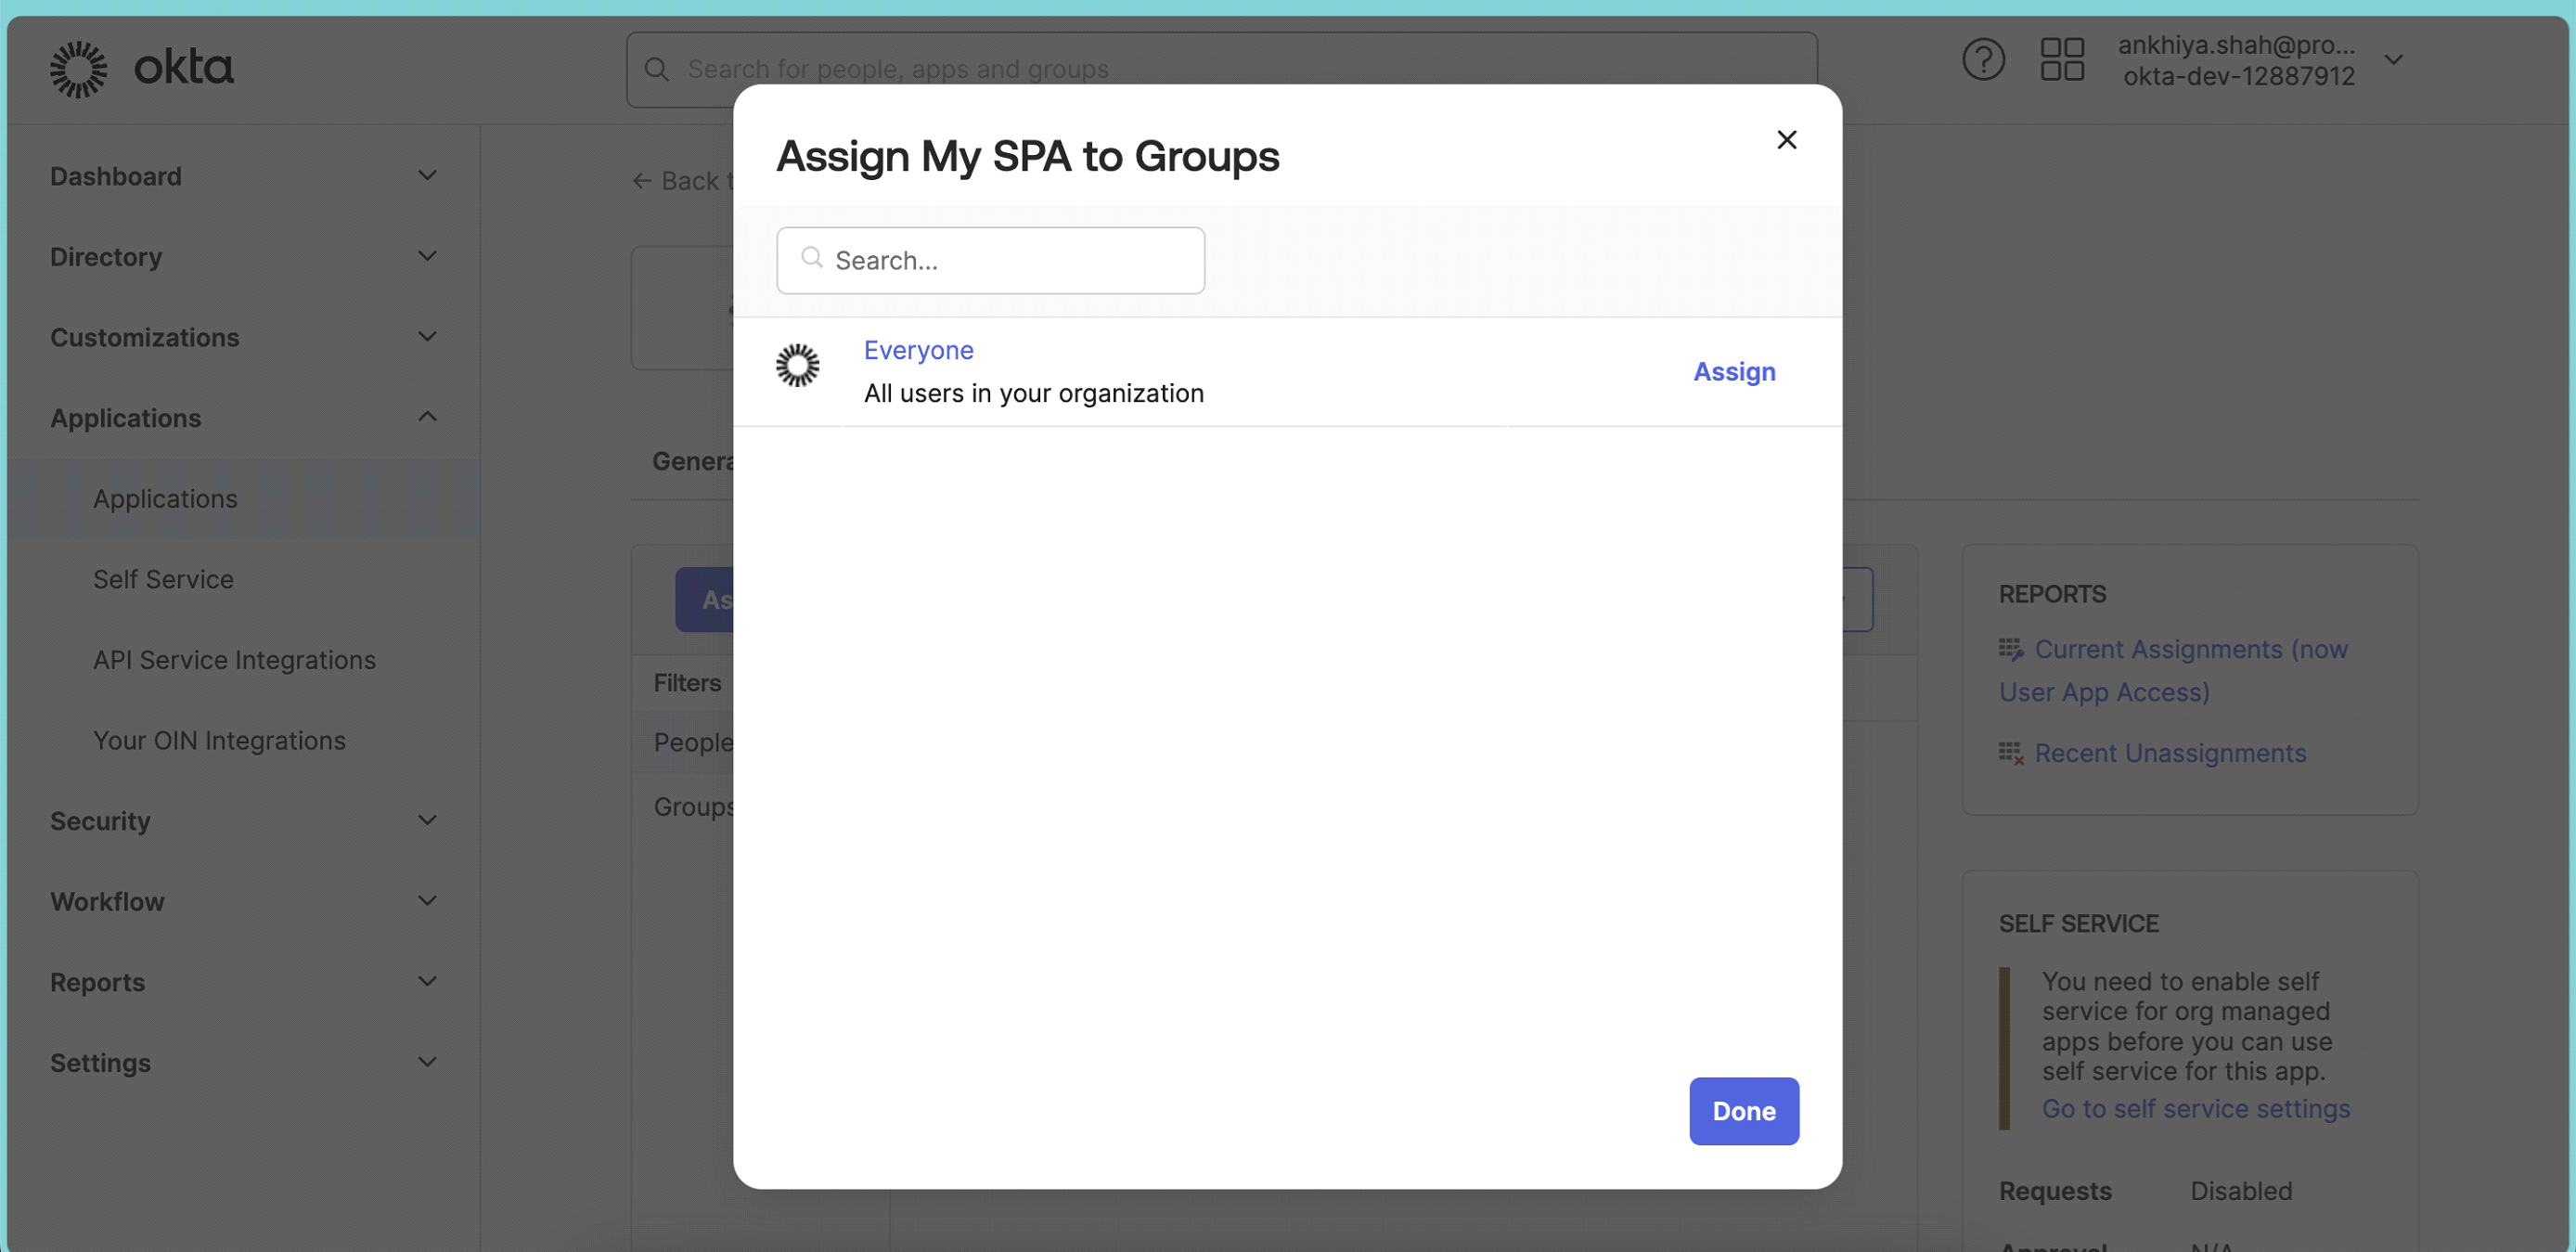
Click on Assignments tab.
-
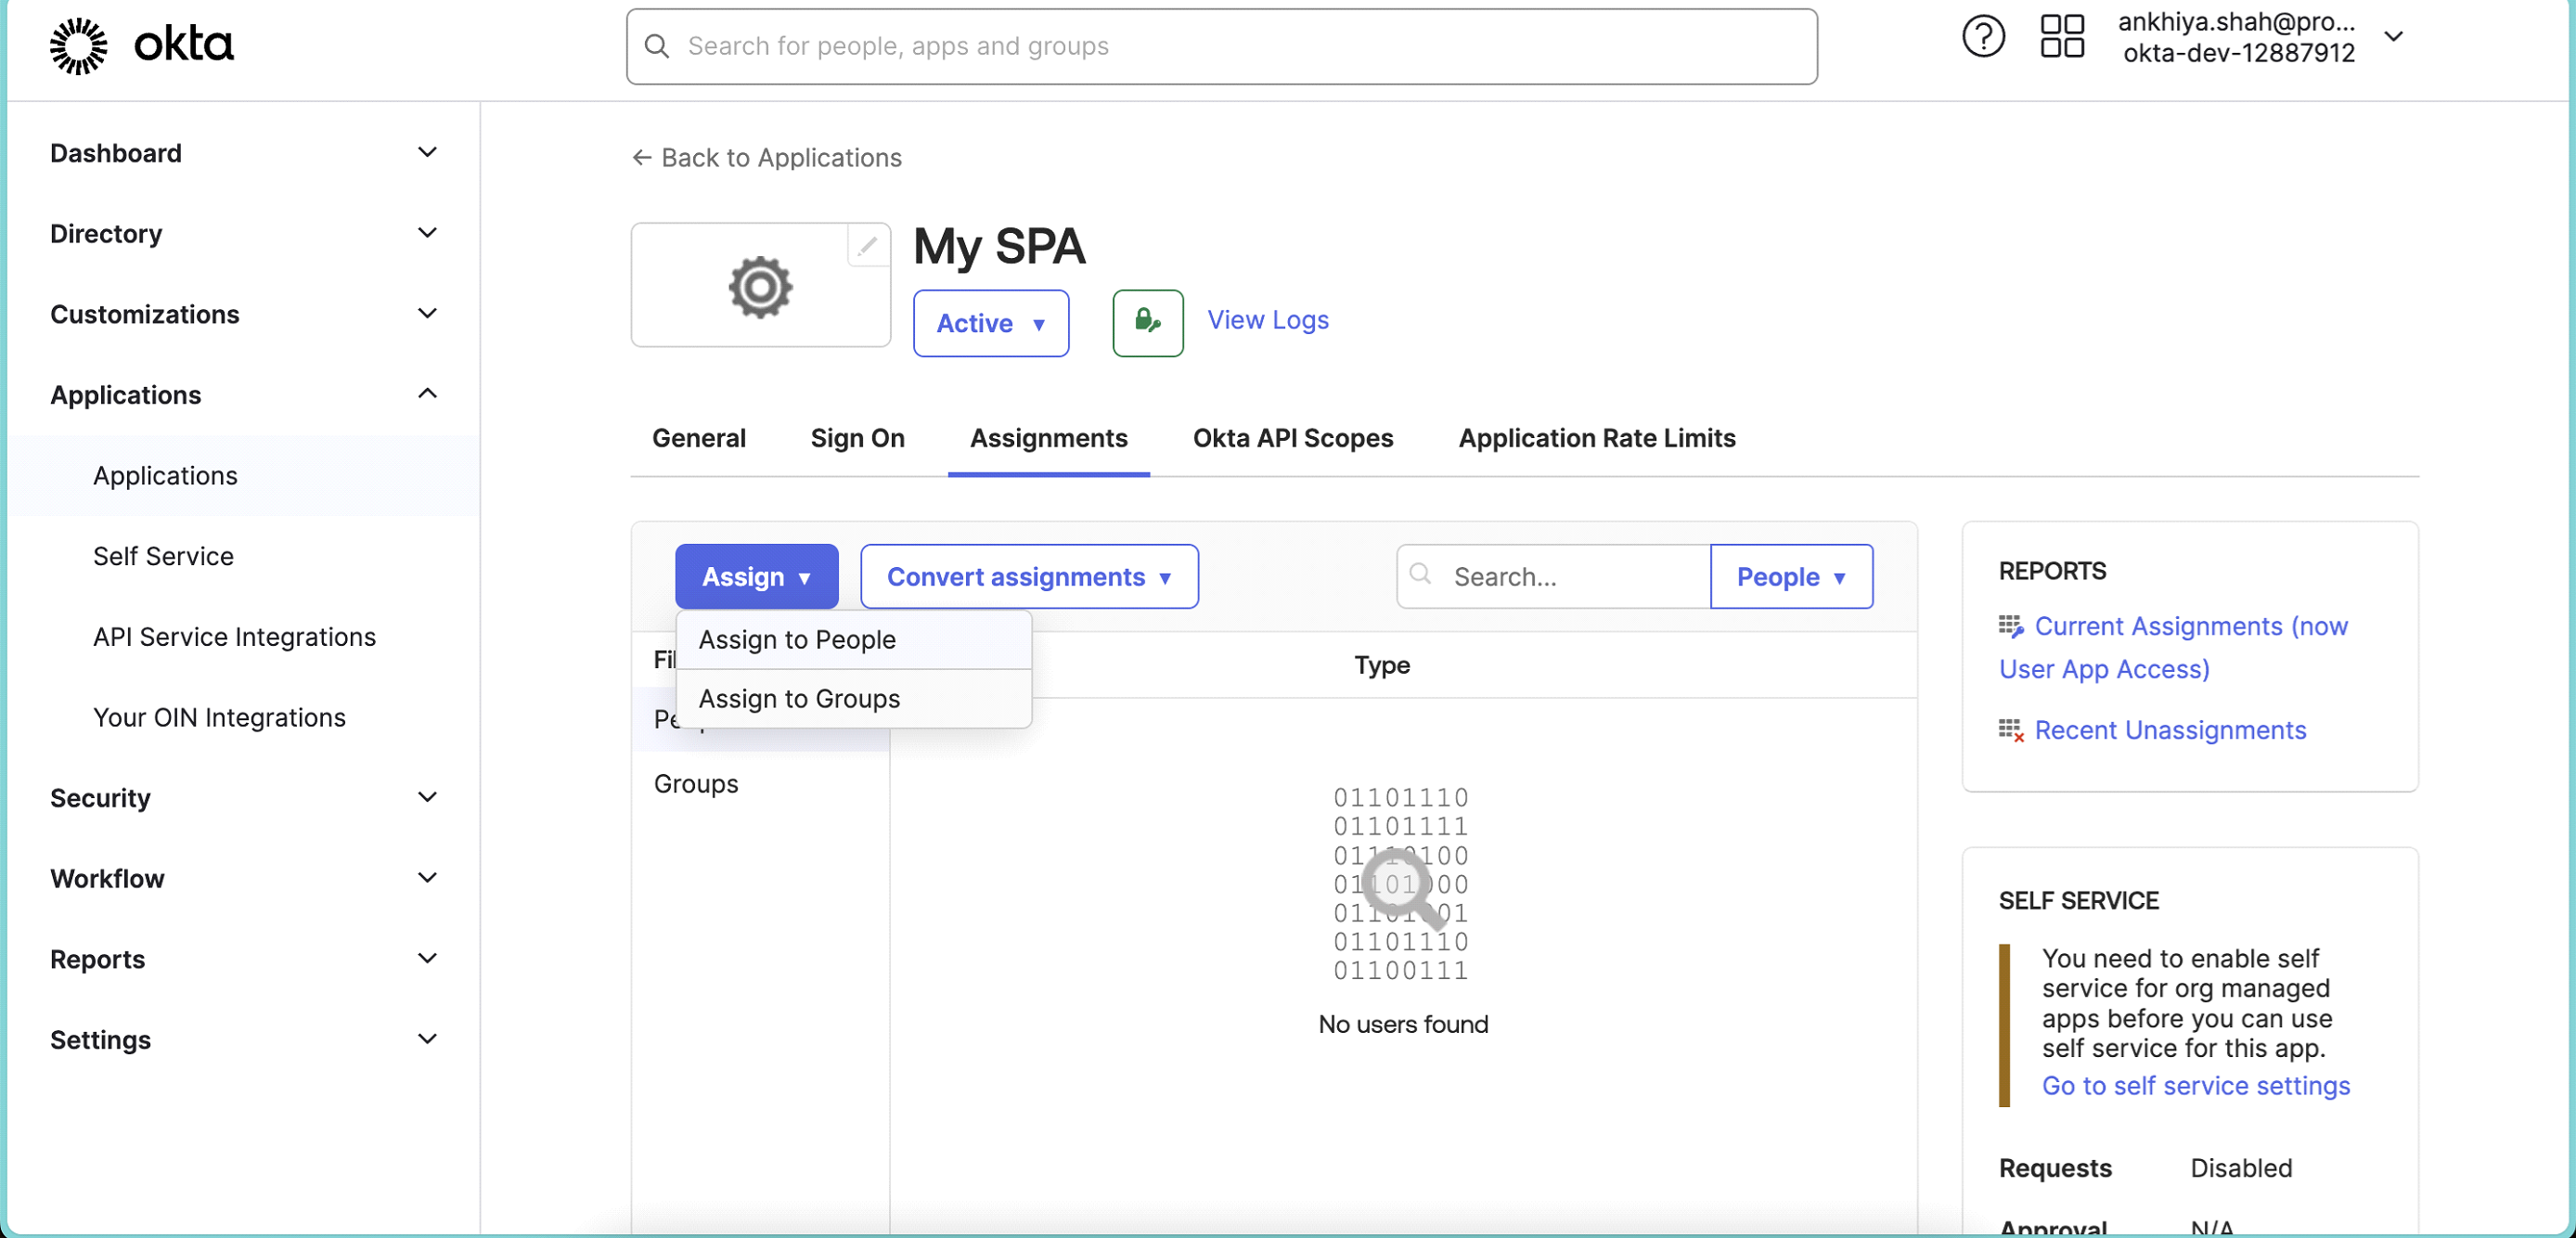
Click on Assign > Assign to Groups.
-
Assign app to group which all can access app. Once assigned click Done.
-
From Left Main Menu, select Security > API.
-
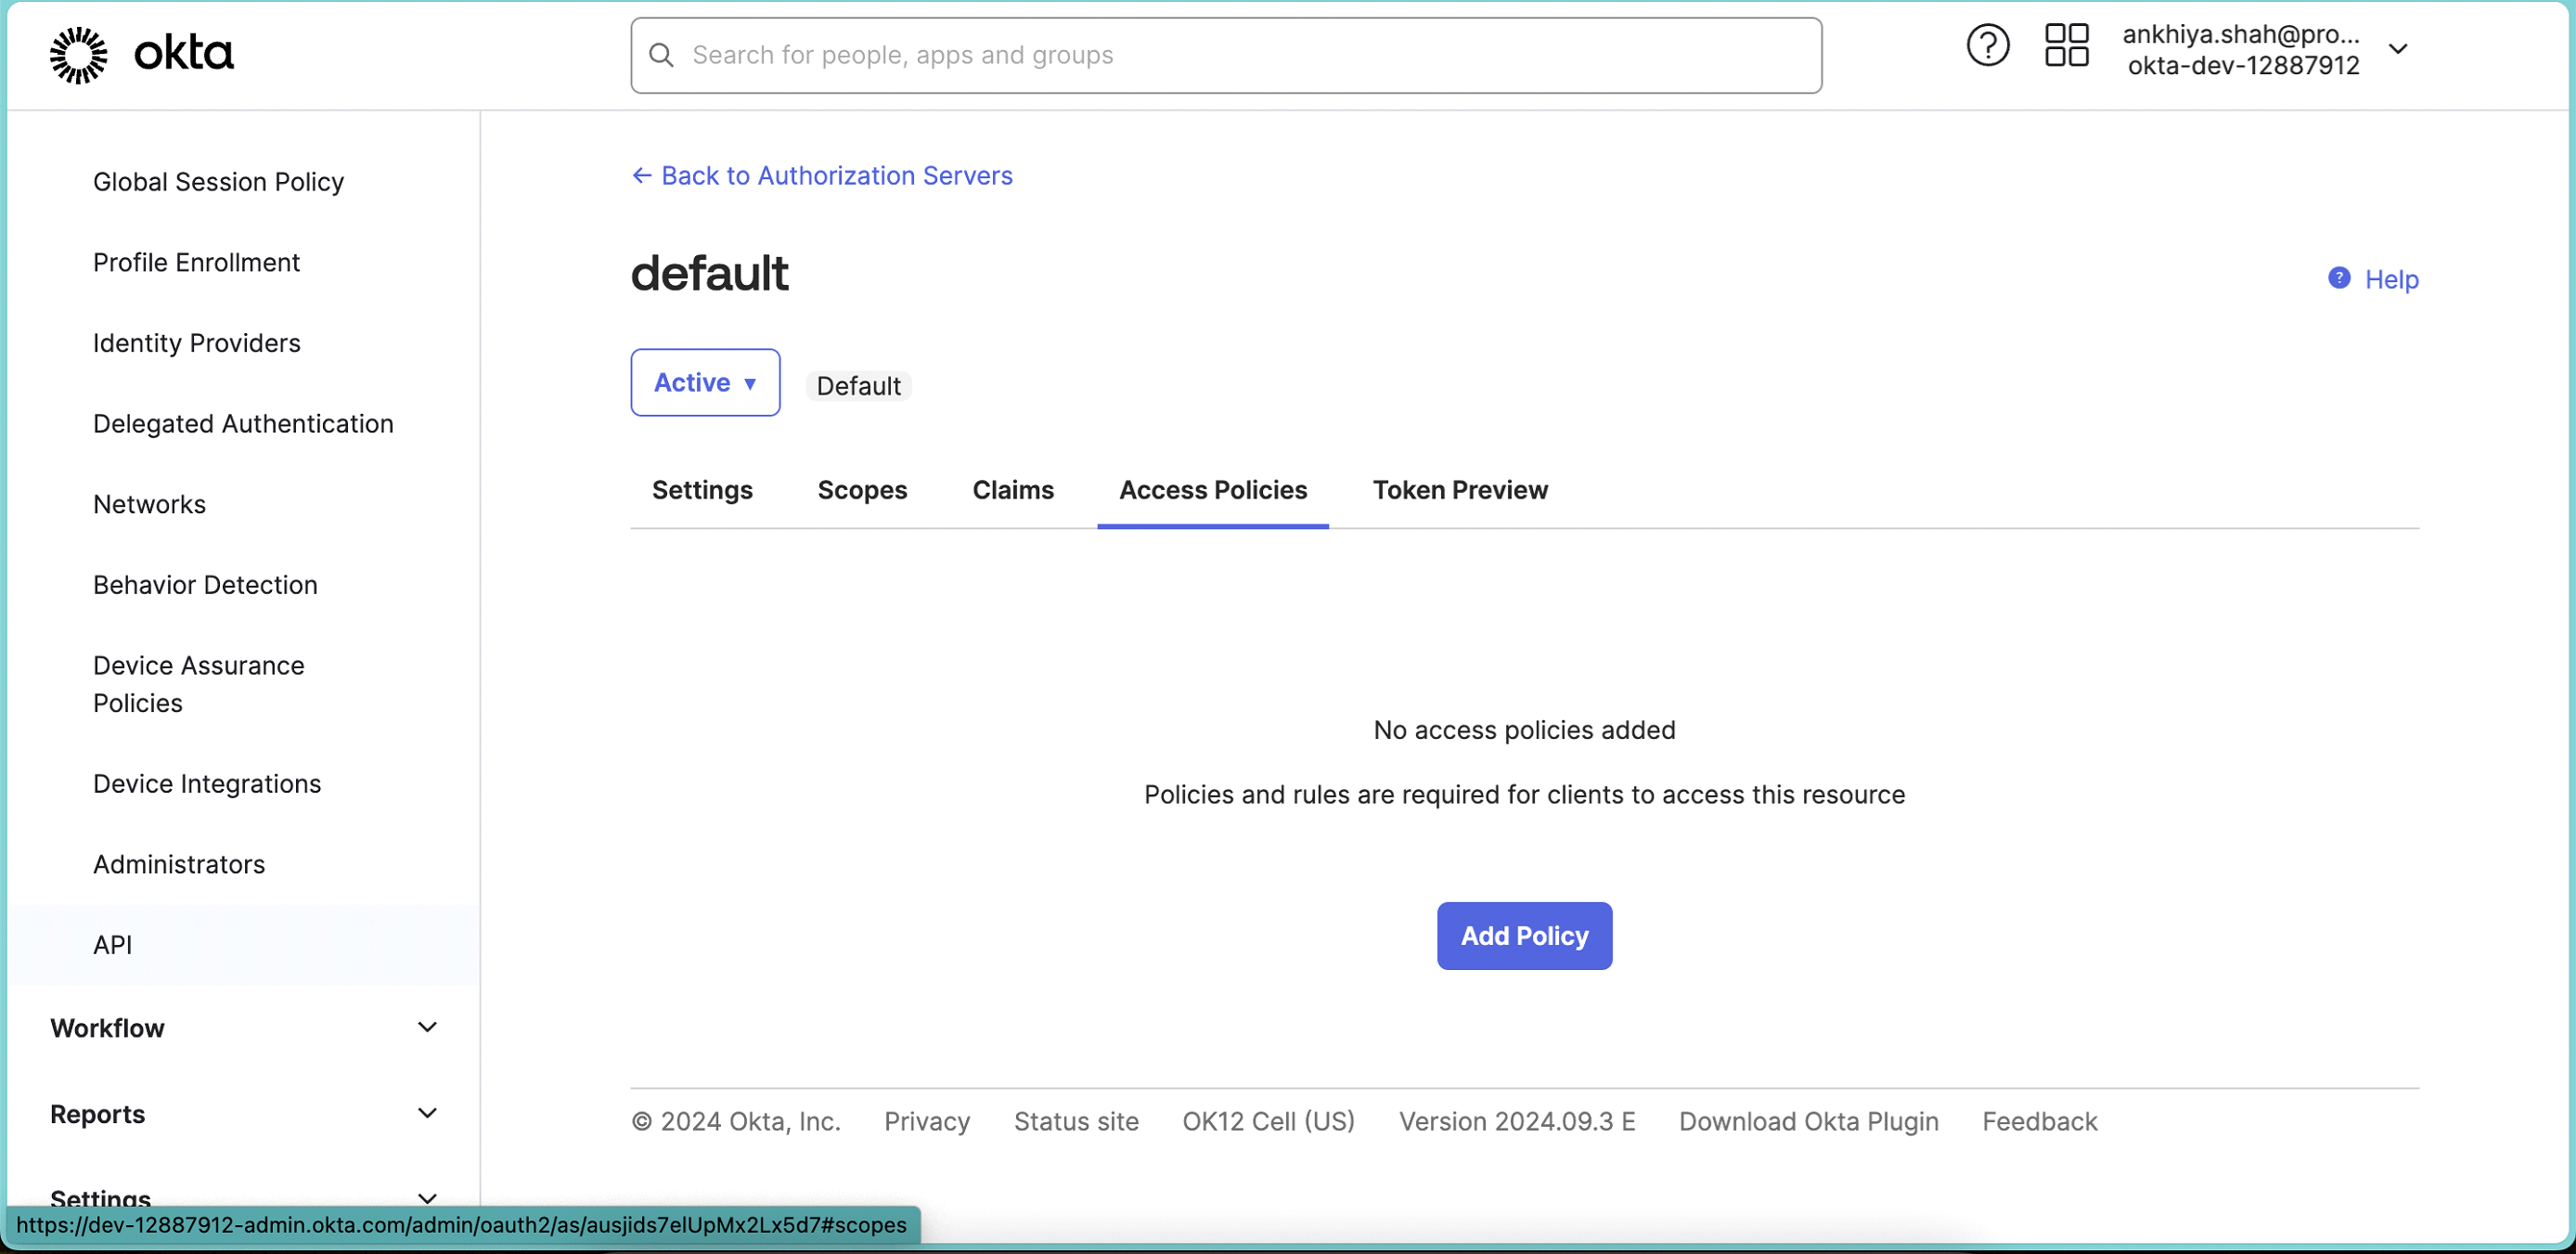
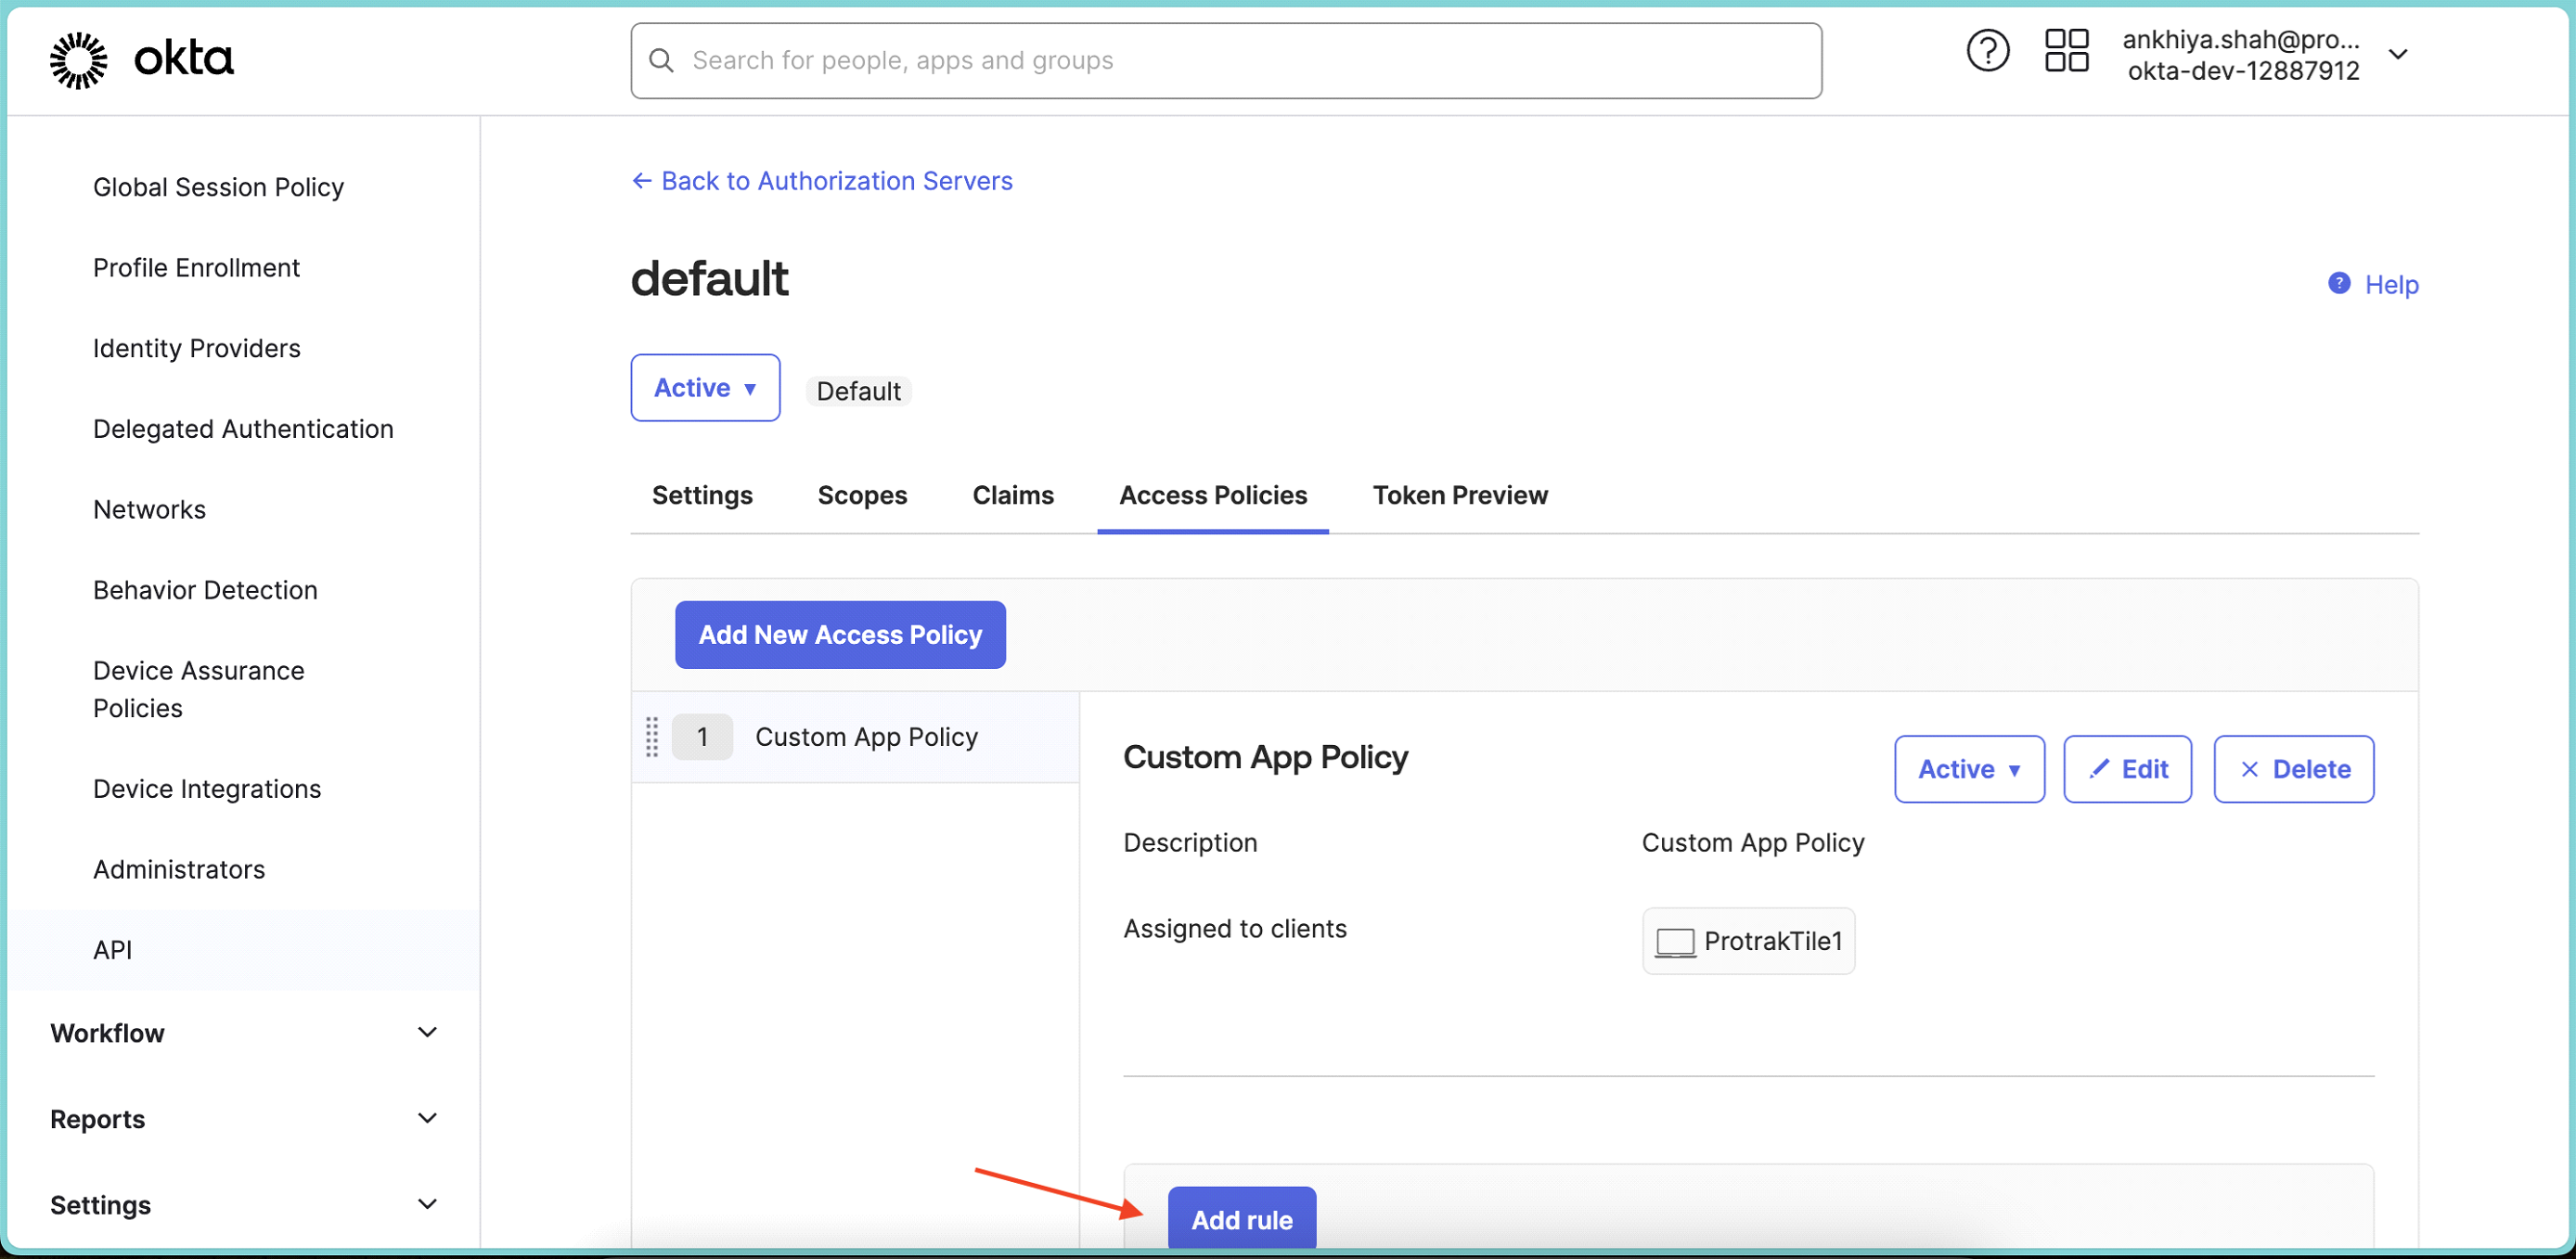
Select default Authorization Server and select Access Policies tab.
-
Click Add Policy and add below details.
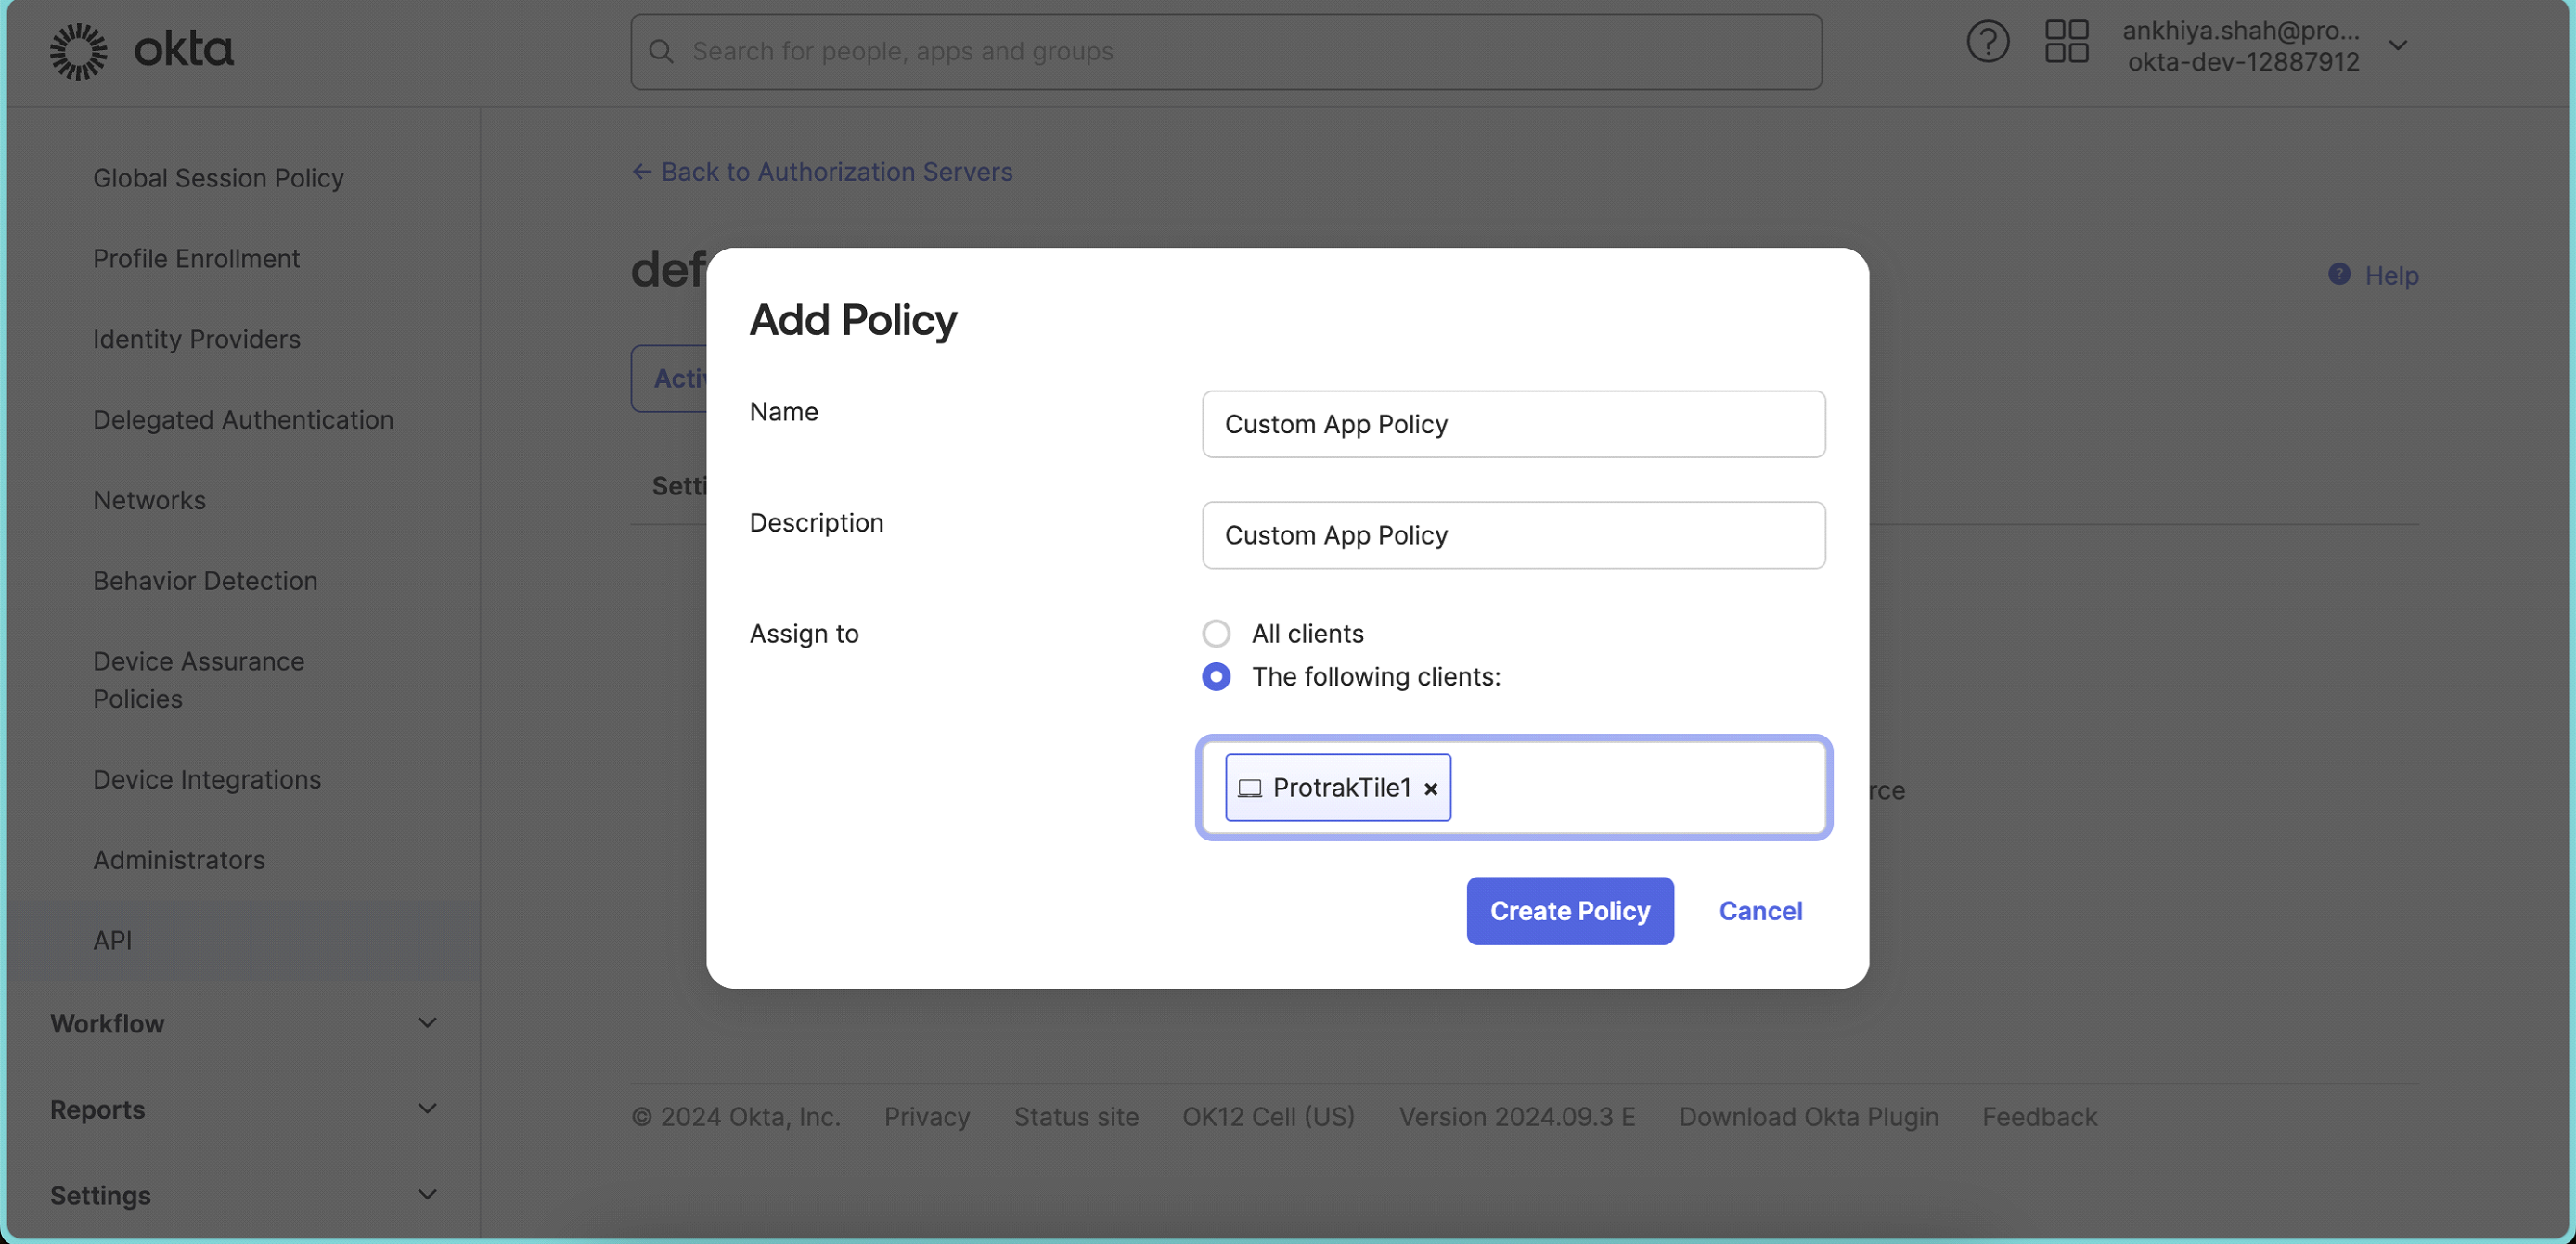 In Assign to, search for your app, created in above steps and select. Click Create Policy.
 -
Add Rule in created policy.
-
Add Rule name
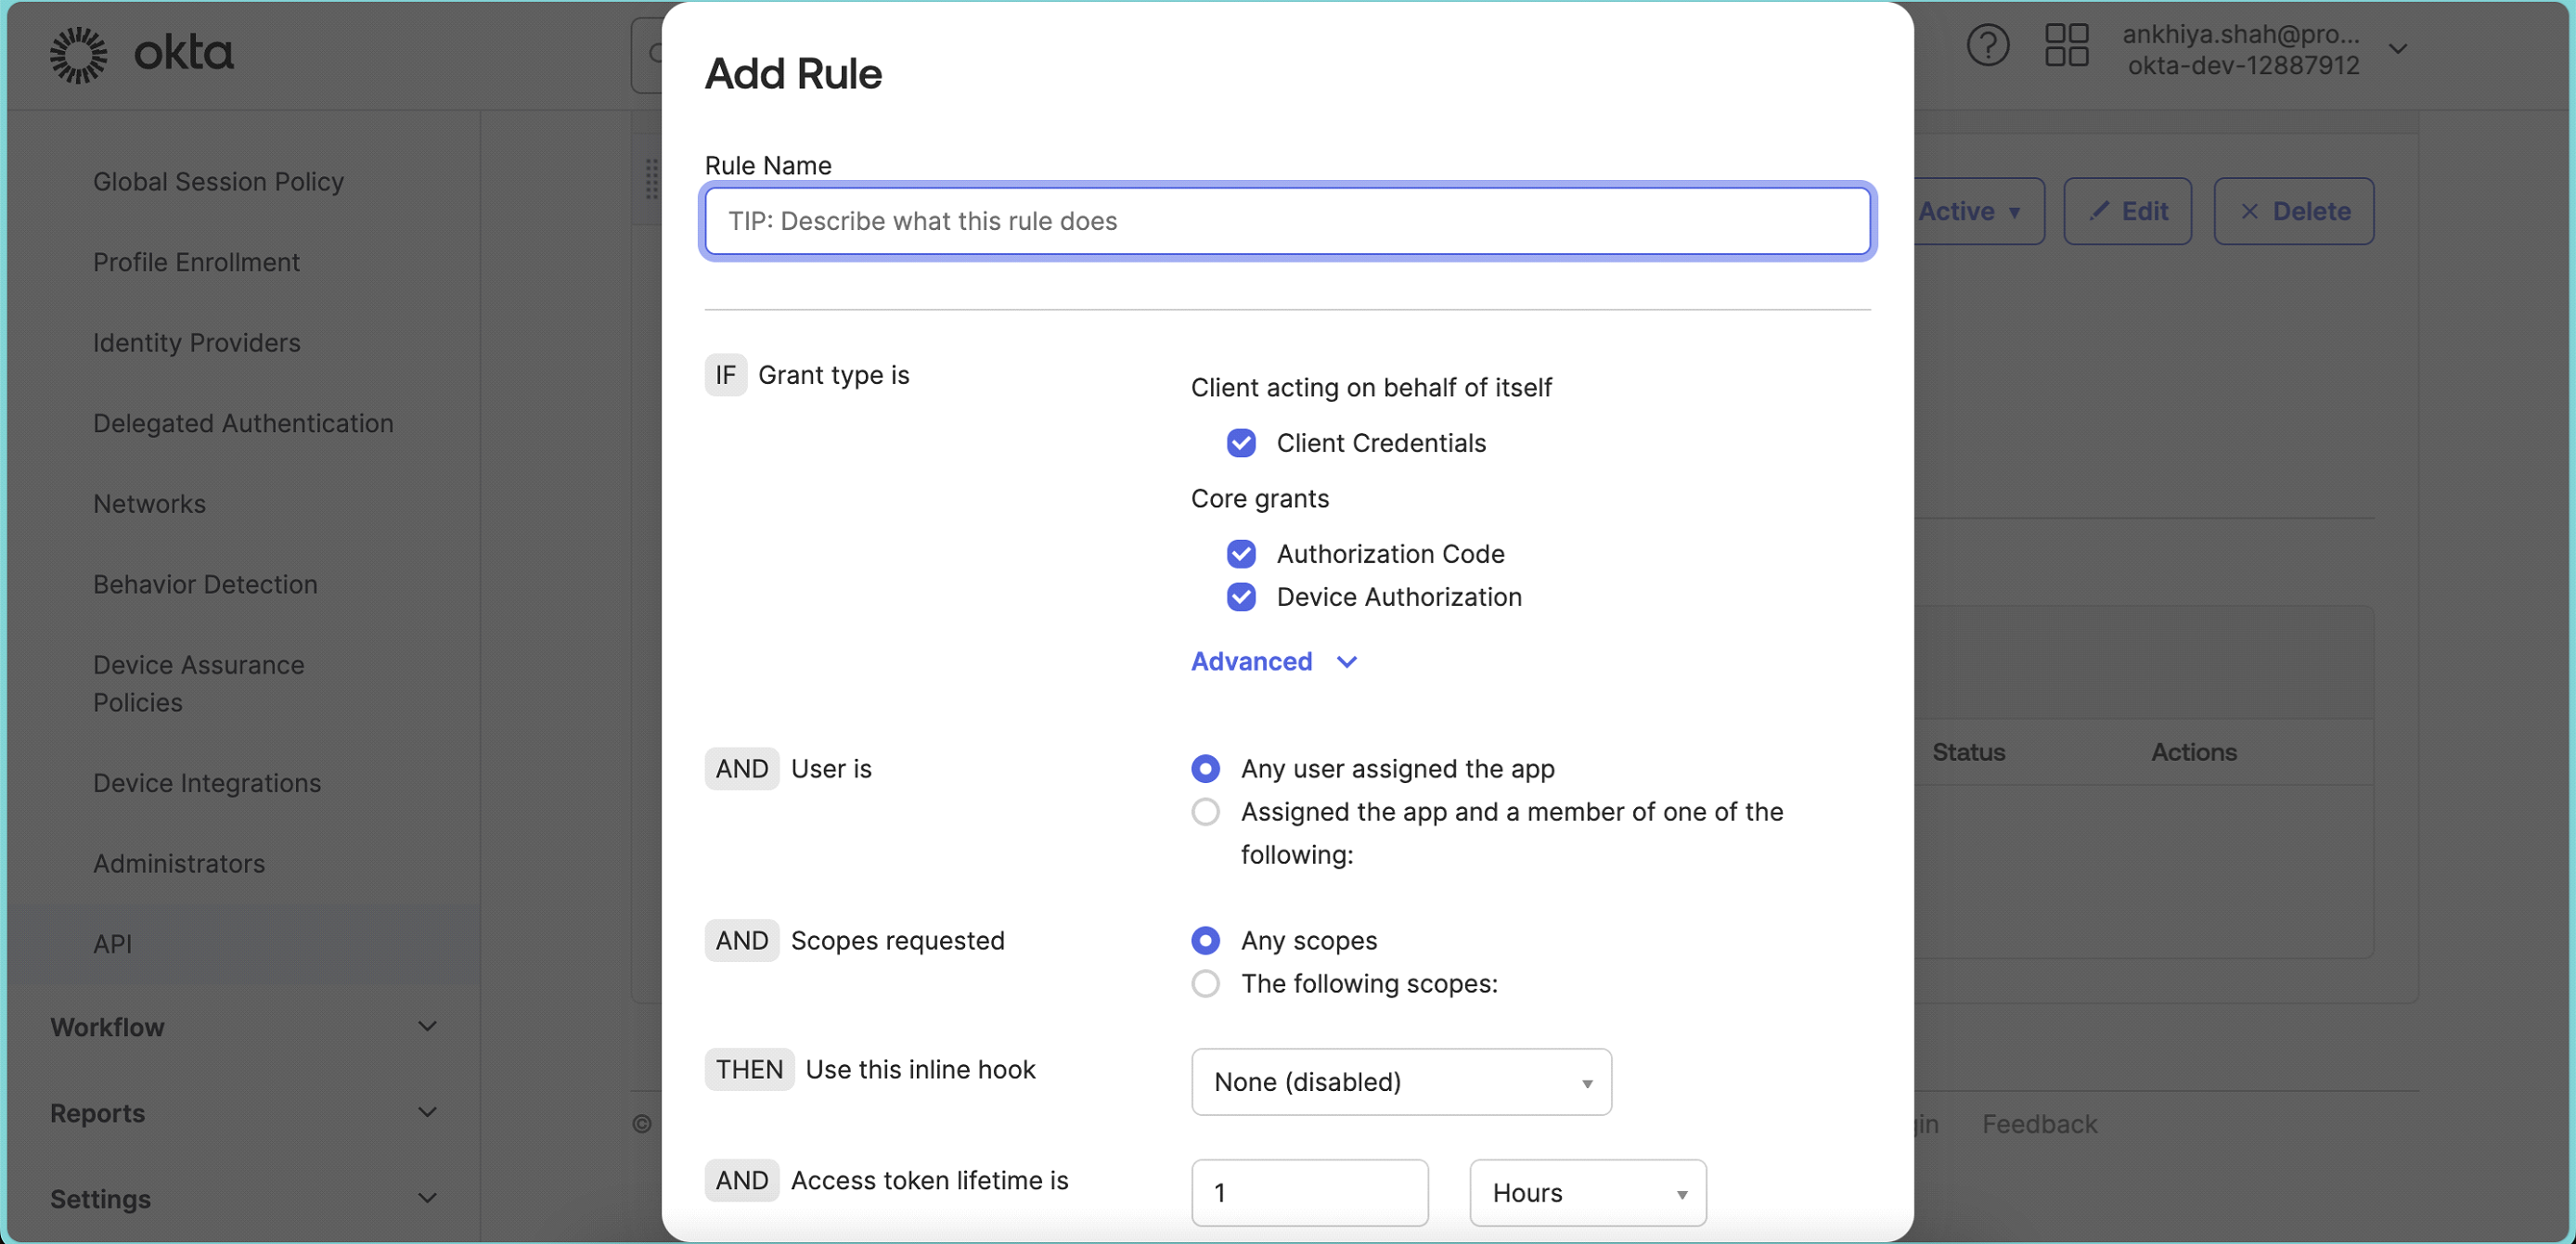
-
Make sure to select Grant types as below
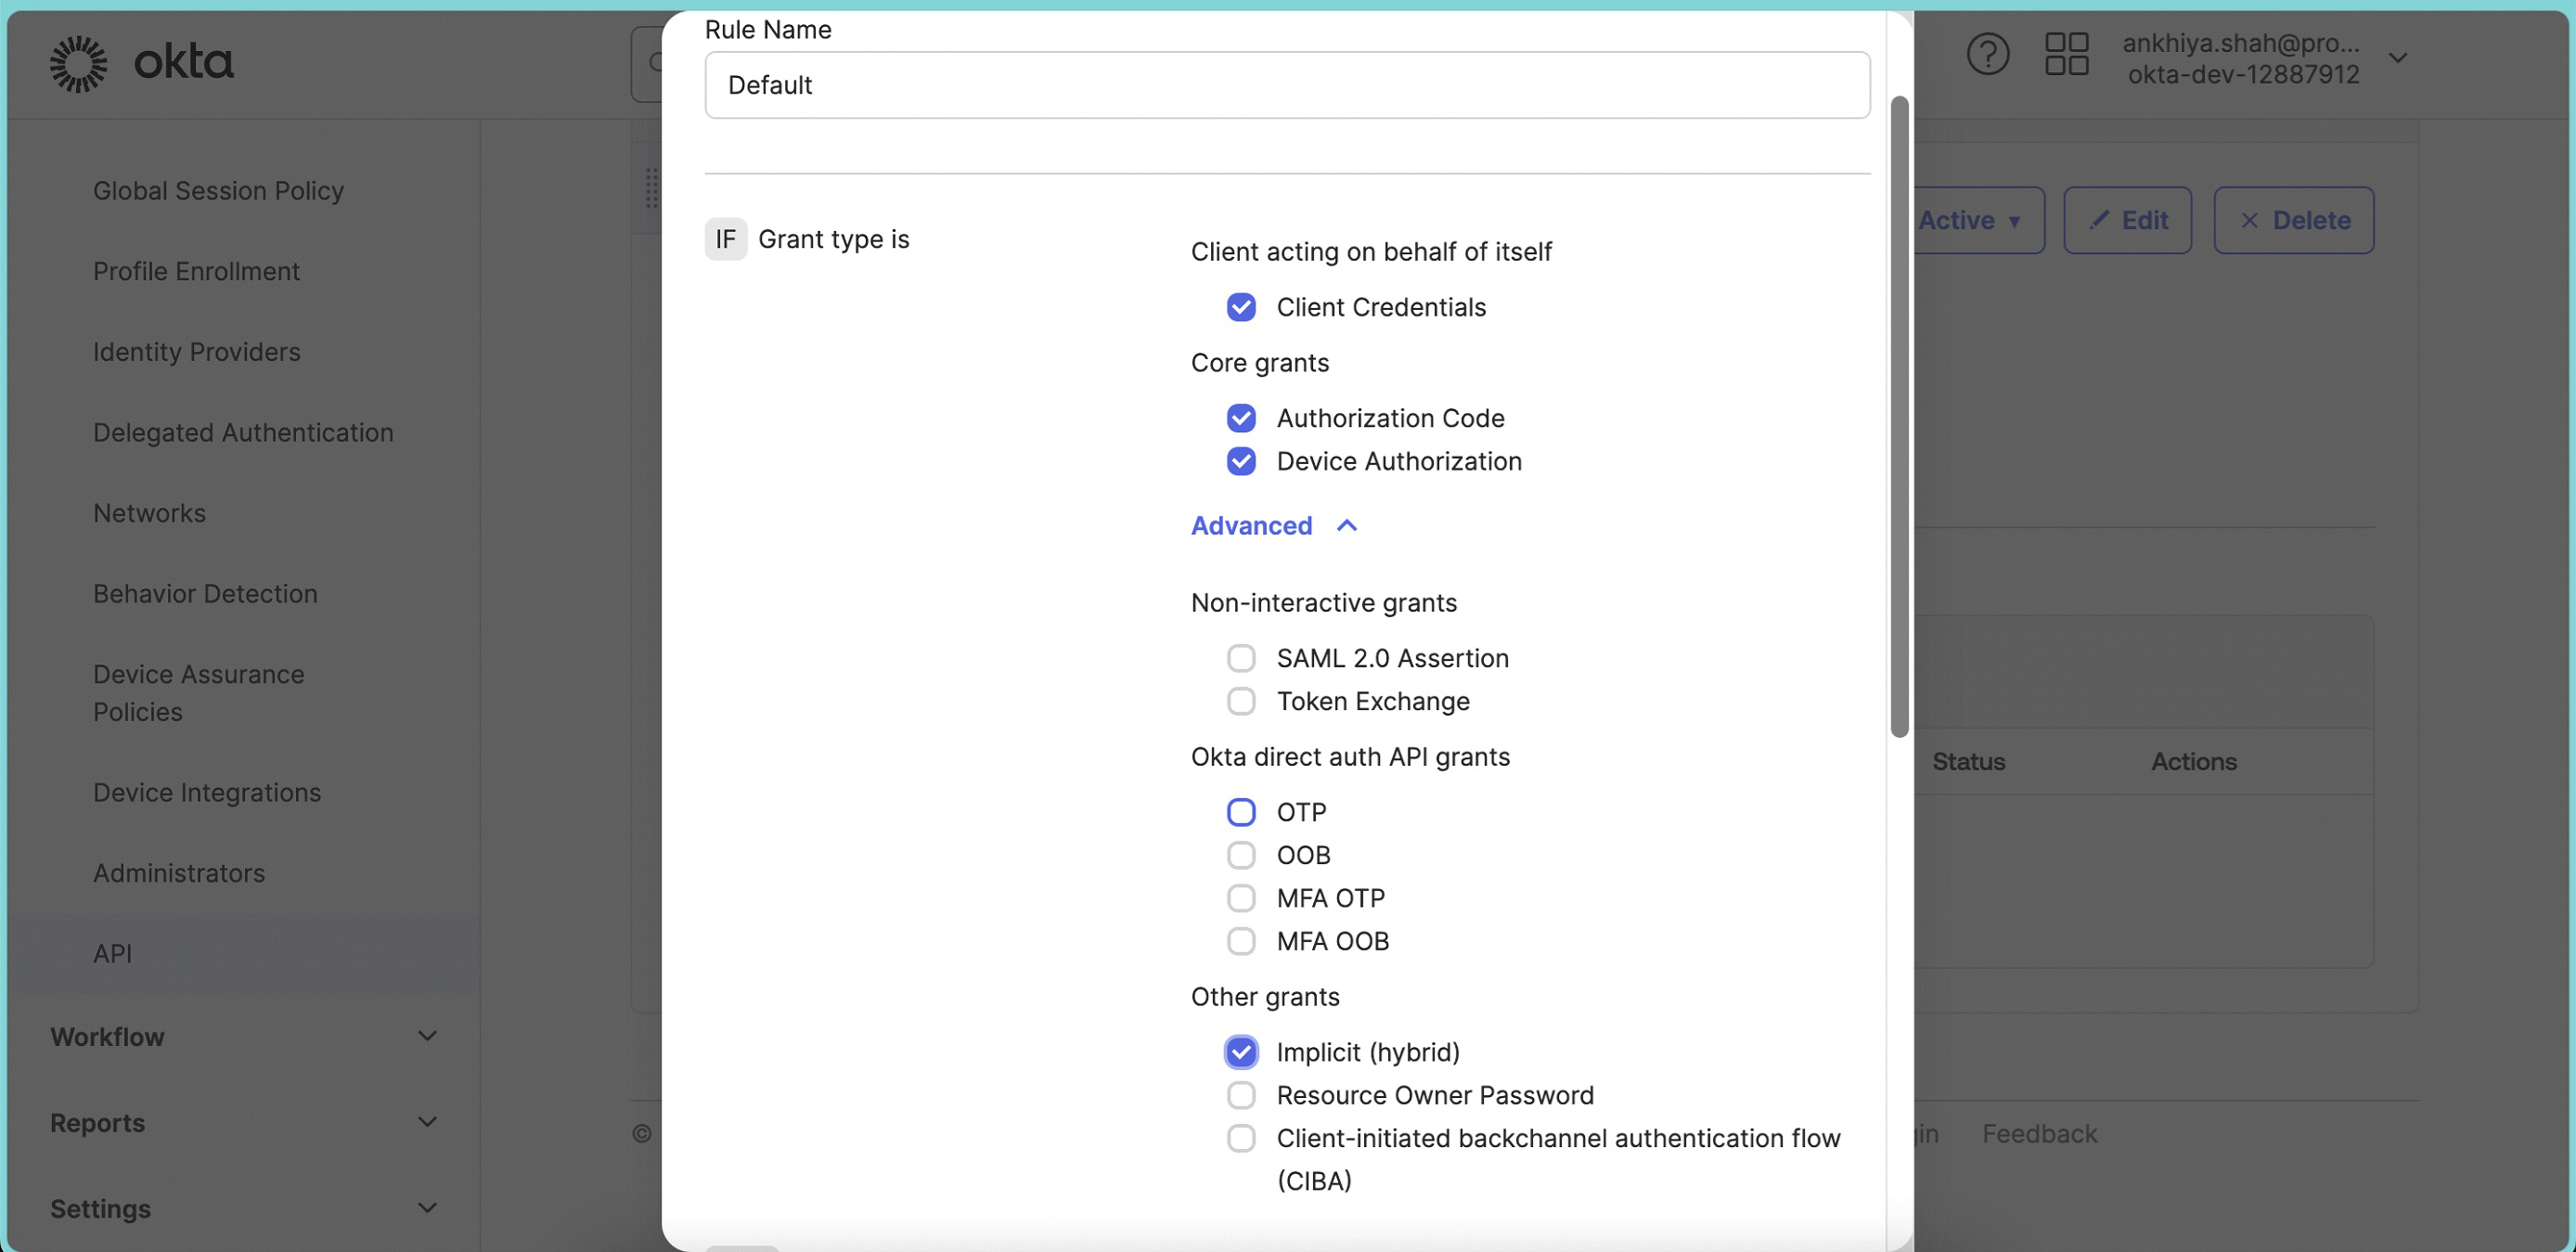 And click Create Rule.
 -
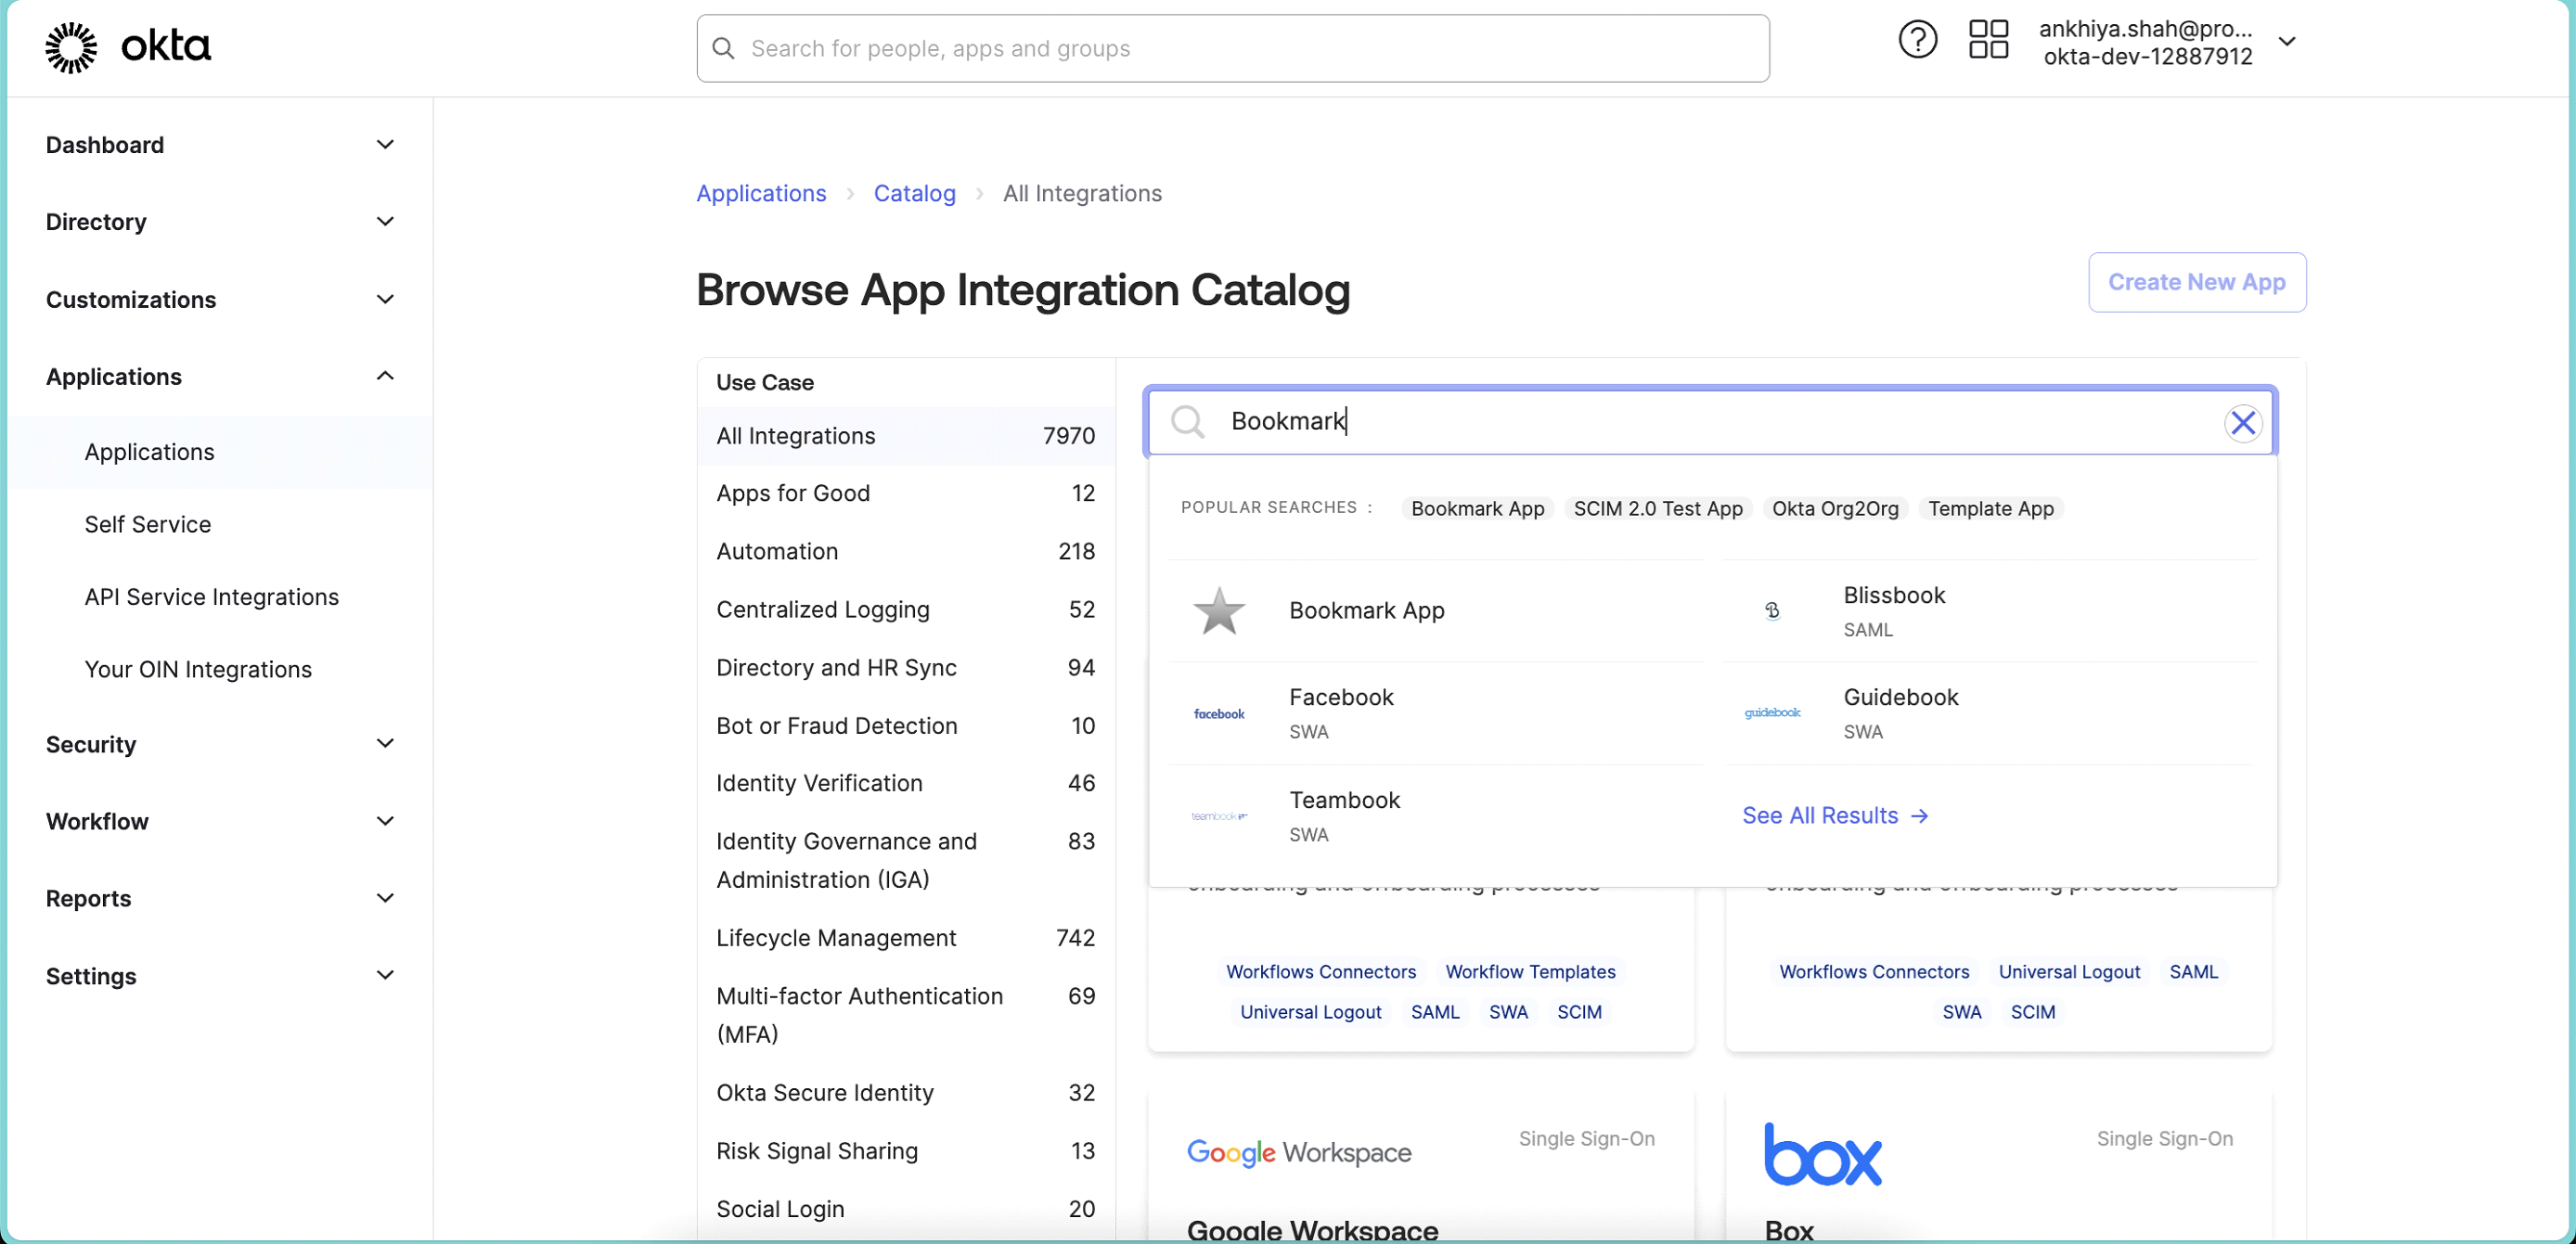
From Left Main Menu, Go to Applications. Click on Browse App Catalog.
-
Search Bookmark App.
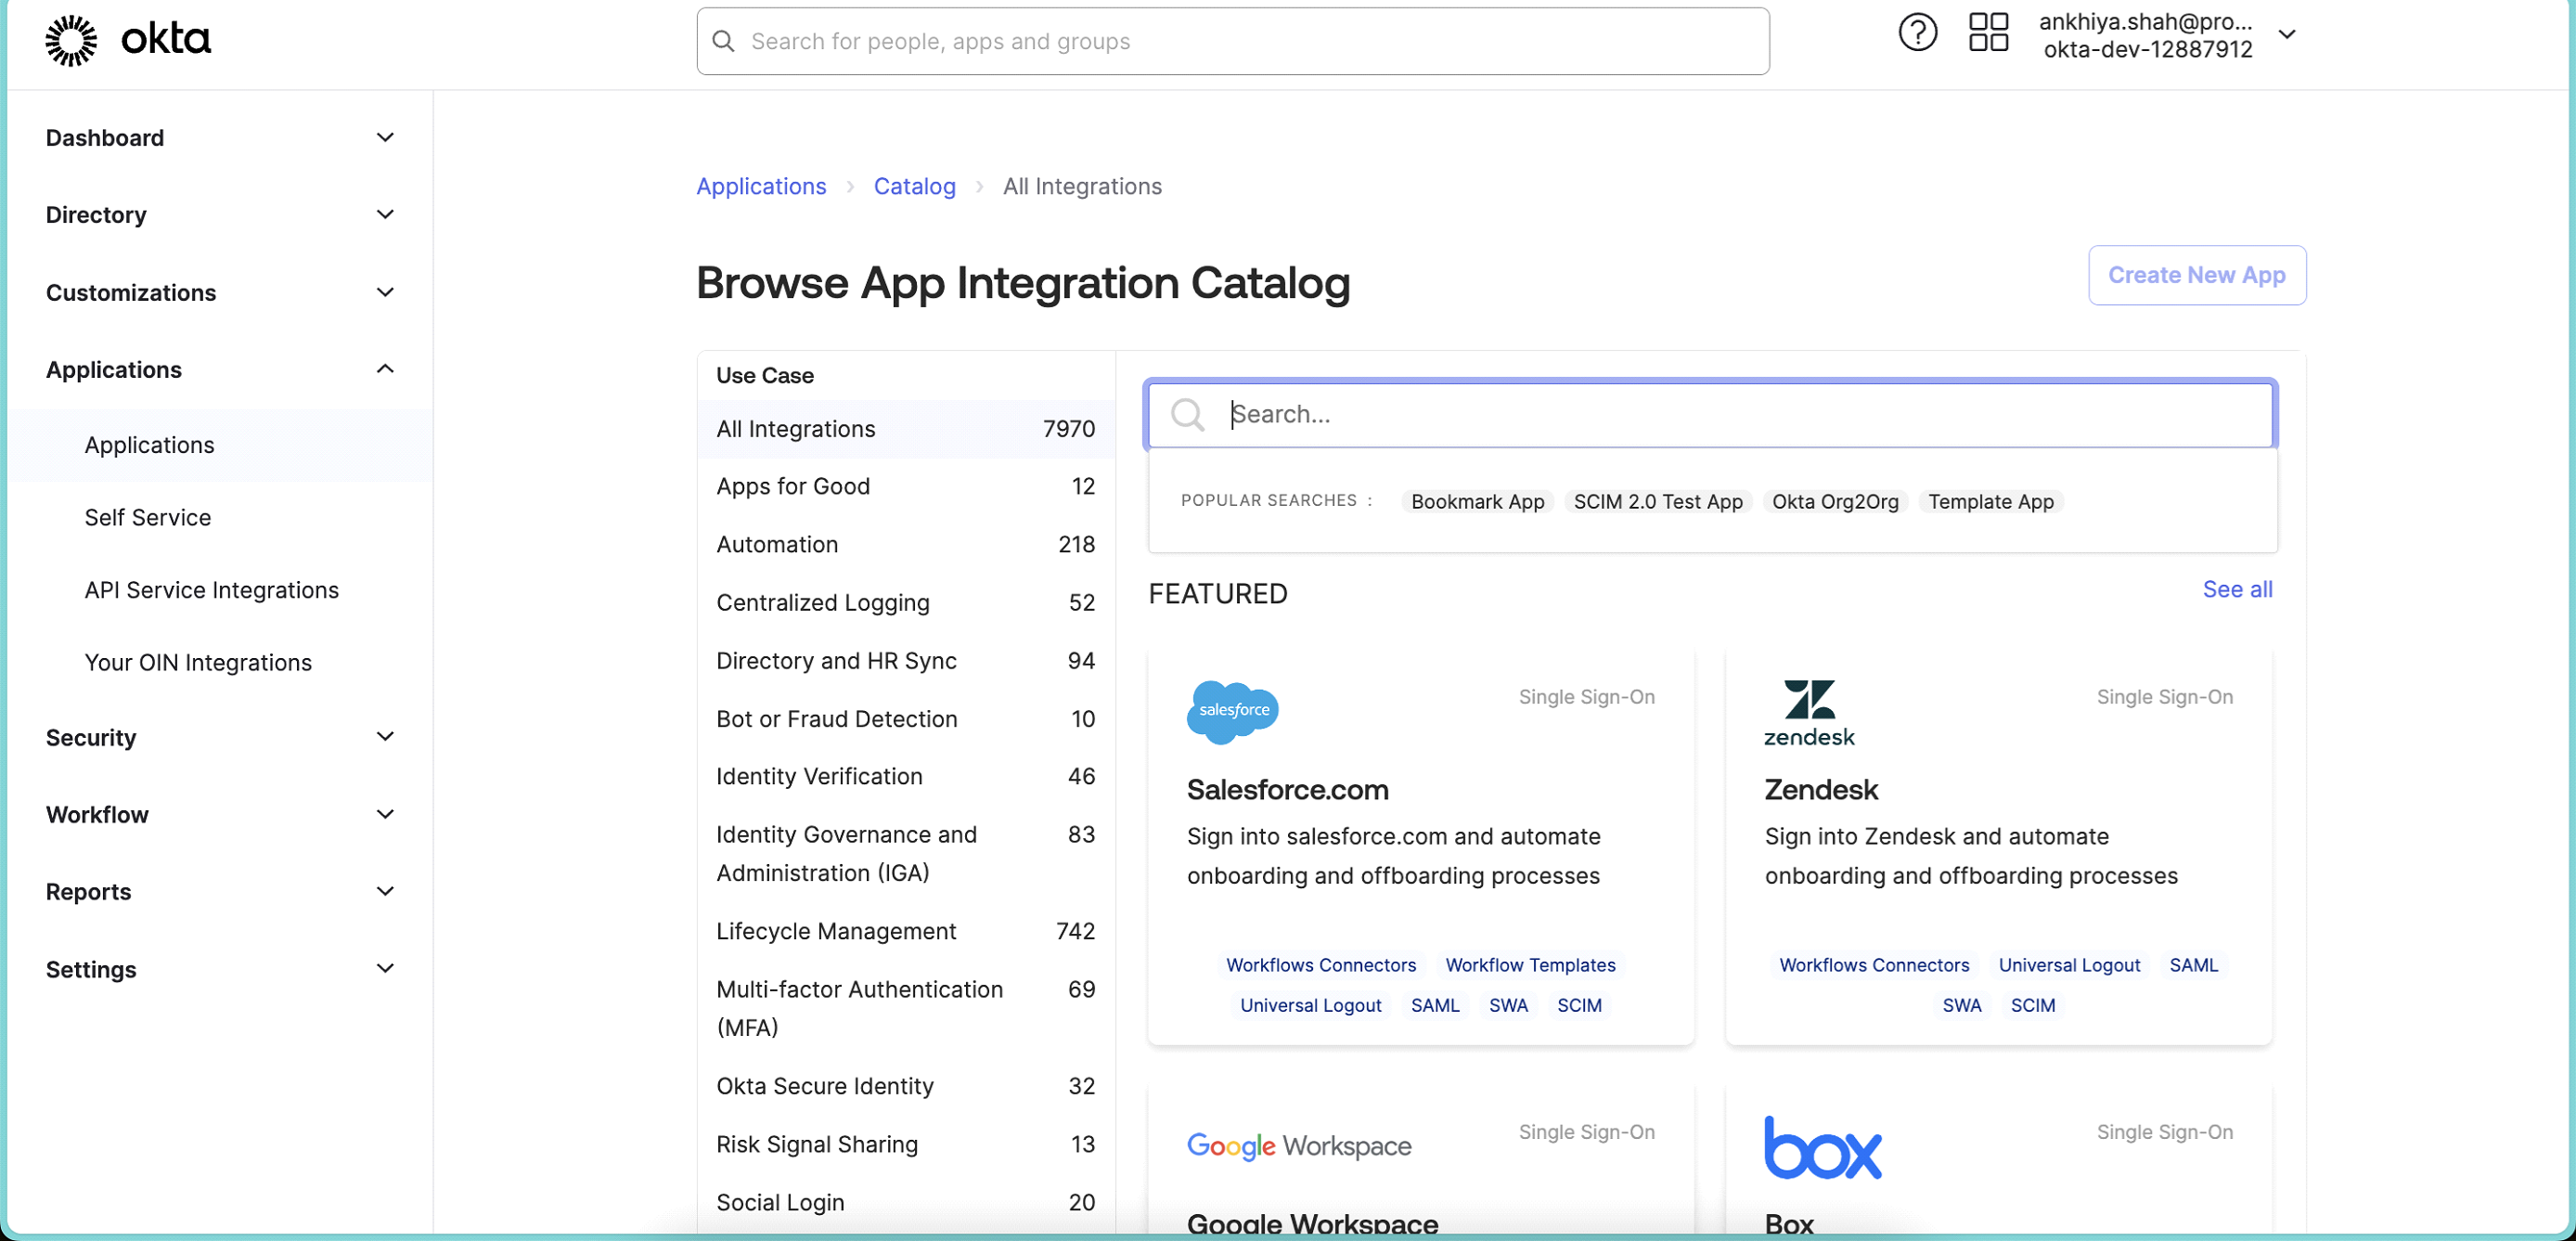
-
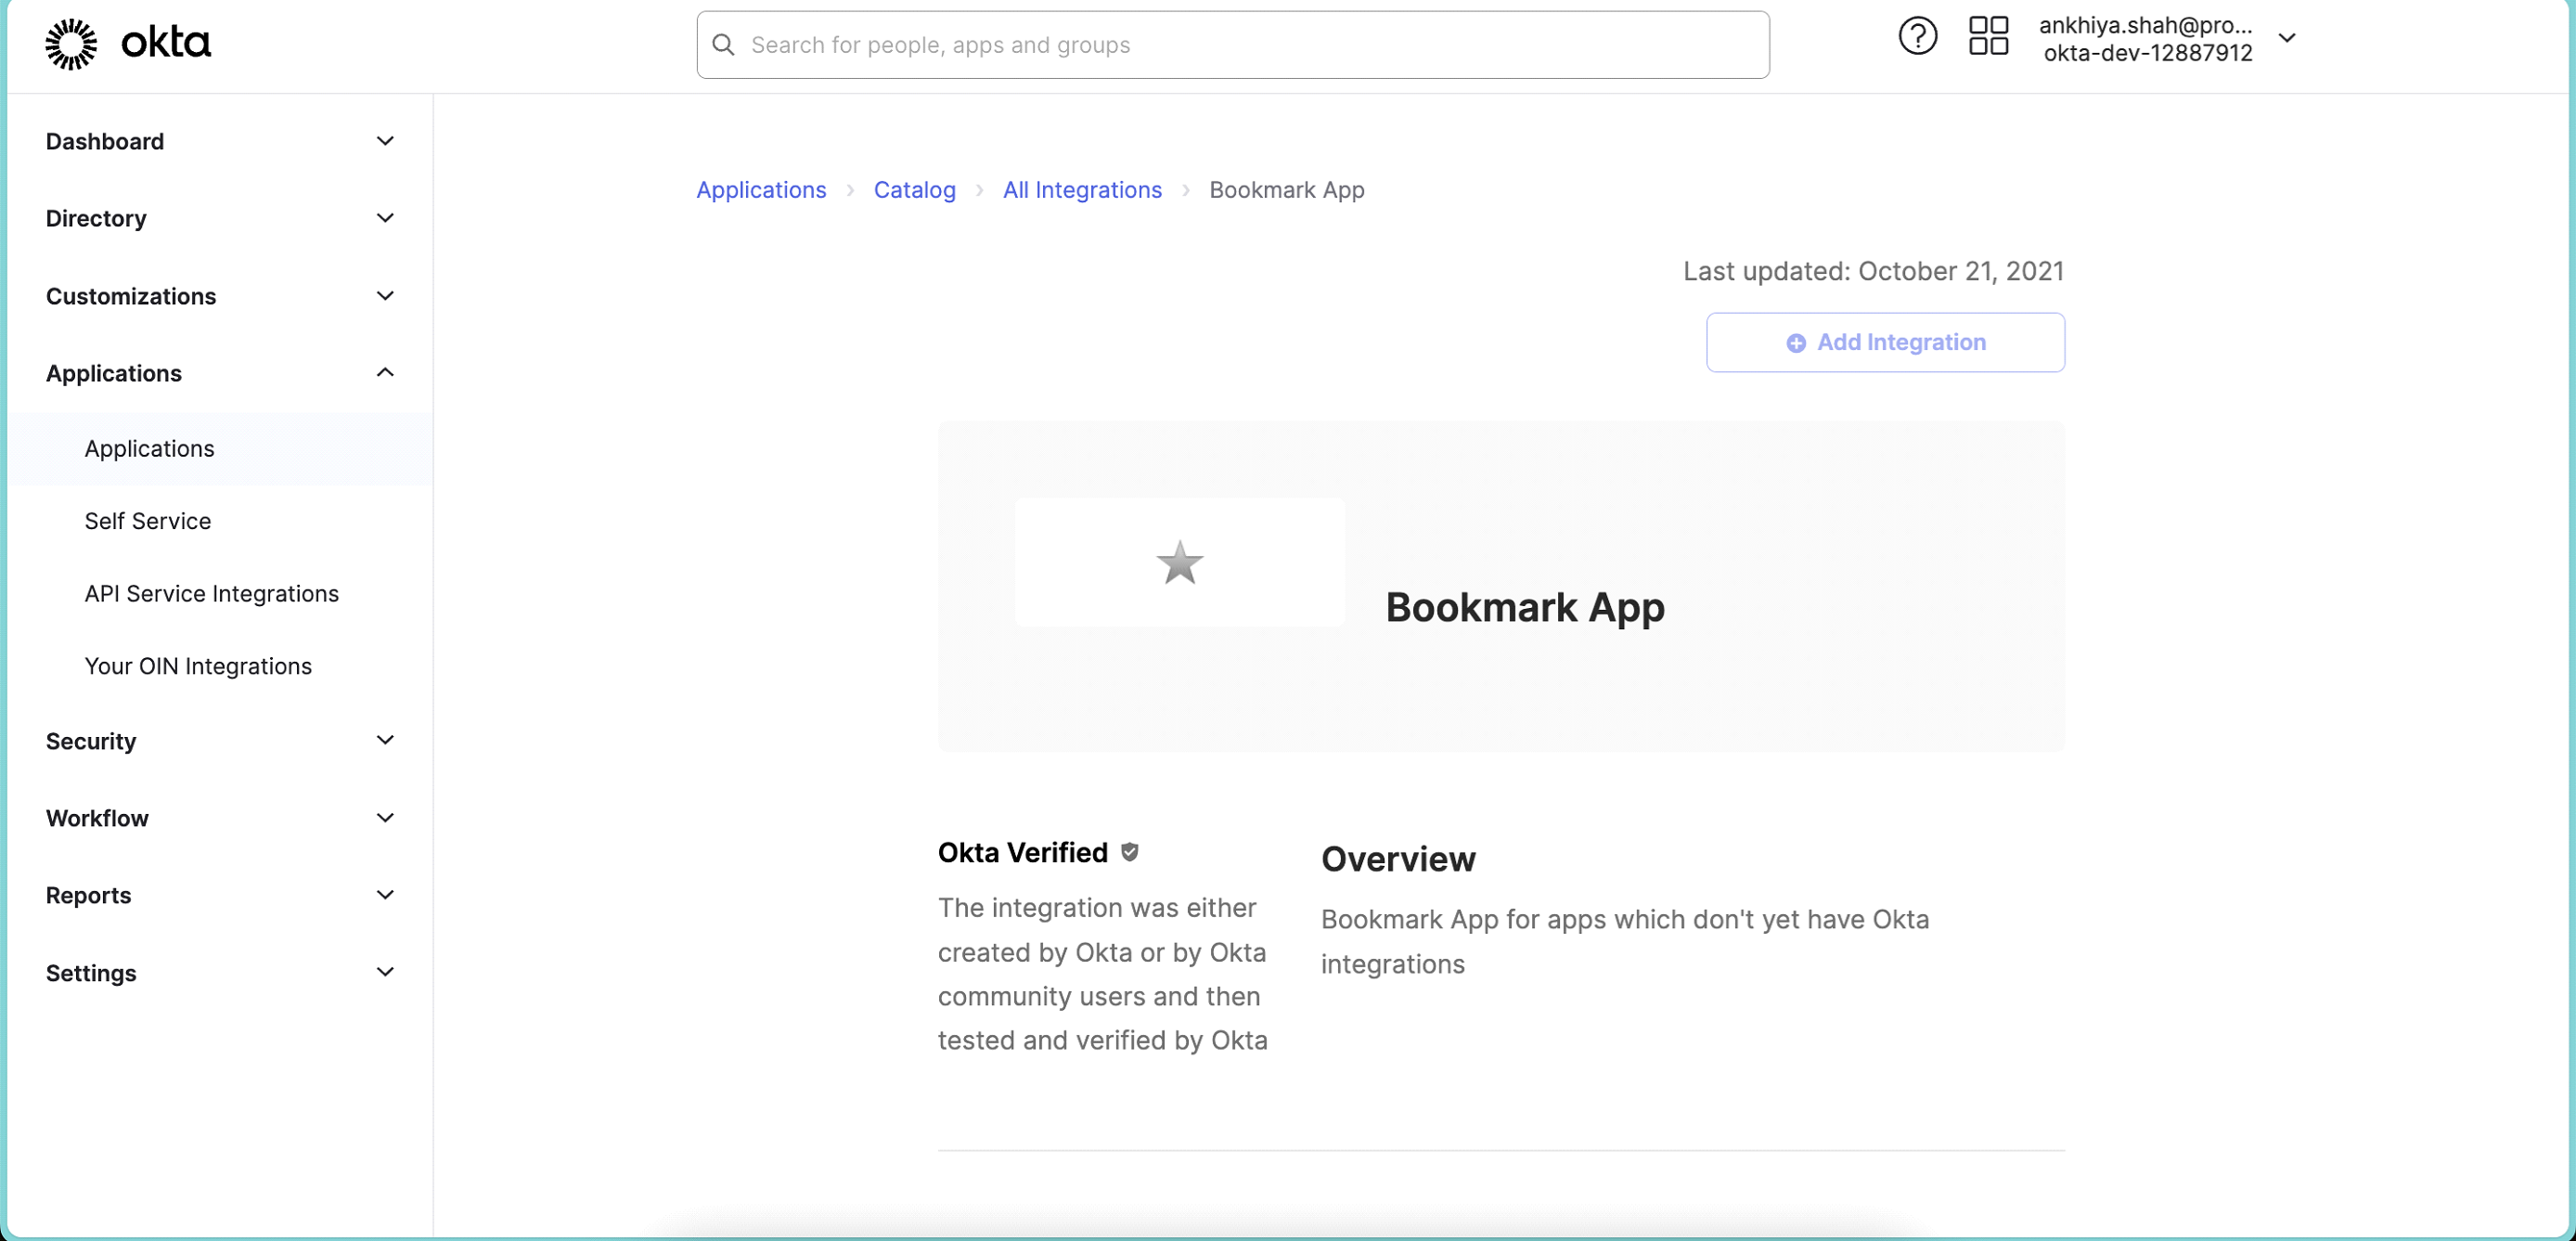
After Selecting app, will take you to below screen
-
Click on Add Integration.
-
Add Application label
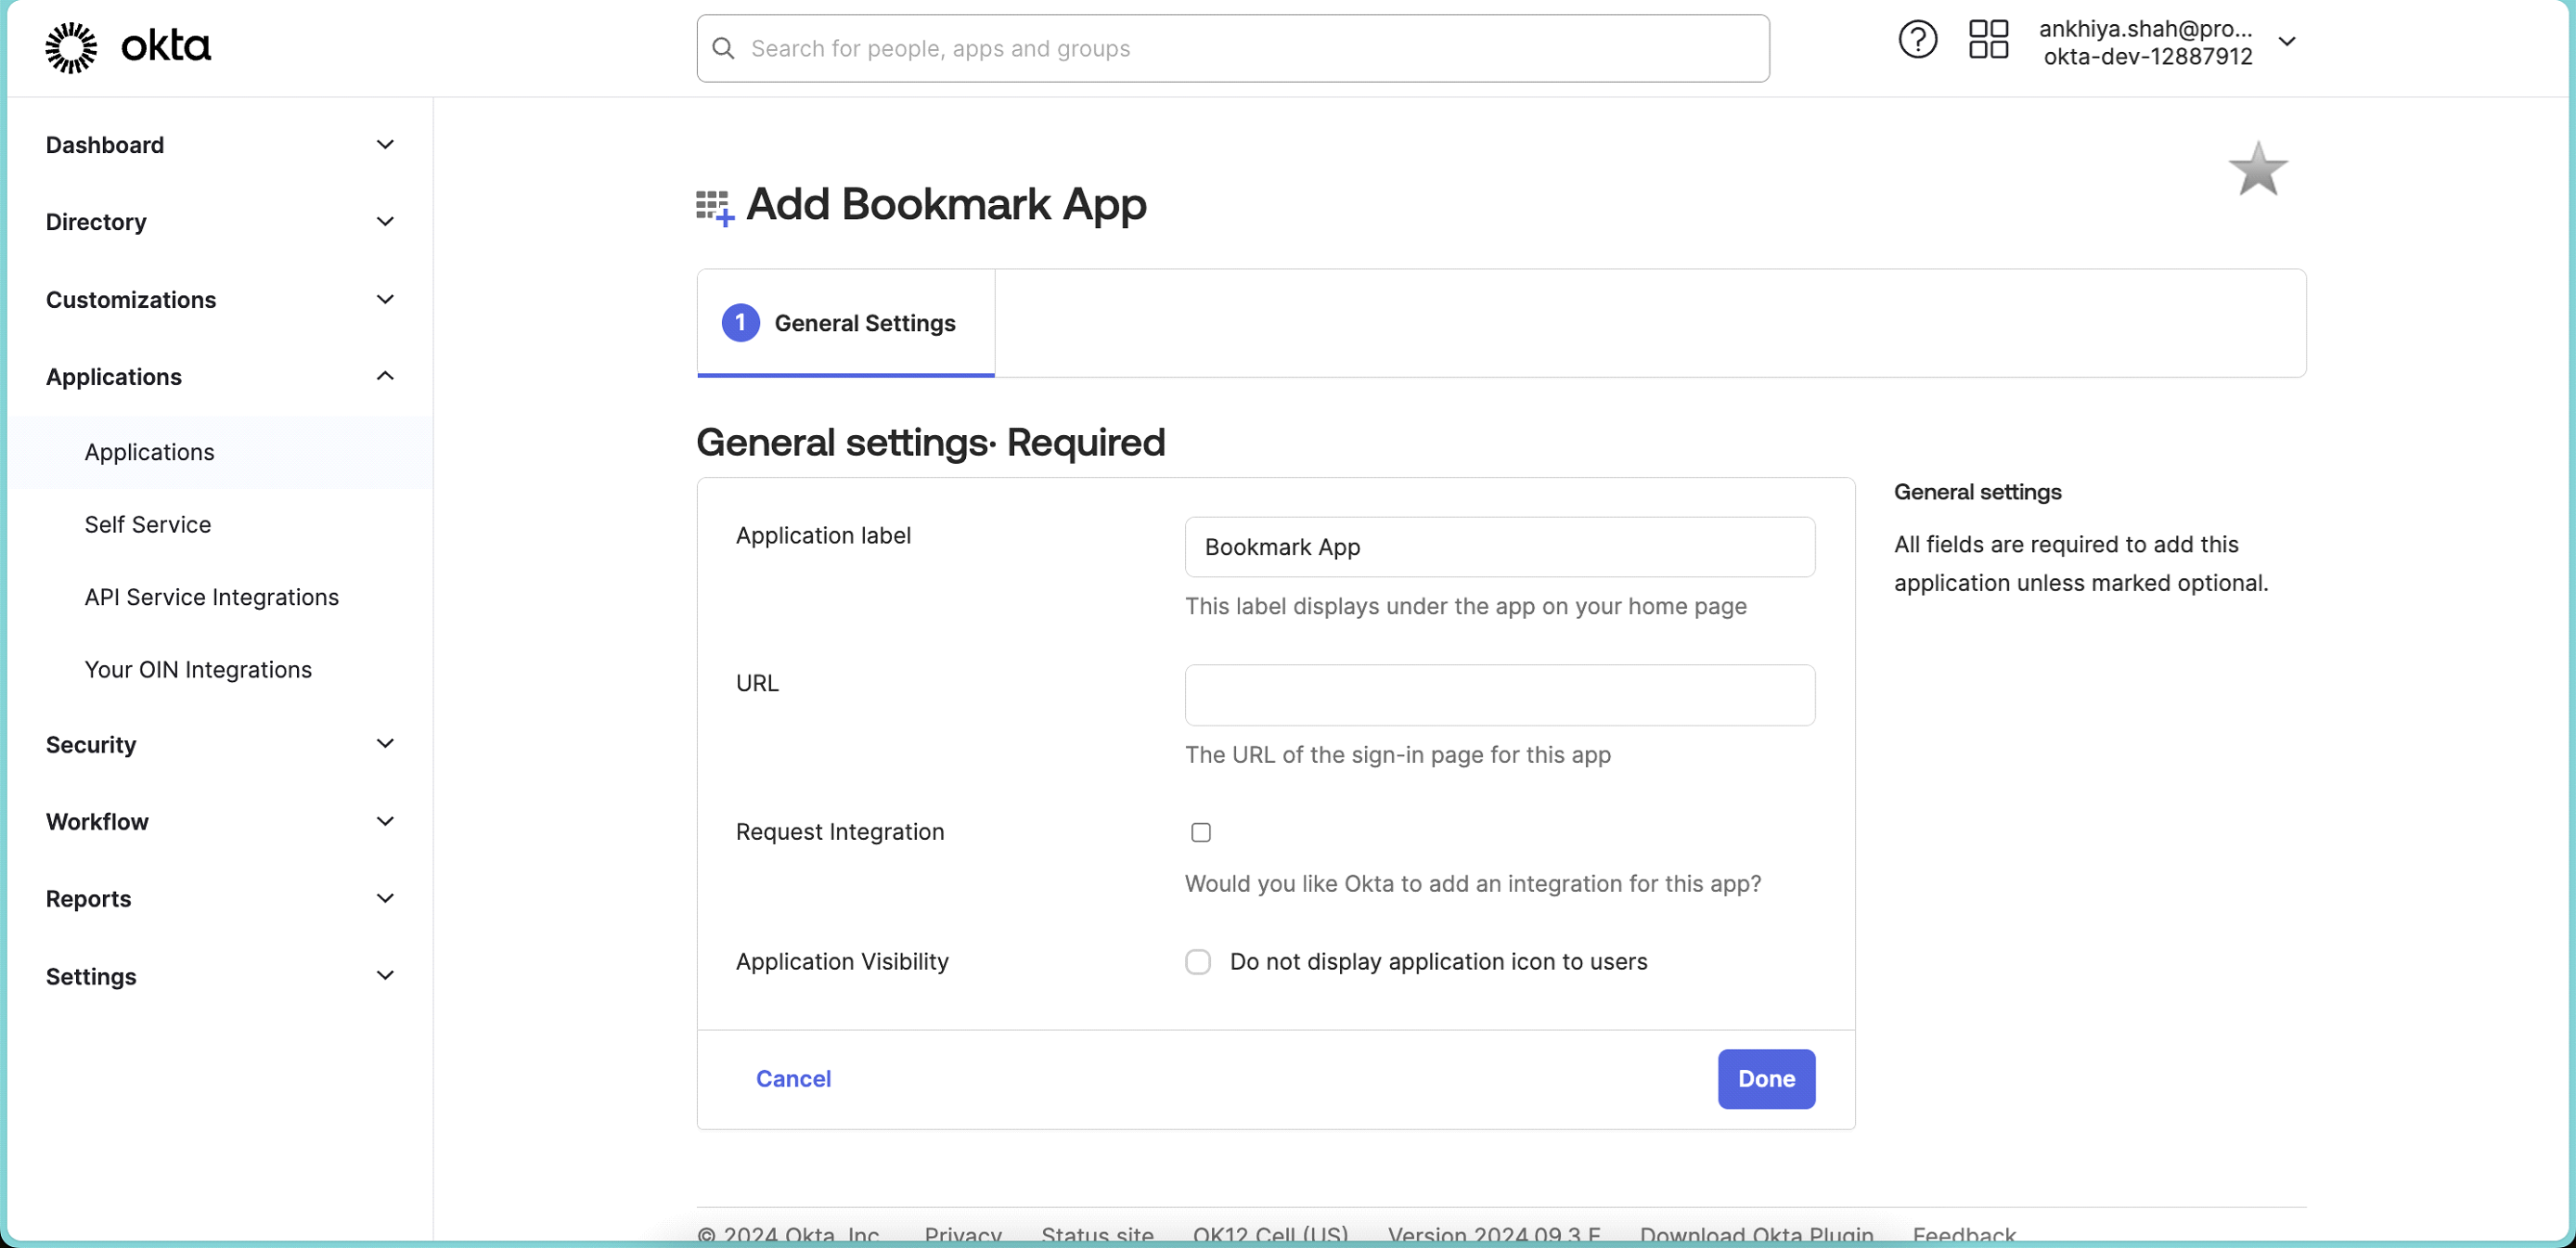 ⦁ In URL, add URL provided by Protrak Team. Sample URL ⦁ " https://xxxx.okta.com/oauth2/xxxx/v1/authorize?idp=xxxxxxxx&client_id=xxxxxxxx&response_type=id_token&response_mode=fragment&scope=openid%20email&redirect_uri=xxxxxxxxx&state=xxxx&nonce=xxxxx"
 -
Click on Save.
-
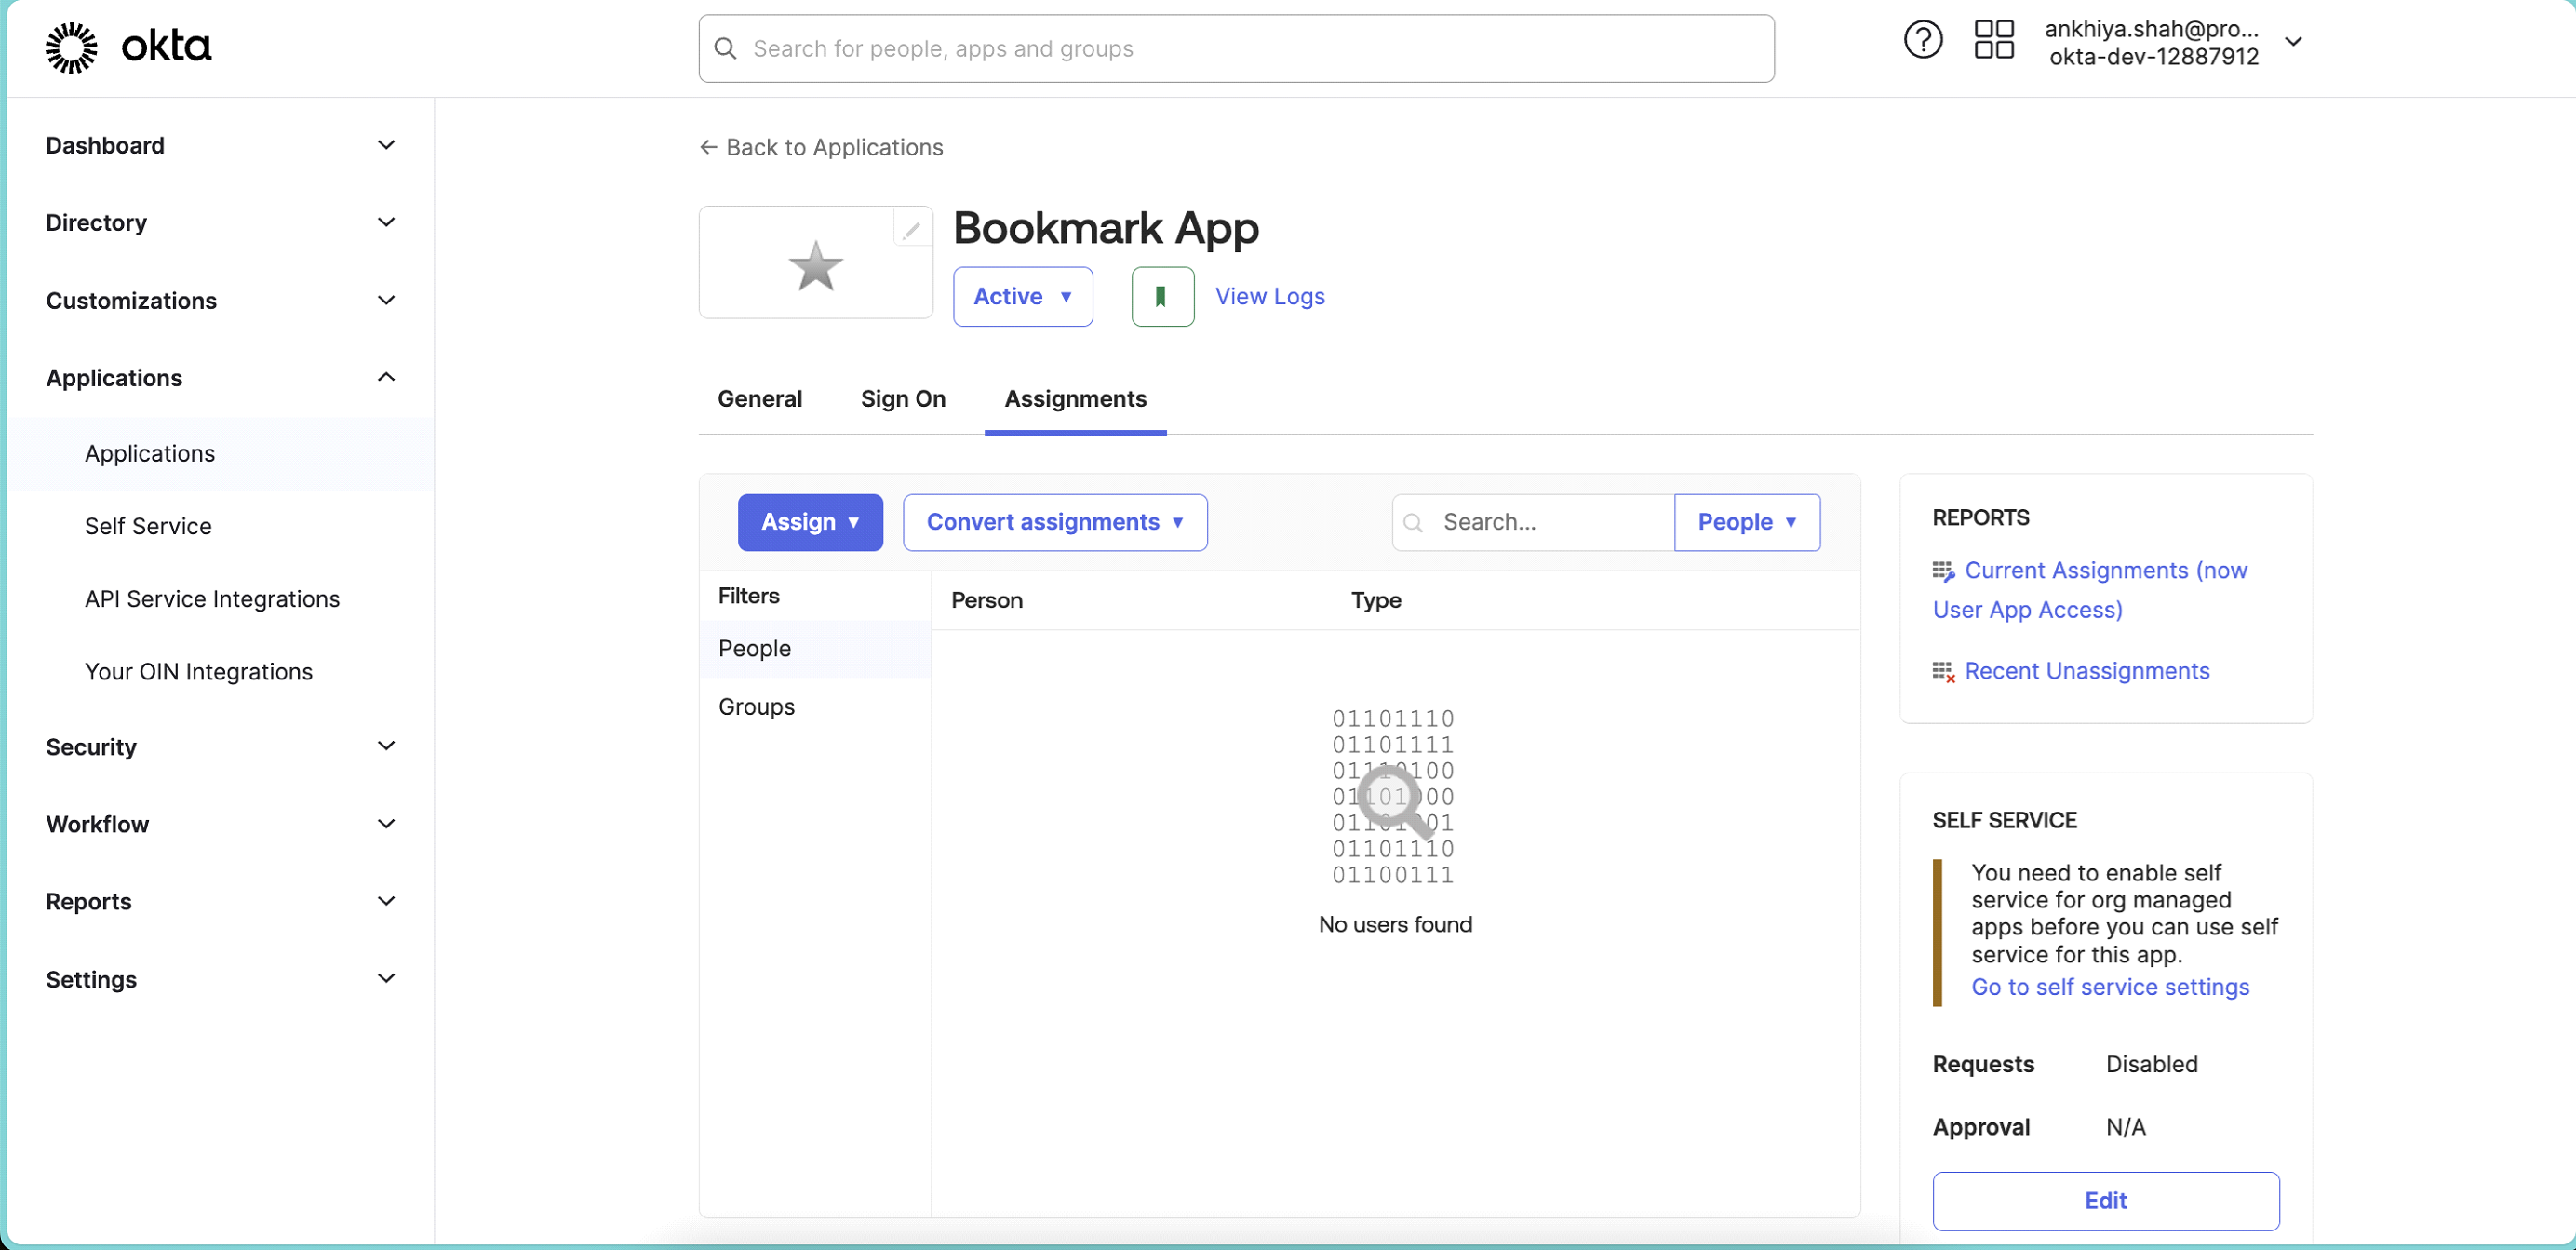
Click on Assignments Tab in create bookmark app.
-
Assign app to people or group. Same as done in step no 14 & 15.
-
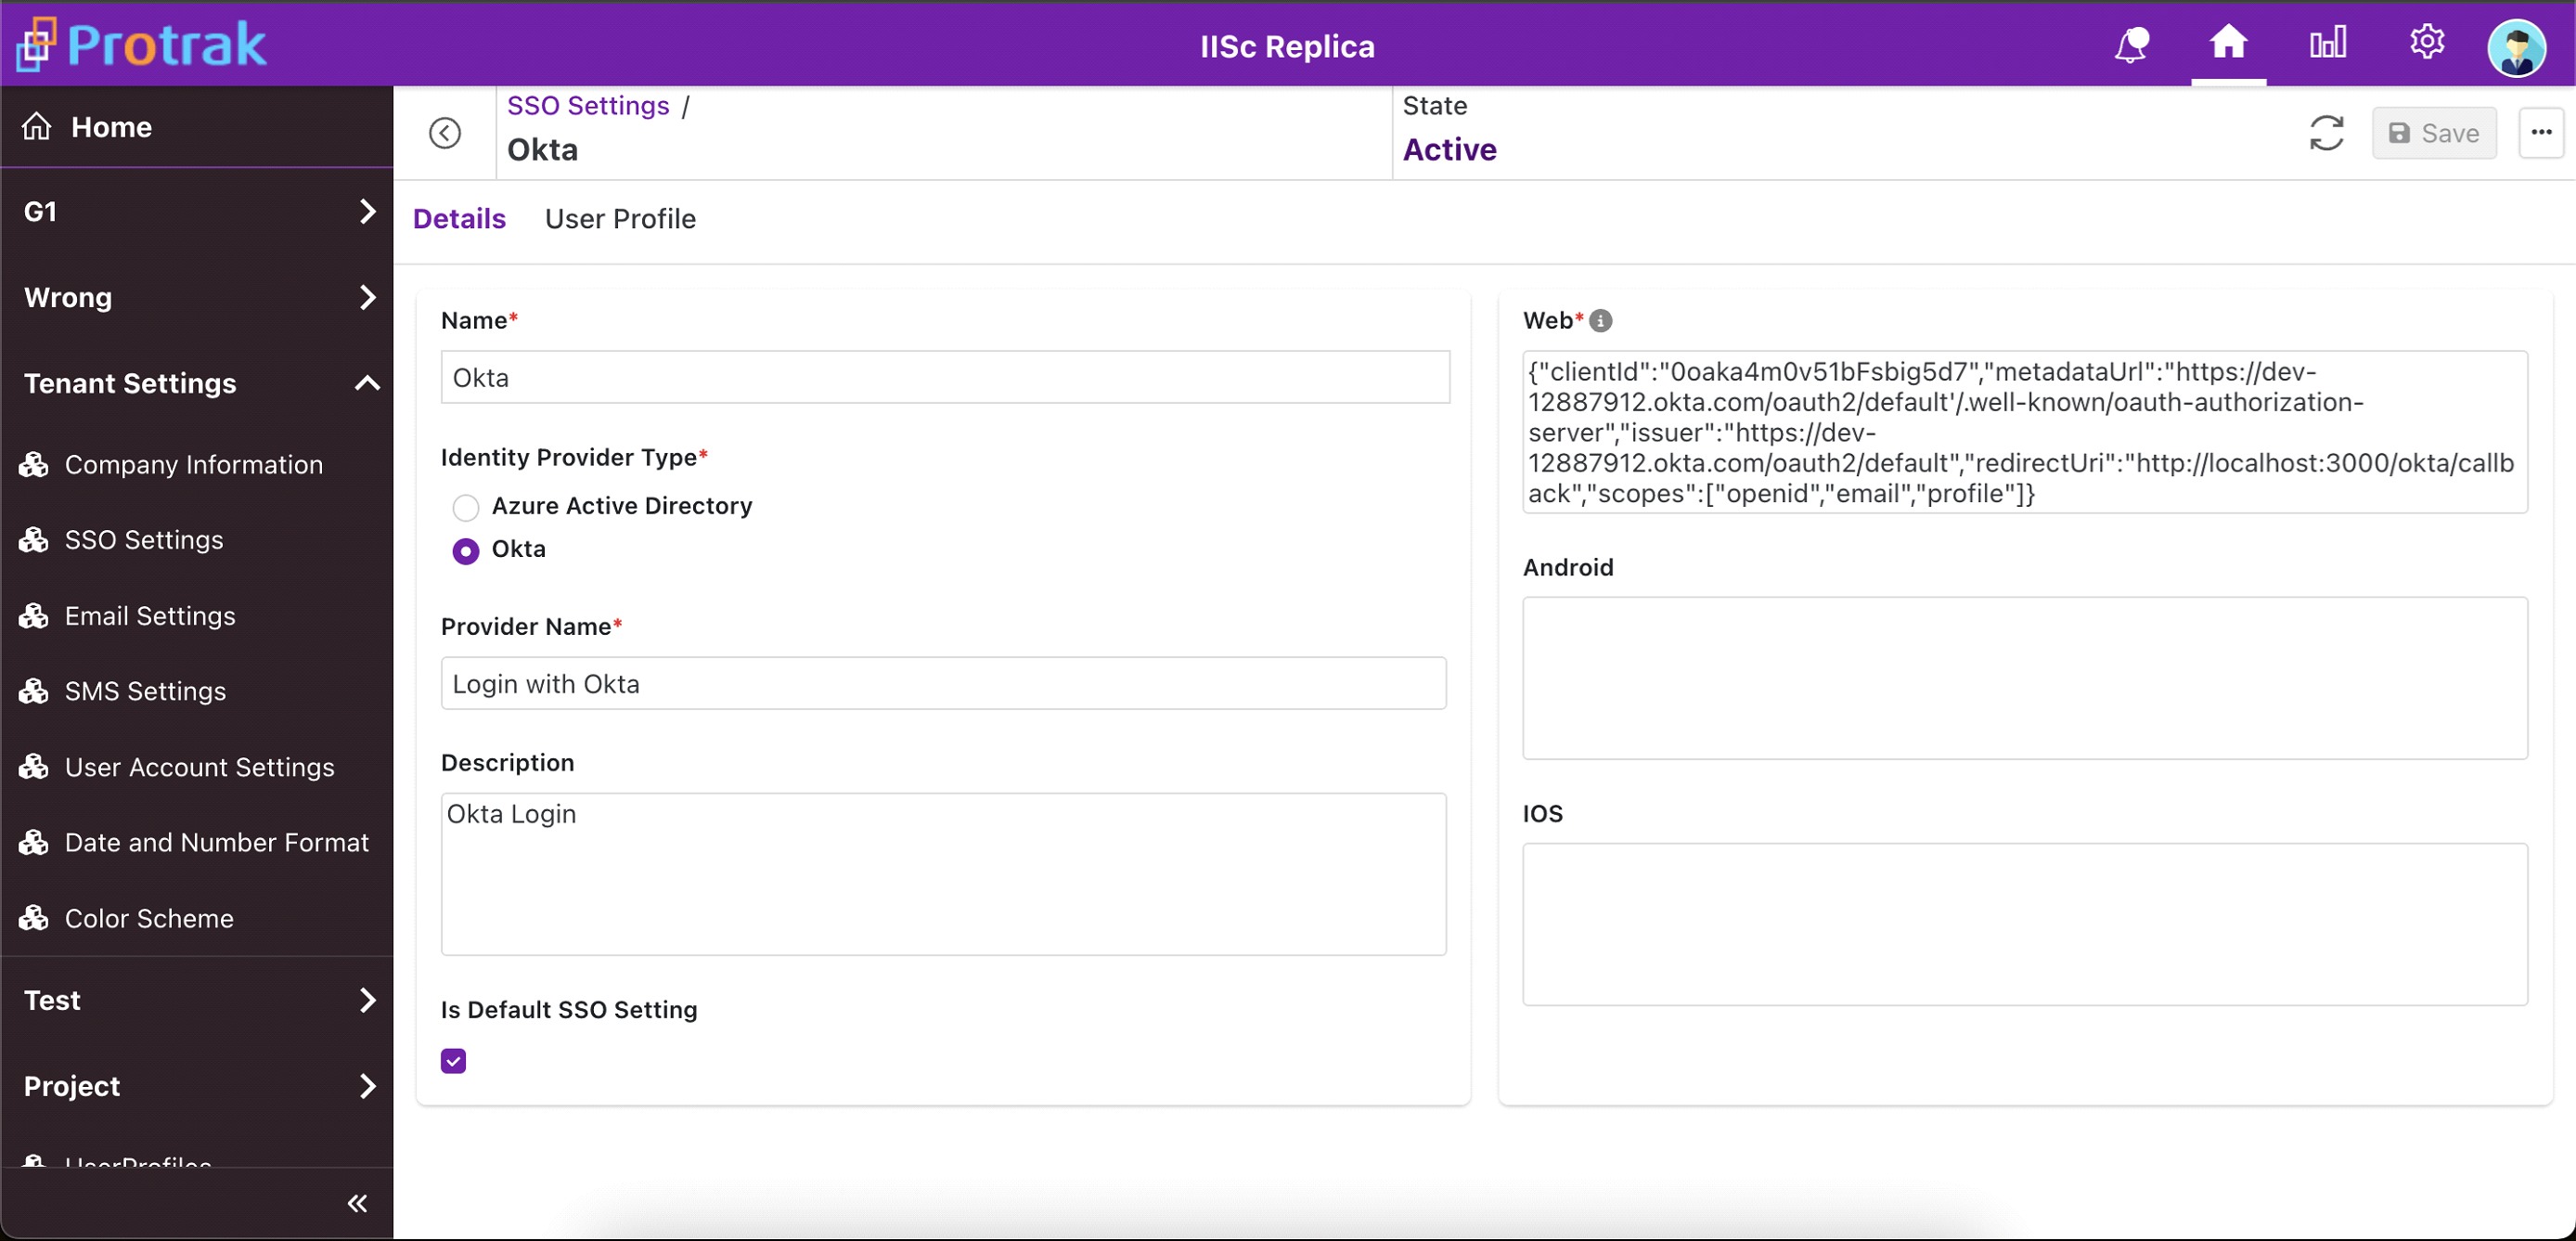
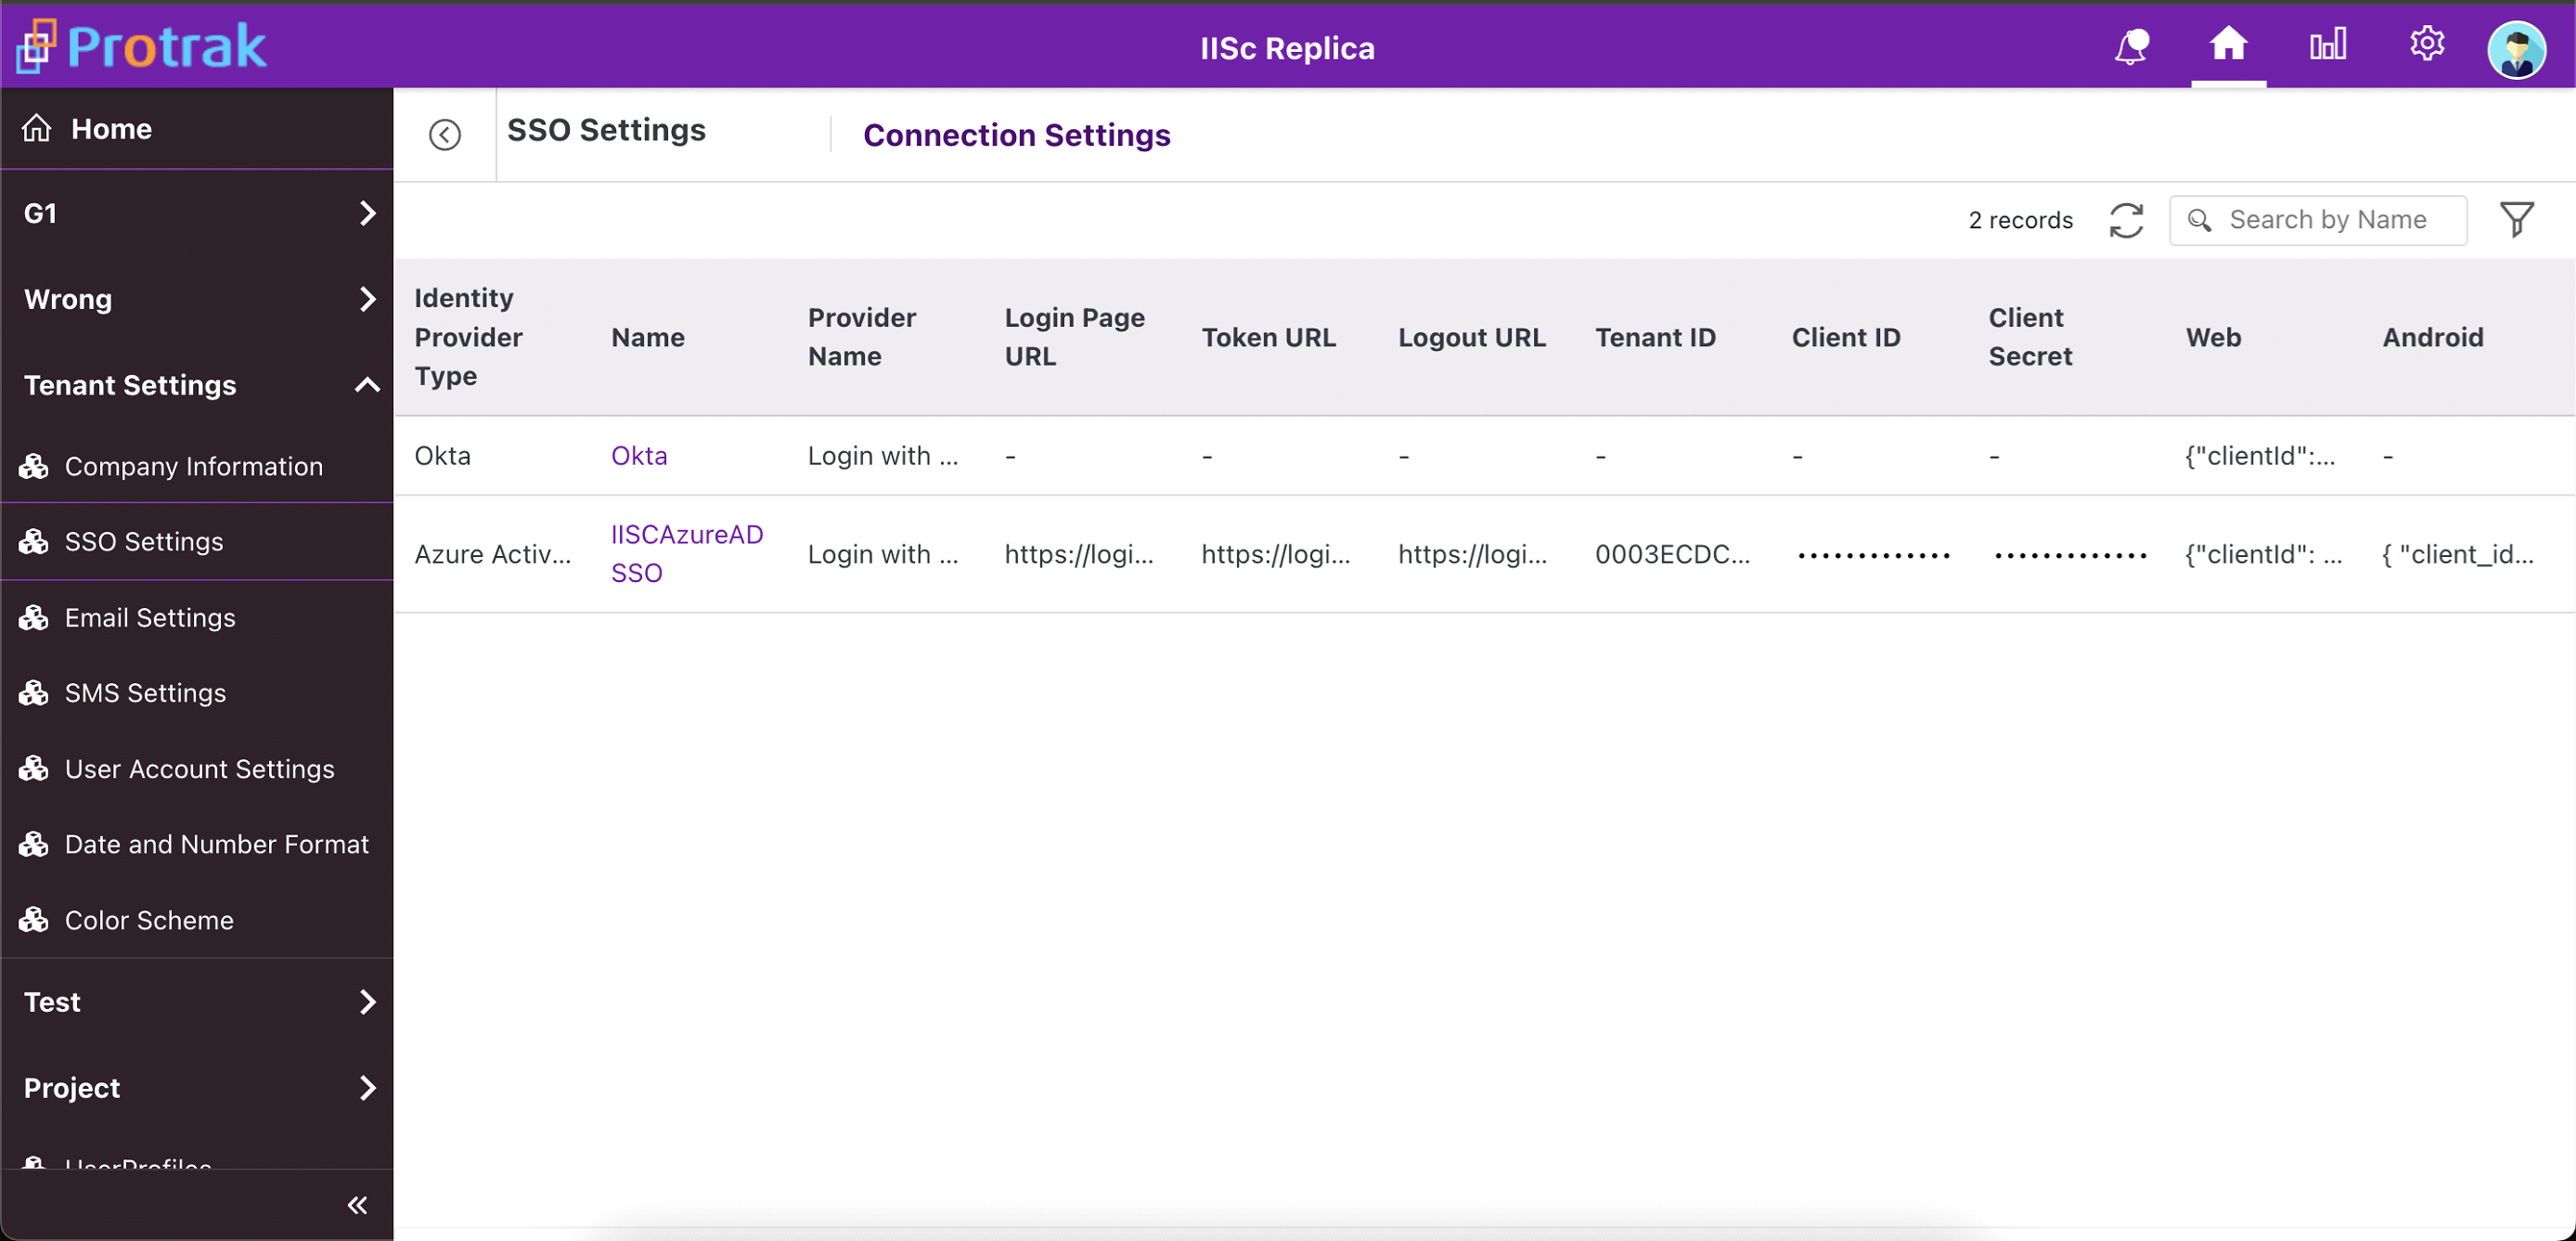
Once Okta configurations are done, login to Protrak app with admin user. Go to Tenant Settings > SSO Settings.
-
Select instance with Identity Provider Okta. And add details like Name,